GarageFarm.NET is a cloud render farm that seamlessly connects with your 3D software and fully automates the process of rendering. You can send your scene right from the interface of your application without any complex and time-consuming setups. You can render high res stills or animations. You can render using any of the most popular render engines and industry standard plugins.
Our plugin is comfortably integrated into your app allowing you to send a project as it is with minimal configuration. It does all the work for you. It collects the assets, relinks them, helps you choose the right render settings, and it detects any potential errors that may lead to problems in network rendering. It then sends all the data to the cloud where you can render your project with ease and full control.
Steps below briefly describe the workflow of working with our render farm.
Open an account at https://app.garagefarm.net/. The registration is quick and easy and requires only a few clicks. You will receive an activation email from us with a verification link. You need to activate your account in order to start using our service.
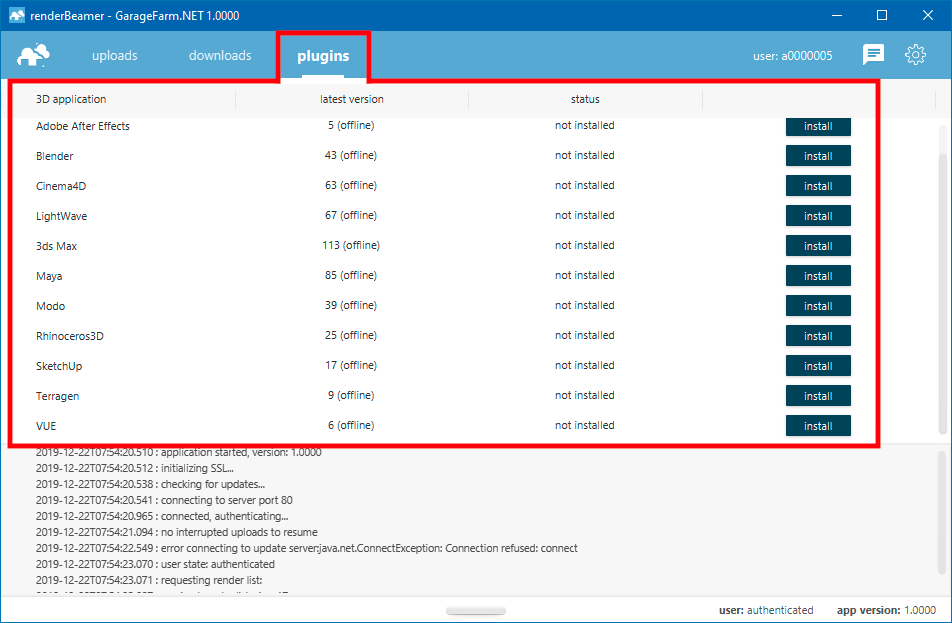
Log in to Web Manager (our web dashboard) at https://app.garagefarm.net/ and download our renderBeamer app. The download link can be found in the Downloads panel located on the top of the dashboard. Supported apps include Blender, Cinema 4D, LightWave, 3ds Max, Maya, Modo, Rhino, SketchUp, Redshift, Terragen, and VUE Xstream.
.png)
Install the renderBeamer app you downloaded and run it once done installing. You’ll be then asked to log in. Use the account user ID you received or the email you used in registration.
Upon first start, open the Plugins panel and install the plugin pertaining to your 3D software. The status will change once the plugin has been installed successfully.
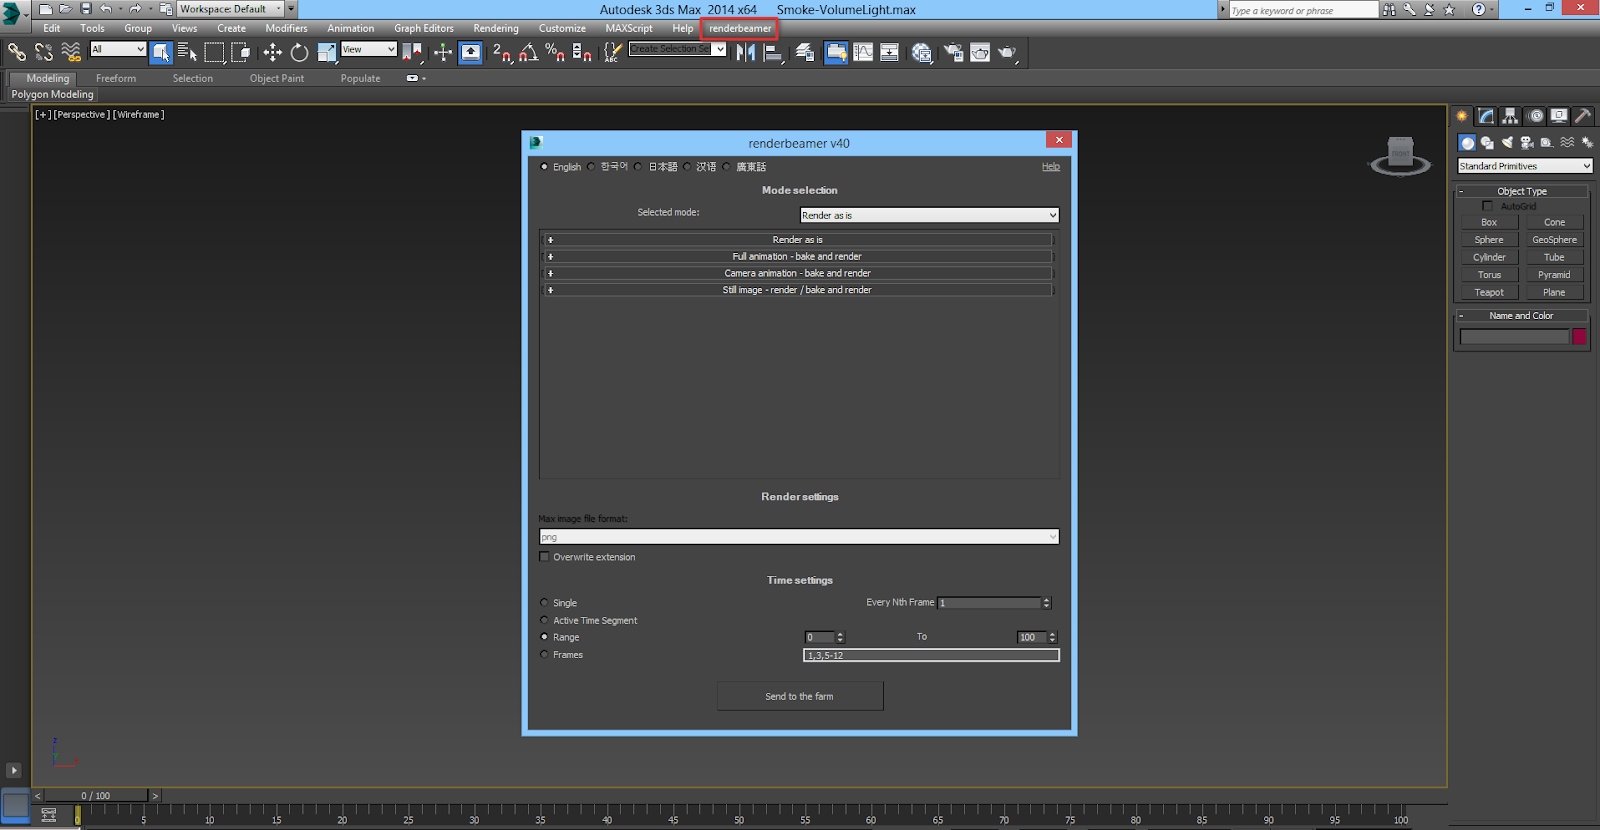
Open your project scene in the 3D program of your choice. You can now send your project through the new menu item sitting in the interface called ‘renderBeamer’. When you click Beam it up, you will see our plugin settings that let you choose things like render mode (for different GI setups), file format, frame range for an animation or a single frame for a still, and other settings.
The best practice is to do a test before rendering a full range job or a full-resolution still to see if the scene renders fine, and to get a cost estimate.
For animations, send a few test frames by setting a step (s10, s25, s50) i.e. 1to400s40 will render 10 frames in total from your range. For stills, send a lower resolution or lower quality image.
3ds Max interface shelf example:
You can read more about the importance of testing and ways to estimate the render cost and time in our FAQ.
Or learn more about the scene setup for each 3D program in our video tutorial series on our YouTube Channel or our Software Guides page.
Please note that the plugin interfaces and their settings vary per 3D software.
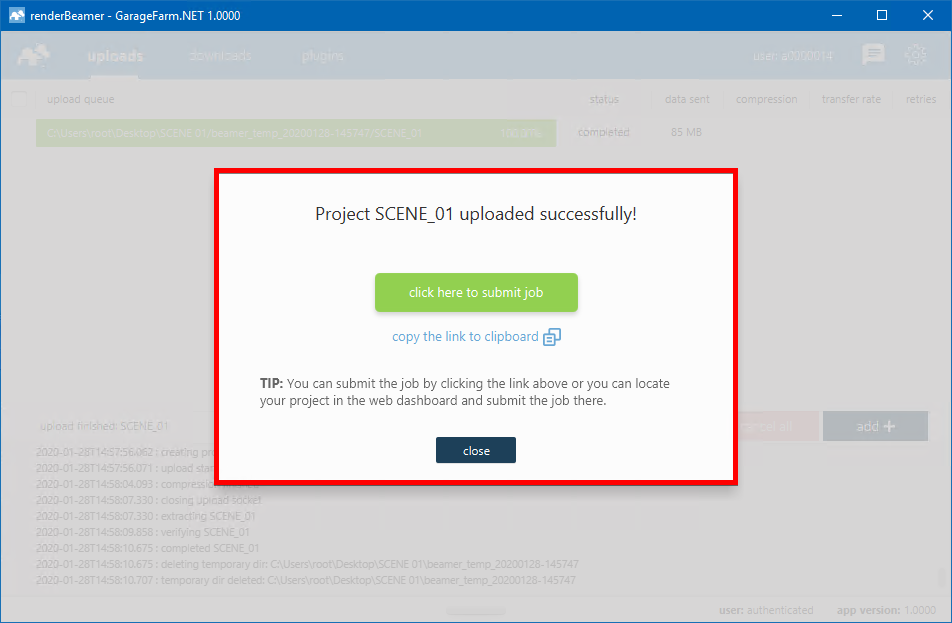
After the scene has been fully uploaded, our application will generate a link for you to submit your scene online in Web Manager (web dashboard). If for some reason you closed the window with the link or it didn’t work, you can locate your project in the web dashboard and submit your scene by clicking on the scene file.
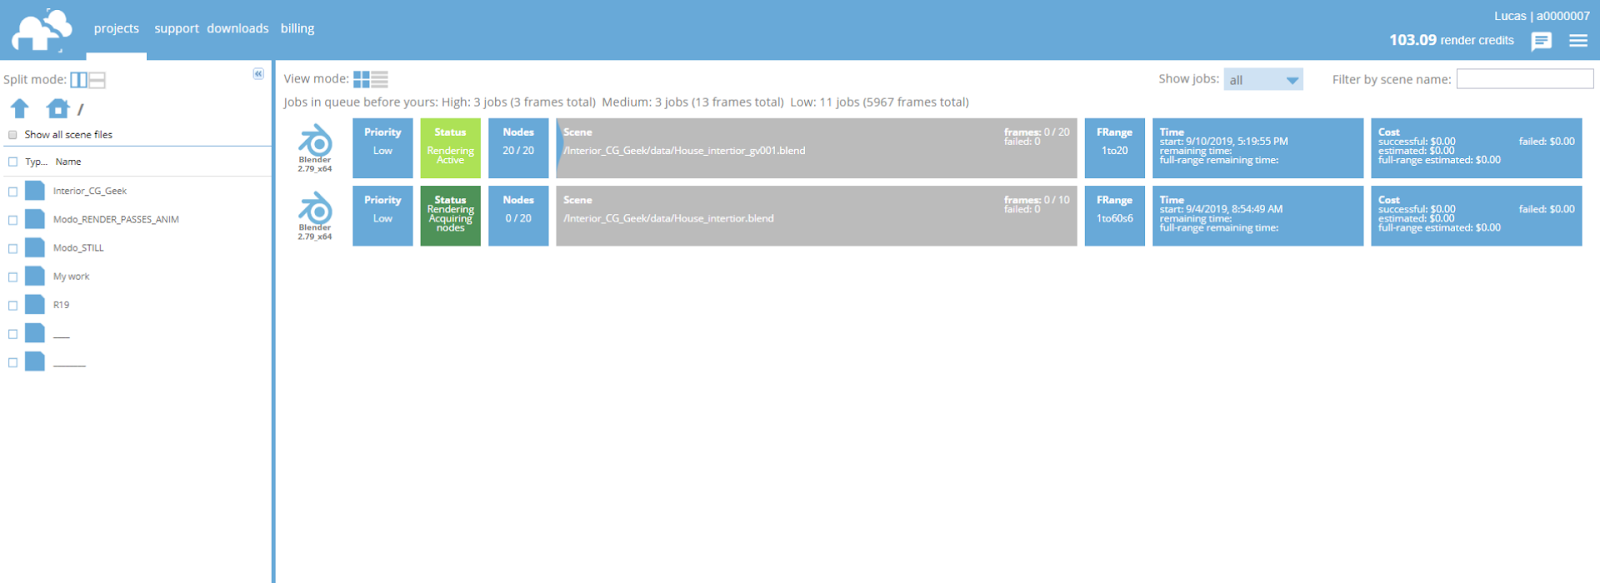
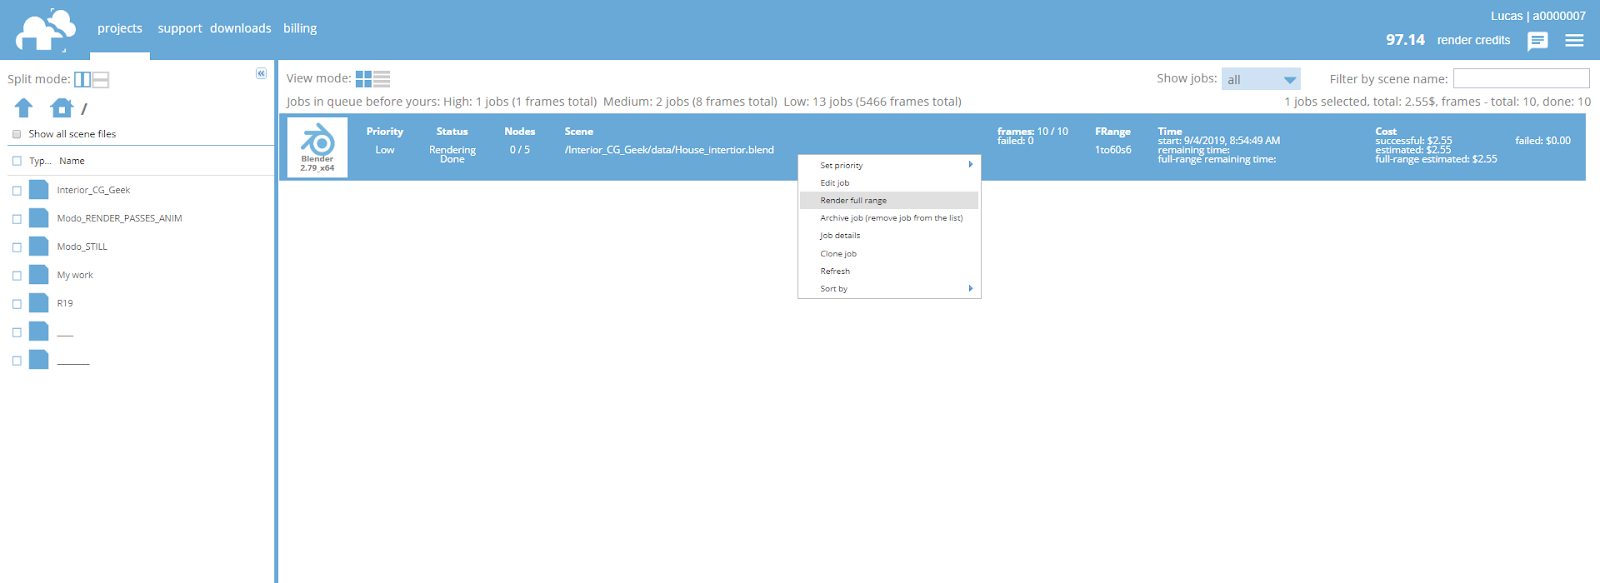
You can choose between three priorities when submitting a job: High, Medium, and Low (more info on prices and priorities here). You can also view the current queue on the farm, which should help you inform your decision about selecting the best priority for your needs.

After giving your render settings a final check and choosing your preferred priority, hit ‘Submit’ to add your job to the farm queue. First-time users receive $25 credit to test our service. The credits should be enough to run a few test jobs and get you familiar with how the service works.
Each frame is downloaded automatically as it completes. Please make sure you keep renderBeamer app running whenever you have jobs rendering to get the frames downloaded right away. Check out the frames and, if they are correct, you may now want to submit the full range job in Web Manager by simply right-clicking on the job that was rendered with step and selecting ‘Render full range’. Our system will skip the frames that have been already rendered and will render the remaining range. You will also be able to see the cost estimate for the full range job based on those few frames you rendered as a test.
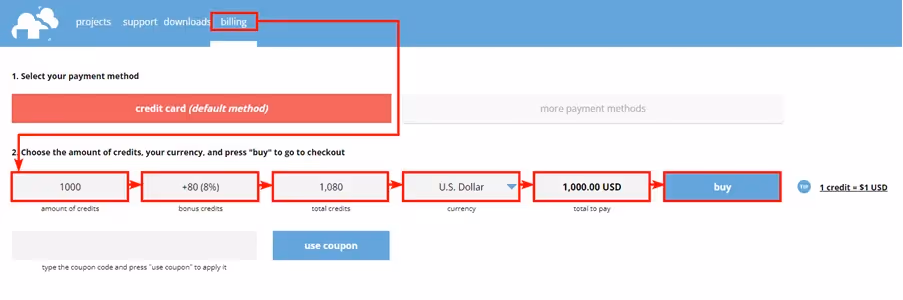
You’ll need to charge your account to continue using the service when you use up all your trial credits. Please note that when your balance goes below $0, you won’t be able to download rendered frames or start new render jobs. You can make payments in the Billing panel in Web Manager. We accept debit cards, credit cards, and wire transfer payments. Also, you can purchase credits via Revolut, Zen, P24.
If your rendering needs are high or you plan to render regularly, please make sure to check out our volume discounts.
In addition, you can use our Cost Calculator to get a quick estimate prior to sending a project to the farm. It is a very useful tool allowing you to gauge the approximate cost and time a scene will render on our render farm.
You can talk to the GarageFarm.NET’s tech team any time of the day, any day of the week. We’re here to help you get started, answer your questions, and assist you in any way. Don’t hesitate to give us a shout.
You can contact us through our live chat accessible in the web dashboard or our desktop app when you log in to your account or message us here through the guest chat.
We also recommend checking out our FAQ page which answers most of the questions new users have.
.avif)
