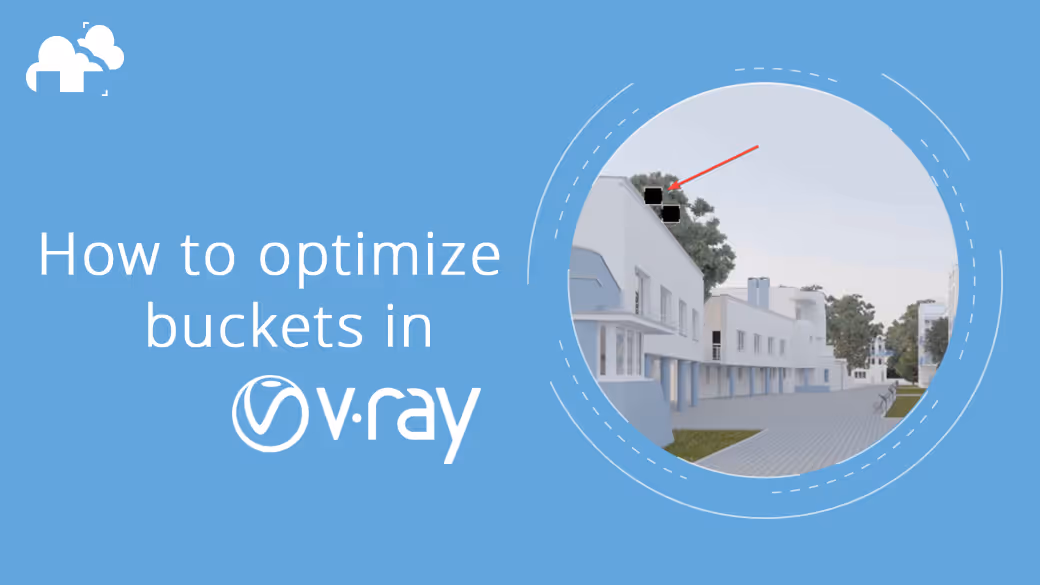


Anyone who has ever rendered anything in V-Ray must have encountered those annoying hanging buckets--those little parts of an image that takes a long time to finish rendering or don’t finish rendering at all. It looks like this:

Notice on the upper left part of the image (on the tree, above the white building) are two “buckets” that are left unrendered. In reality, those parts could still be rendering but are just talking way too long (the rest of the image could have finished hours ago). Or, it could be that the rendering has been crashed completely by those problematic parts.
Why is this a problem? Well, let’s say you are mowing your lawn. So you bring out the lawnmower and you start running it across the lawn to cut the grass.

You are almost done mowing the whole lawn but you run into this area where there is stubborn grass. No matter how many times you run that part over with the mower, the grass simply won’t get cut. So you spend all day just running the lawnmower back and forth over that part and it still won’t get cut. You waste hours trying to clear that last part, and if you paid someone by the hour to mow your lawn, you’re wasting money, too.
That stubborn patch of grass is kind of like the hanging buckets in V-Ray. It can cause you to waste hours in rendering (possibly causing you to fail in meeting a deadline) and worse, burn your budget if you are rendering on a cloud render farm.
How can you avoid this? Before we answer this question, let’s first learn what buckets are and what their role is in rendering.
Bucket 101
Bucket refers to bucket image sampler in V-Ray. It is a type of rendering where the image is subdivided into rectangular sections called buckets.

What this does is that after subdividing the image into buckets, the buckets render the image piece by piece in a certain sequence (more on this later). You get one bucket for each core or thread of the CPU processor you are using.

If you are using a render farm like GarageFarm.NET for rendering, you get access to more processors and therefore more buckets that are simultaneously rendering an image resulting in faster render times. If this isn’t all that clear to you, you can learn more about the relationship between rendering and CPU cores from our article that explains what is a render farm.
Buckets affect rendering time
Buckets are basically a group of pixels. And based on the tests we’ve run, the bigger the bucket size (meaning more pixels for each bucket), the faster the bucket rendering time.
Why is this so? There a few reasons that explain this general principle:
- Buckets load and unload data before they render their part of the image, which takes time. If the bucket size is small, it means each bucket has to do this many more times compared to a bigger bucket size, and that time adds up.
- If you don’t have enough RAM to store the whole image as it renders, the delay that smaller bucket sizes create is worsened, leading to longer render times.
- When you choose a rendering pattern that leads to the buckets skipping around the image, this again worsens the delay created by having a small bucket size.
Simply put, we never recommend setting your bucket size to 1 or 2 pixels. With this said however, later we will see that smaller bucket sizes can play a role in solving problematic hanging buckets (but again, never so small as 1-2 pixels per bucket).
Pro tip: to avoid issues when rendering high-resolution still images on cloud farms, make sure first that your image is going to be rendered on a single node before you try a bigger bucket size (256 or 512 pixels). If you are not sure, better to stick to the smaller default of 48 pixels.
A quick note on Vray bucket size and shape
Based on our tests, it’s better to set your bucket size to numbers that are powers of 2 (512 = 2x2x2x2x2x2x2x2x2) or 3 times the powers of 2 (48 = 3x2x2x2x2). This gets a little mathematical and computer science-y but doing this leads to better computing efficiency for the CPU and therefore faster bucket render times.
Also, V-Ray sets the bucket shape as a square by default. We tested this against non-square bucket shapes and square buckets simply rendered faster than non-squares. So except for very rare scenarios, there’s no practical reason to change the default bucket shape.
Different rendering sequences
V-Ray gives the user the option to choose where the buckets will start rendering and the order they’ll render from that starting point. Here are the different sequences/patterns and their advantages and disadvantages and their effect on bucket render time. It’s important to have an understanding of these render sequences because later they play a role in solving hanging buckets.
Left to right
Buckets start rendering from the left side of the image then proceed towards the right. Advantage: allows you to cancel the render at any point if you want to make changes to the image and then stitch in Photoshop the finished part of the image to the modified part of the image that was rendered later. Best for arch-viz images since these usually come in landscape orientation.
Top to bottom
Buckets start rendering from the top part of the image then proceed towards the bottom. Same advantage as the left-right sequence.
Triangulation
This is V-Ray’s default. New buckets that start to render are close to the finished ones.There’s less need for the repeated unloading and loading of data from the image, resulting in faster render times. Advantage: speed. Disadvantage: partially-rendered image is unusable if you want to stop and make changes.
Hilbert curve
Similar method to Triangulation but follows a different path. Also optimized for speed. Also yields unusable partial images if you choose to stop rendering and make changes.
Spiral
Rendering starts at the center then buckets proceed in a spiral pattern outward. Advantage: good for previews and quick peeks into the rendered image. Disadvantage: slower render time due to the skipping that the buckets do across the image as the render progresses farther from the center starting point.
Checker
Render happens in alternating buckets, subdividing the image like a checkerboard. Advantage: gives a quick preview of the rendered image and gives accurate render time estimates. Disadvantage: partial image is unusable if you stop rendering and can render can generally take longer.
Mouse following
Buckets render the parts of the image that are pointed to by the mouse. Advantage: you can preview specific parts of your image. Disadvantage: less efficient and can’t be used on cloud render farms.
Causes of hanging buckets
Now we can talk about dealing with those pesky hanging buckets. Here are the usual reasons why you get buckets that take forever to render or don’t render at all:
Technical errors
These errors have to do with broken geometry in the 3D image (non-uniform/flipped normals, unwelded vertices, poor 3rd party models/plugin effects), unsupported shaders or rays, scene’s bounding box being too large, scene being too far from origin, or software bugs.
High scene complexity or too high quality settings.
Not having enough RAM to render a complex part of your image can cause a bucket to hang. Buckets can also hang if the scene has a too high sampling set (high materials settings, motion blur, caustics or DOF settings) or if there are objects with surfaces that get into a loop of glossy reflections or refractions (for example: car headlights and car alloy wheels). Buckets can also get in trouble trying to render an object within the scene that’s reflecting a broken/problematic object outside the scene.
Sherlock Bucket: finding the cause of a hanging bucket
Before we can fix a hanging bucket, we need to identify first what’s causing it. There are two scenarios for a hanging bucket:
- Bucket will never render. This is usually caused by technical errors.
- Bucket will render after a long time. This is usually caused by high complexity/settings.
To determine whether the bucket is still rendering or has completely frozen, you have to check the bucket’s CPU usage:
- If the CPU core for the hanging bucket is below 10% capacity, it’s most likely caused by a technical error.
- If the CPU core is within 10%-100% capacity, the scene may need more RAM.
- If the CPU core is at 100% capacity, high complexity is the culprit.
Another thing you can do to determine whether your hanging bucket is frozen for good (technical error) or is just taking a long time to render (high settings), you can try rendering a 1/10th resolution version of your full image. If this smaller version of your image renders for longer than 15 minutes, it means there’s something seriously wrong with the image (technical error) and it will never finish rendering unless that error is addressed.
Troubleshooting hanging buckets
Now, let’s start fixing. If it’s a technical error that’s causing the hanging bucket, sadly there’s no optimization trick that we can do within V-Ray except maybe trying the other rendering process, the progressive image sampler method. The way to fix a hanging bucket caused by a technical error is to fix or delete the broken models or shaders that’s causing the rendering issue. Sometimes it’s faster to remodel the broken geometry from scratch.
How do we find the object that’s broken? It’s possible that the object causing the problem isn’t even in the scene but is being reflected by one of the objects that is in the scene.

To isolate the object that’s causing the problem, you can try deleting half of the scene objects and then running a test render to check if there’s a change in rendering time. You can repeat this process, bringing back the deleted object then deleting a smaller and smaller subset of objects each time to finally pinpoint the problematic object. We demonstrate this technique at the 7:18 mark of this video:
Now that you’ve discovered the broken object outside the field of view, you can fix it, delete it or remodel it.
Let’s move on to solving a hanging bucket caused by high quality settings. Here are some of the things you can do to a bucket that’s taking a long time to render:
- Optimize sampling setting of shaders.
- Cut the number of reflections or refractions.
- Delete long-rendering objects outside the field of view (FOV) but visible in reflections within FOV.
- Use a smaller bucket size. What this does is it allows you to harness more CPU cores to render the hanging bucket. However, as discussed above, you lose some render speed by lowering the bucket size but at least you do not have to modify your image. It’s a give-and-take situation. This method is shown at the 10:00 mark of the video above.
- Use the appropriate rendering sequence. Let’s say the hanging bucket is located in the left part of the image. You can use the left-right rendering sequence so that the buckets begin in the left part of the image. This way, the bucket that will render the challenging part of the image can have a chance to finish rendering as the rest of the image is being rendered. If the hanging bucket is located near the center of the image, you can try using the spiral sequence. For more clarity, watch the portion of the video above starting at 11:05.
- Use the “lock bucket starting point” option. This method is similar to the method described above but here you can be more specific in setting the starting point with the use of the mouse. This option is demoed at the 12:07 mark of the video above.
- Set sequence to finish on the long-rendering part. This is the opposite method of the method described above. This works with V-Ray’s automatic bucket division system.
There you have it! Now you have an idea on how to deal with those bothersome hanging buckets. If you don’t feel confident troubleshooting on your own, we at GarageFarm.NET have a 24/7 support staff that you can chat anytime should you encounter hanging buckets while rendering on our cloud farm. So you don’t need to worry that you’re wasting time and money on hanging buckets. We got your back.
Register Now and Get $50 FREE Credits!