
Explore our newest YouTube guide and master the basics with ease
Need Help?
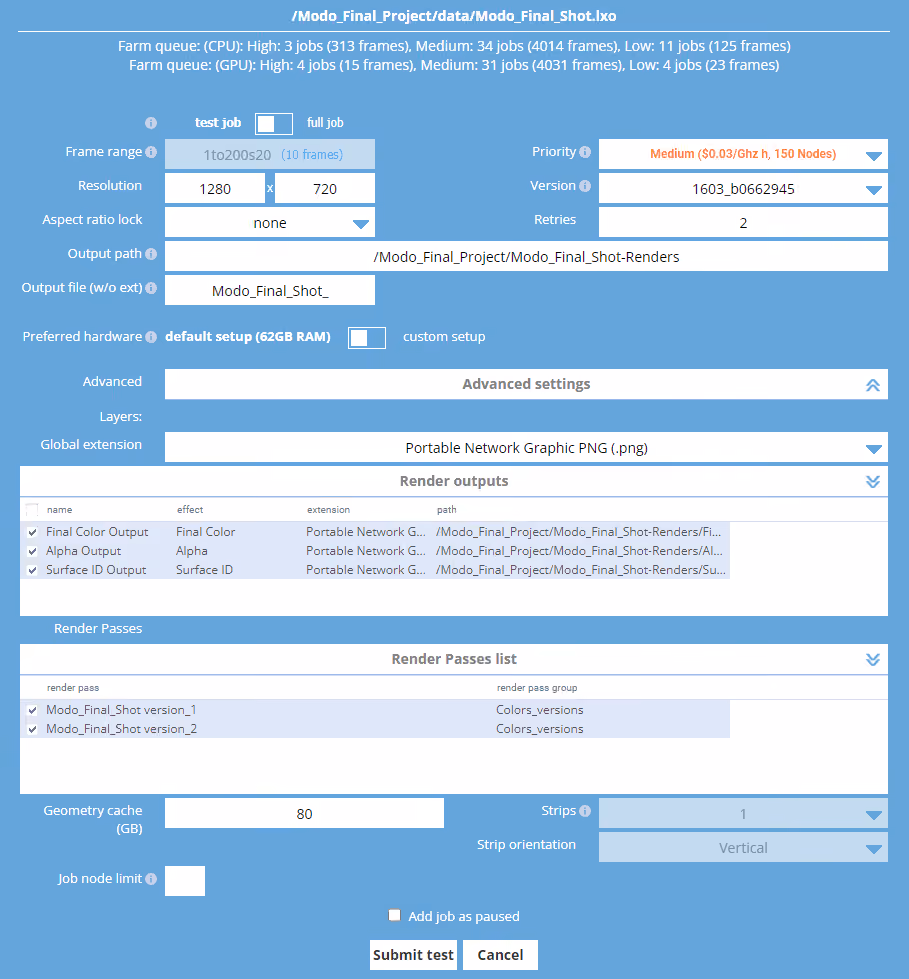
Automatic tests - “test/full job” switch
What is the “test job” feature and how does it work?
This article will guide you through using the test job feature effectively. The "test job" feature allows you to render a small portion of your animation before rendering the full range. This helps you:
- Identify potential errors
- Estimate costs
- Optimize rendering time
The system sets a "step parameter" (represented by "s") that allows for the rendering of every nth frame from the defined range. The step parameter skips a certain number of frames between each rendered frame, saving time and resources during testing.
Example: If your final scene has a range from 1 to 250, the system sets the step parameter for the "test job" to s20. This means it will render every 20th frame, testing 13 frames in total: frames 1, 21, 41, 61, 81, 101, 121, 141, 161, 181, 201, 221, and 241.

Benefits of using the "test job" feature
- Checking outputs correctness: Catching potential errors before rendering the full range is crucial. Rendering a test helps avoid costly mistakes related to incorrect scene settings, missing effects, or plugins used in the project. With the automatic range feature for the "test job," you can render a test every nth frame and check if the output is correct after the test is performed..
- Calculating a cost estimation - Estimating costs for a given shot or scene is an important factor in planning your budget for project implementation. With the automatic test range feature, you can render a few frames from the full range, allowing you to estimate costs for the final rendering of the full range (with a given priority).
Strips - If you upload your scene using the "Strips" mode (in our plugin), then in the web dashboard you will have a visible additional option for strips.
- Verification and optimization of rendering time - With tests, you can check if the rendering time for individual frames in the animation meets your expectations and if your frames do not require quality adjustments concerning rendering time. If the rendering time is significantly longer than expected, you can optimize the settings in your project to reduce rendering time. Using the "test job" feature allows you to avoid rendering the full range without first making sure your settings are optimally set.
- Automatically setting the "step" parameter - With the automatic range setting for the "test job," you don't have to think about what value to set; our system automatically does it for you. Based on the number of frames you want to render, it analyzes the range and sets the optimal and most effective value for you.
- Reducing risks and ensuring success: Test jobs minimize potential issues, save time, effort, and resources, and help guarantee successful rendering. Our technical team is available for assistance, but test jobs simplify resolution processes and provide a basis for addressing concerns, including compensation for system-related errors.
How to use the "test job" option?
By default, the "test/full job" switch is set to the "test job" option when your range is defined during range setting in our plugin, based on which the range for the test job will be set. If you want to modify the range based on which the range for the step job will be defined, switch to the "full job" option, provide the range you will ultimately want to render, and switch back to the "test job" option. In this way, the step parameter will be set by our system based on this range.

Factors affecting the range setting for "test job"
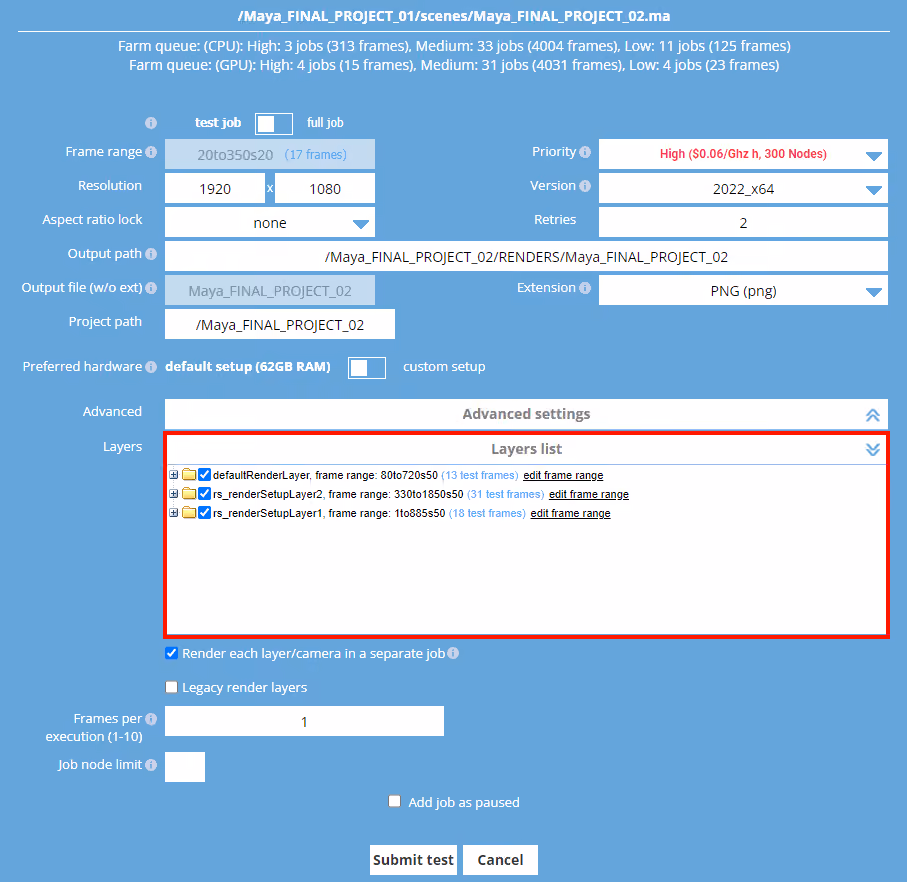
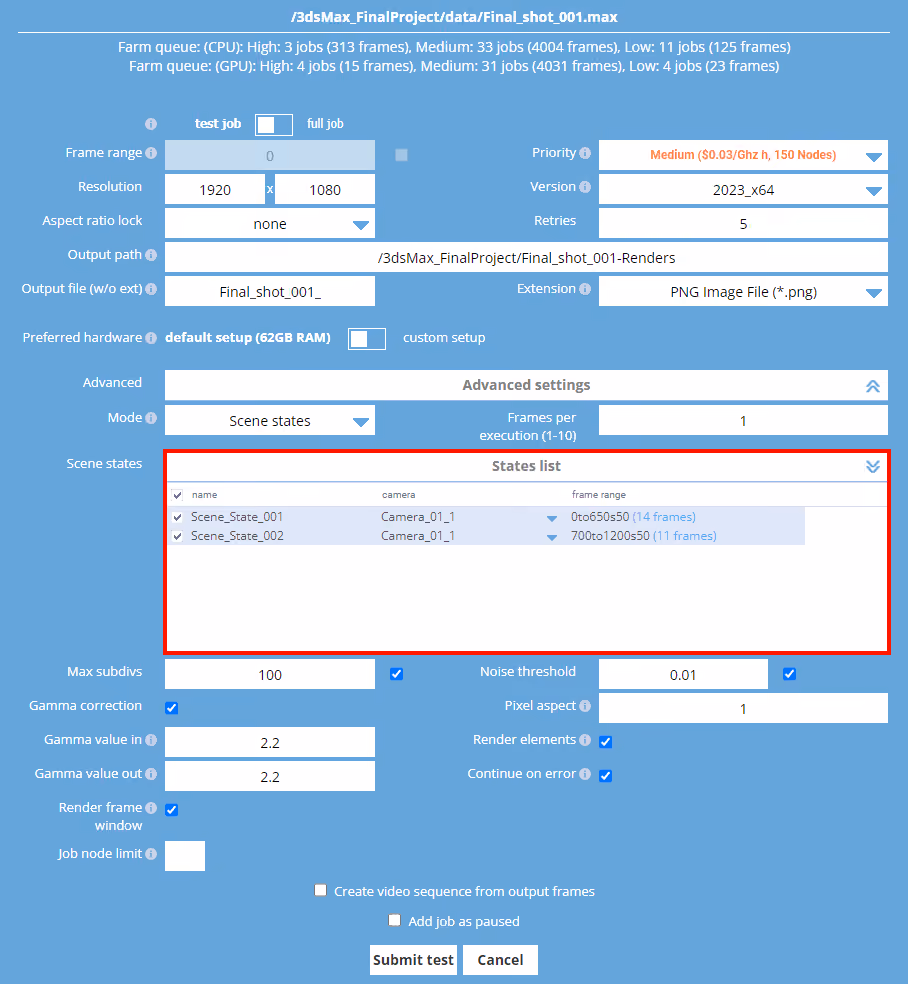
Our system is based on the animation range(s) provided by the user in the scene. We can distinguish several scenarios with defined settings:
- Simple range - in this case, our system sets the step parameter for the main range and indicates how many frames will be rendered as part of the "test job."
- Complex range - if you have a specific range set, separated by commas, our system will also detect these complex settings and set the "step parameter" accordingly, analyzing each range and adjusting the best value to make the test as efficient as possible. In this case, you can also see how many frames will be rendered as part of the "test job."

Each of these ranges, if set individually, is also analyzed by our system, and the step parameter is set individually. Below are some examples of how it works in different software:


Ways to customize automatic animation range settings to your needs
Depending on your needs, you can set up a different test than the one set by our system.
Our system is designed based on our customers’ experiences and the most common scenarios. The system automatically sets the step parameter to the best value by analyzing the frame range and the number of frames to make the test efficient and useful (finding errors, estimating costs, etc.).
However, if you want to set up a test for your project on your own, we strongly recommend always performing such tests before the final rendering.
Below are cases for which you can set up your own test:
- Rendering part of the whole animation for a few frames in a row - if you need to render a test to check if your animation is smooth and if there are no visible flickering effects, you can switch to "full job" mode and set a smaller animation range that you want to check instead of using the test with the step parameter.
The cases where such tests, i.e. rendering a few frames in a row from the entire animation, can be applied include in particular:
- various types of simulations
- environmental animations such as vegetation and scattering
- complex and dynamically moving camera object/animations
- material or object animations with reflection/refraction effects
Example: If you want to check if your animation contains flickering and you are going to render the final range of 1to200, you can set a test range for a "problematic part" of the animation, for example: 101to115s1 for 15 frames in a row. You can also set a complex range for multiple parts of your animation, such as: 1to10,51to60,101to110,151to160. Then you set to render four ranges in a row of 10 frames each for the entire animation, which will allow you to check multiple parts of your animation.
After checking if there are no flickering effects visible in the outputs, you can edit the job settings and set the full range for the final rendering.

Remember that such a test will not give you an estimate for the full range, as in the case of the performed test with the "step parameter".
- Rendering test for a smaller/larger number of frames - if the test set by our system is too precise for you, and you want to set a larger value for the "step parameter," or alternatively, if you want to render more frames by defining a smaller value for the "step parameter," you can switch to the "full job" option and define the step value for the given range on your own.
Example: If you want to render the range 1to500, our system will automatically set the "test job" range to 1to500s20, which means that 25 frames will be rendered. If you want to render fewer frames, you need to define the step parameter to a larger value yourself. So, if you set it to 1to500s50, only 10 frames will be rendered. Alternatively, if you set the step parameter to a smaller value, for example 1to500s10, it will allow you to render 50 frames as a test in this case.
Alternatives to setting up test job when the feature “test job” is unavailable
Our system currently automatically sets up the testing range, mainly for animations larger than 10 frames. If your job does not have an available testing option, then you can set the alternative test in cases:

How to render the full range after completing a test job?
If you have performed a test for your scene and after checking the outputs (whether they are rendered correctly), you want to resume rendering for the full range, you can do so easily without re-rendering the already tested frames. Simply select the job for which you want to render the full range in the rendering queue, right-click and choose the "Render full range" option.
Below is an example of a successful test render for the range 1to250s50. The test job has a "done" status as all 5 frames within the test were rendered correctly, with a step value set to 50 (every 50th frame).

In this way, your job will be resumed for the full range for the remaining frames (with the step set to "s1"). So if you rendered a test for the range 1to500s20, then by rendering the full range, it will be the range 1to500s1.
Alternatively, if you want to render the full range and/or make some changes to the settings, such as changing the frame range or setting the priority or FPE, then choose the "edit job" option. You can then manually make the necessary changes, apply these settings, and choose the "resume job" option.

We value your feedback! Please share your thoughts on the "test job" feature, as we constantly strive to improve it based on customer feedback. Your opinions are crucial in developing this feature to your needs and expectations. You can share your feedback through our website's contact form or directly with our technical support team. We are open to suggestions and eager to make our "test job" feature even more user-friendly.
Register Now and Get $50 FREE Credits!

Frequently asked questions