The folks at the Blender Foundation have yet again brought their dark horse DCC another step closer to being a force to be reckoned with in the 3D industry with their latest release with Blender 3.2. Many in the Blender community have already given us a rundown of the exciting additions and improvements, and we’re just as keen to share our list of what’s new and has us absolutely thrilled in version 3.2!
Before we go over our favourite features, we’re also happy to announce that we’ve already added support for Blender 3.2.0 over at our online render farm! New users get 50 USD worth of starting credits, and ALL Blender users rendering with us enjoy an automatic 33% discount. On top of that, they get generous volume discounts when they top-up credits!
And now, we’ll go over some of the goodies Blender 3.2 has to offer:
Light Groups
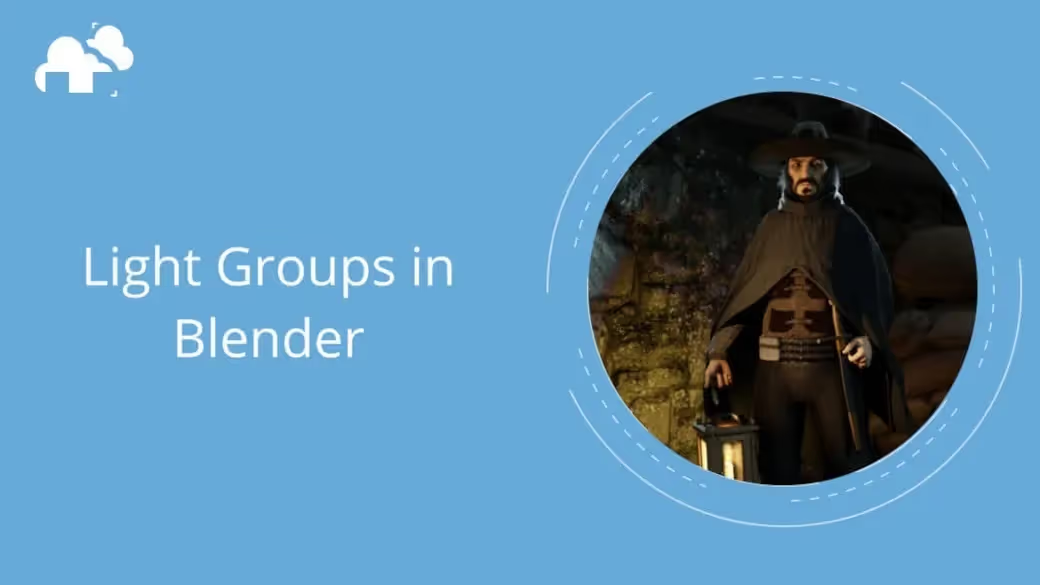
Blender Light Groups make it possible to assign any number of lights in a scene to groups that become available as passes for compositing after a render. This cuts down the turnaround time spent in lighting scenes since even dramatic changes to light setups can be made in compositing. We were so eager to see this that we wrote about this feature while 3.2 was in its Beta stage, and made a more in-depth tutorial that comes with already rendered light passes that you can use to experiment with!
NLA Editor: tweak full stack
This new feature is a little esoteric, which makes it completely understandable that it isn’t talked about a lot, but for anyone who uses the NLA editor for creating Mixamo animations with Blender, this is a godsend.

Above is an animated character with a stack of action strips in the NLA editor. The action strip highlighted in yellow and the action strip above it both contain individual keyframes that are combined together to create the character’s final movement. Previously, if we were to edit the keyframes on a strip below other strips, the strips above would be disabled. This made it difficult to make adjustments because there would be no visual feedback for the end result of all the combined action strips in the stack.
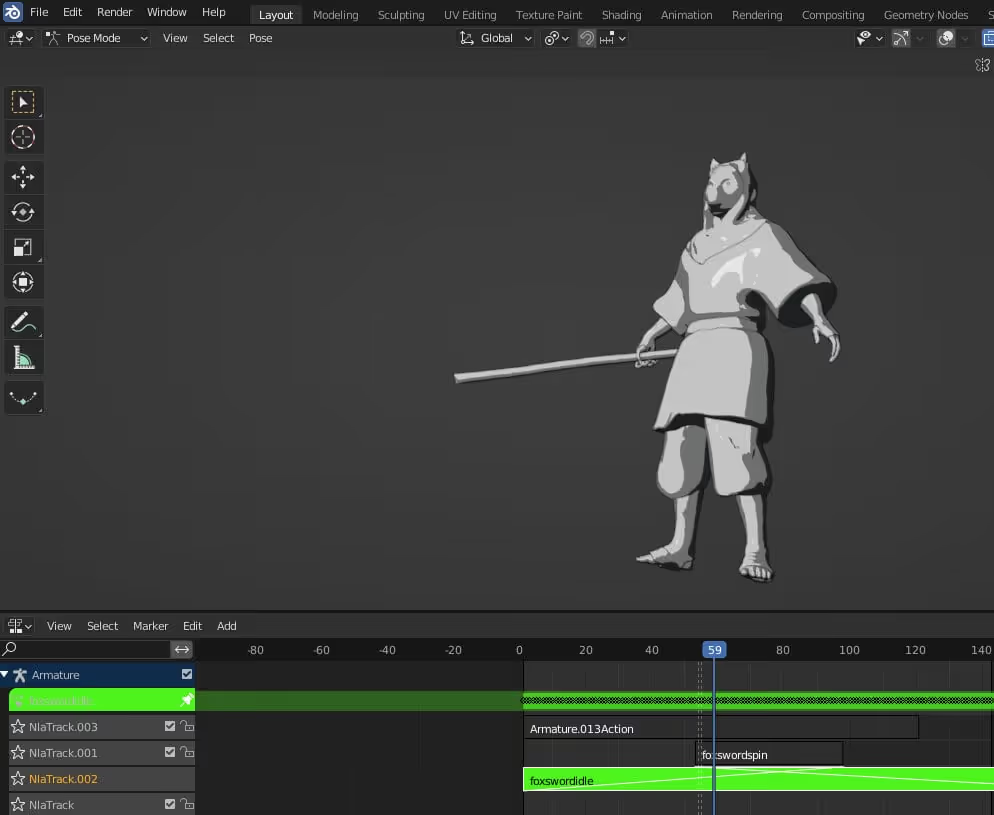
In this image, the previously highlighted strip is now in Blender’s OLD tweak mode. Notice the character’s pose is totally different. This is because we’re only seeing the keyframes inside of the highlighted strip, not the result when combined with the strip above.
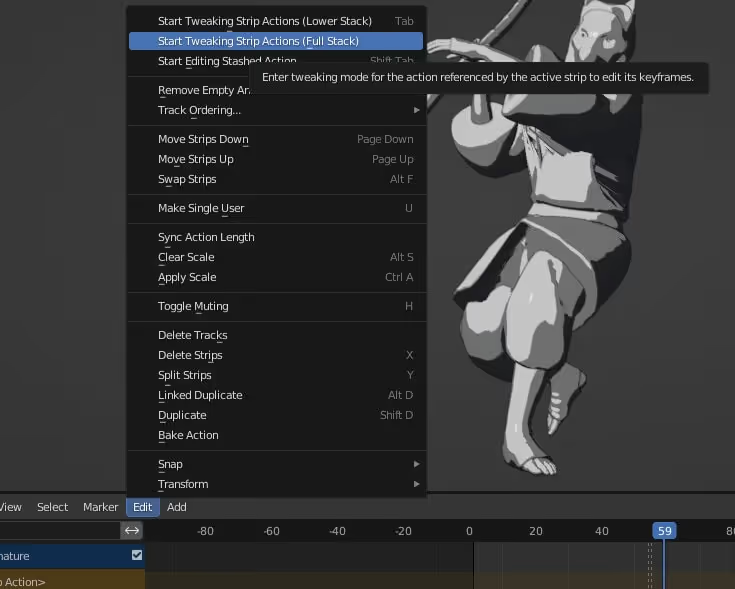
In Blender 3.2 we get the option to “Start Tweaking Strip Action (Full Stack). Using this tweak setting, we now get to make adjustments and view the complete end result.
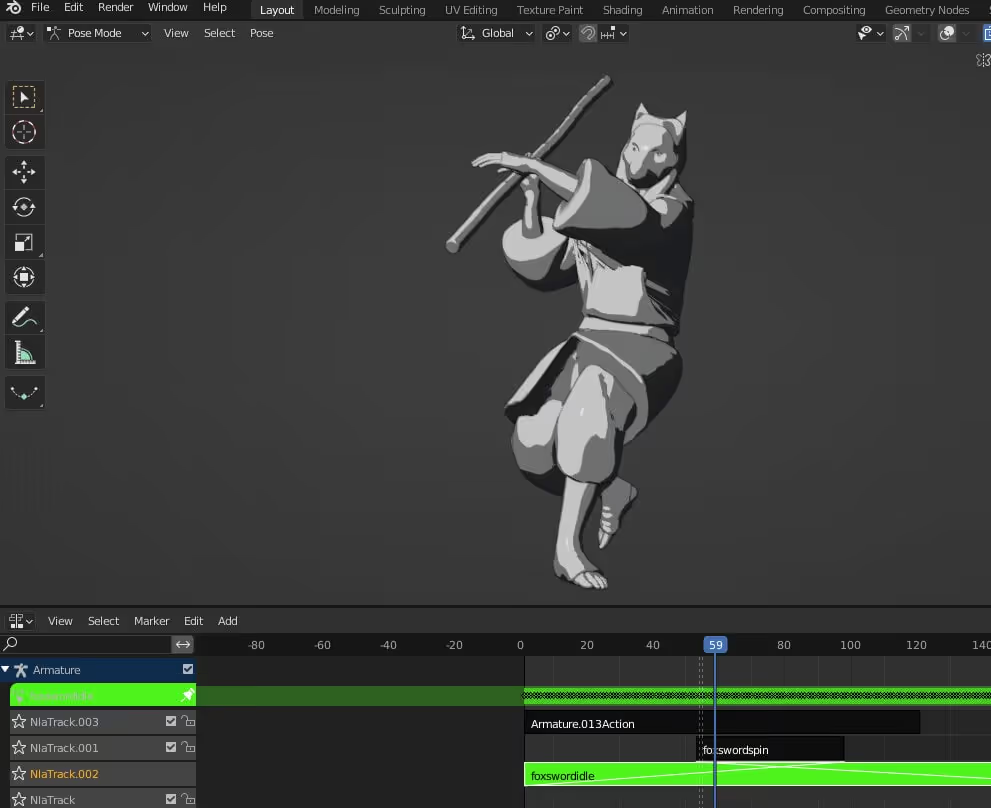
Notice how in this image, the same strip is in tweak mode, but we now we can adjust it while previewing changes in the final result (which is the combination of the current strip’s keyframes and those of the strip above it).
Polygon painting
Concepting in Blender has been a real treat in the past few releases, and now it’s even better. A new painting toolset has been introduced to Sculpt Mode which makes it possible to paint with unprecedented thoroughness on unoptimized sculpts!
The new Paint tool in sculpt mode comes with parameters to control tip hardness and size, wetness, Blending Modes and more to make painting over meshes as intuitive as digital painting on a 2D program.
The Mask by Color tool creates masks only within a selected color range (in this case the light greys of the eye areas). Adjusting the Threshold parameter can control the scope of the color range. The resulting mask can be further manipulated by the standard sculpt Mask operations.
The color Fill tool can be used to quickly Fill unmasked areas as well as change settings like Value, Contrast, Hue, Saturation and more with a couple of strokes.
The Smear tool works incredibly smoothly and can be used to blend colors into each other.
The Color Attributes are automatically connected to the Base Color input of shaders which means the painted data will immediately show in the render.
And the pièce de résistance: when remeshing a sculpt, its color data can be preserved by enabling the corresponding switch in the remesher menu!
Asset collections
The Asset Browser is now five times more useful as it can finally support entire collections!
This means that any assembly can now more easily be dragged and dropped into a scene. As soon as a collection is marked as an asset, a thumbnail is automatically generated including any textures on the objects within.
While this in itself is a major help, the implication of this is that if any change is made to the contents of the marked collection, all the instances created from the asset manager will automatically update.
In this screenshot, notice that as soon as the selected props were added to the Shelter Collection, all the instances of the collection in the scene now also come with those props!
Additionally, this makes it much easier to nest a variety of more complex assets together in a group. Think of a group of different trees that are keyframed to sway back and forth, or some farm animals moving around inside of a pen.
The Curve Pen
A humble but life-improving new tool, the Curve Pen makes working with complex curve patterns so much easier.
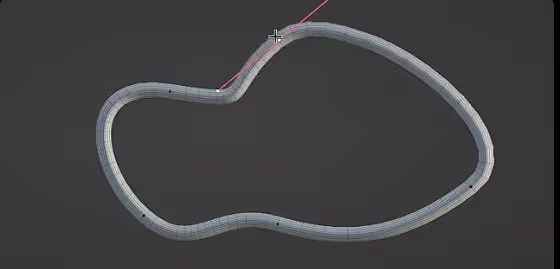
Whether creating some embossed ornamentation on pillars or just creating some really zany pretzels, the Curve Pen tool makes working with curves in general way less tedious, which is always welcome in Blender, particularly.
That completes our list of features, but this selection is by no means all that can be expected from 3.2. Motion Blur on Volumes, Shadow Caustics, the Video Sequencer improvements and the updates to Geometry Nodes and Grease Pencil are some of even more new features that have been generating excitement in the community as well! It goes without saying if you haven’t yet, download a copy of Blender 3.2 and get your hands dirty!
Blender is showing no signs of slowing down in its evolution, and as with every new release, we’re even more assured that it will be the prevalent tool of choice for the next generation of artists and designers.
Register Now and Get $50 FREE Credits!





.avif)

