.avif)


Previously, we introduced the new Blender Light Groups feature in the upcoming 3.2 release. Aptly titled: How to use Blender Light Groups, we showed you how you could use the light passes inside of Blender’s compositor to make adjustments to our scene’s lighting on a rendered image, and how that saves a lot of time. (If you’re unfamiliar with Light Groups, give that article a read first!)
In this article, we’ll delve deeper into compositing with Light Group Passes on an animated shot I created on our render farm, and work on developing an atmospheric look in earnest!
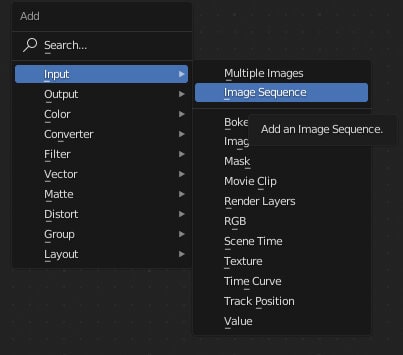
If you’d like to follow along or just want to experiment on an already rendered sequence, you can find my rendered passes here.
Preparing passes for an animated sequence
Normally, we would render a couple of stills and work within Blender’s compositor to get the desired look on our shot, and so long as our node network is connected to the right output node, we could send our scene over to a render farm and have the look applied to all of the frames.


Problem is, If we had to make changes days later and we had closed Blender, we would have to go through the entire process again and that would be costly. We could, however, assign file output paths for each of our passes, so that they render along with our main frames.


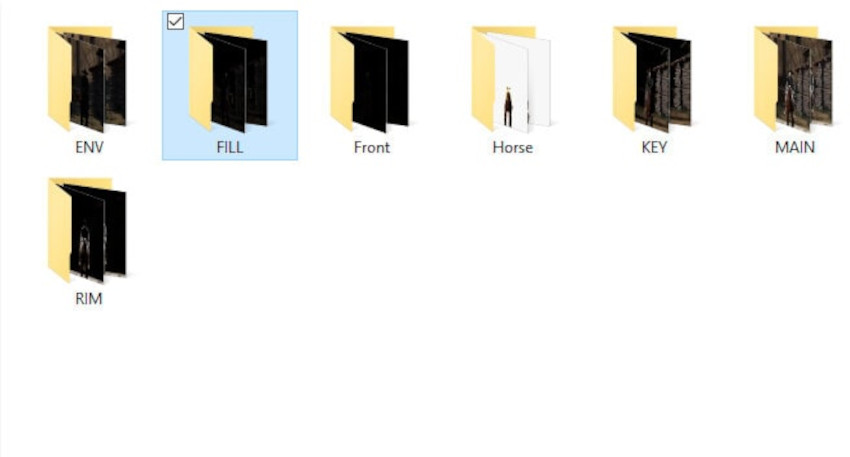
Having our passes on hand allows us to continue compositing without any fuss.
Compositing: Look 1
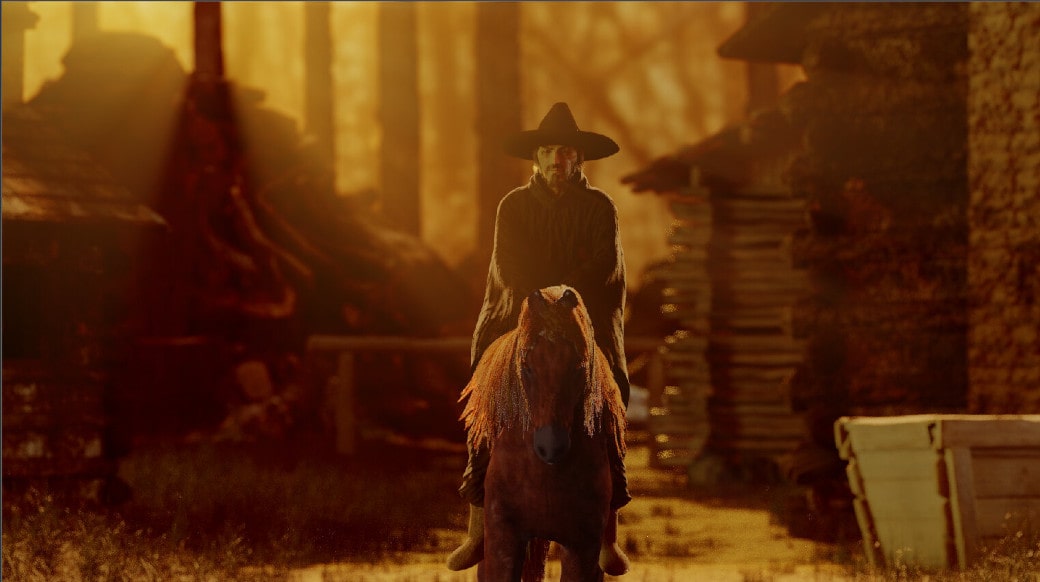
In this look I was going for a warm, late afternoon vibe. Here’s how it’s done.
Combining Passes

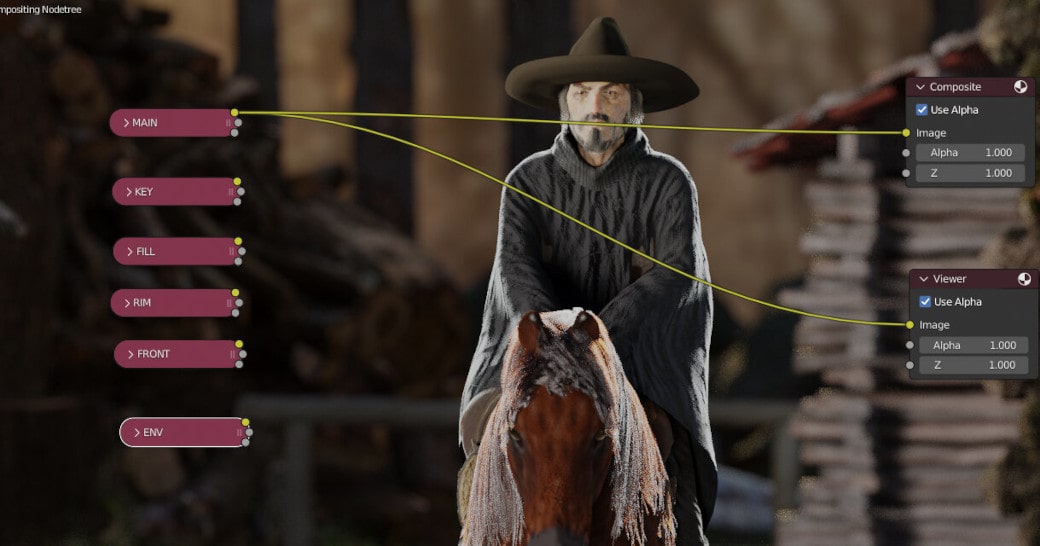
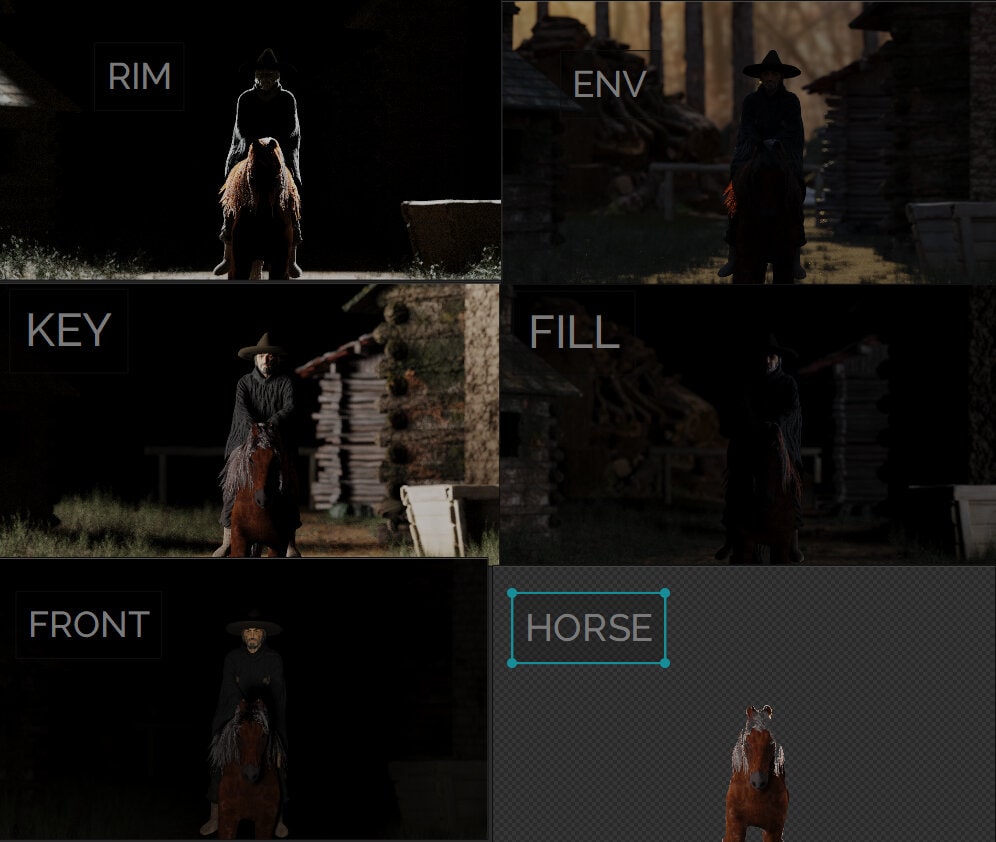
I. To start, I used an Alpha Over node to place the horse pass over the environment pass (ENV). I did this so I could slightly brighten the horse at the beginning of the node network, but leaving the factor value low. This would allow the horse to be affected by the other light passes as I add them on, and I can raise the factor value later on as needed.
II. Next, using a color Mix node set to Add, I brought in the FILL pass and set the Fac value to 1.
III. I repeated the step to bring in the KEY pass, but I brought the factor value down since in this look, I wanted the primary light to seem like it was behind the subjects and to the side.
IV. To sell this idea further, I added in the RIM pass and once more lowered the Fac value to match the intensity of the environment light. This light is already stylistic by nature and so it has to be subtle enough to be of service to the image without being distracting.
This network represents the basic “flow” of the final node chain. The succeeding adjustment nodes will be added between these nodes, but will not alter the sequence of how the passes are combined.
Adjustment 1: ENV COLOR AND LIGHT RAYS

I. I needed the environment pass to be a little stronger, so I brought in an Exposure node to crank it up.
II. After the Exposure node, I added a Color Balance node and brought the Lift Gamma and Gain colors towards the warmer end of the spectrum. I also brought the Lift Value down a smidge to give a little more contrast to the background of the scene.
III. I added a Sun Beams node and set the position to the upper left of the image, and adjusted the Ray Length value to taste. This node output has transparency so I used another Mix note set to Add to superimpose it on the output from the Color Balance node.
IV. As you can see, all these new nodes were set up before the Alpha Over node that combines the horse pass as mentioned in the earlier section.
Adjustment 2: FILL AND KEY PASSES

I. I brought in another Exposure node and a duplicate of the previous Color Balance node after the FILL pass to tweak its intensity and unify its color to that of the ENV pass. This network is combined with what I made in adjustment 1 via the Mix > Add node.
II. Once again I duplicated the Color Balance node to add to the Key Pass, this time giving the gain a yellowish tint. I should point out how being able to alter the Lift Gamma and Gain of each light pass gives us a level of control that I don’t believe was attainable in the previous versions of Blender. At the very end of this group of adjustments is the Mix>Add node that combines the KEY Pass to the chain.

Adjustment 3: RIM

I. For the RIM Pass I added yet another Exposure node and after, another Color Balance node to tone down the intensity and unify the colors again.
II. This is the final combining node in the chain before leading to the Viewer and Composite output. Be sure to link the node before the Viewer Output node to the Composite Node as well, otherwise, when you hit render again, you will only see a black screen.
Here is the final image :
I ended up adjusting the colors even further to get a little more warmth in DaVinci Resolve as an afterthought, but this could easily be achieved using the Color Balance nodes inside of Blender.
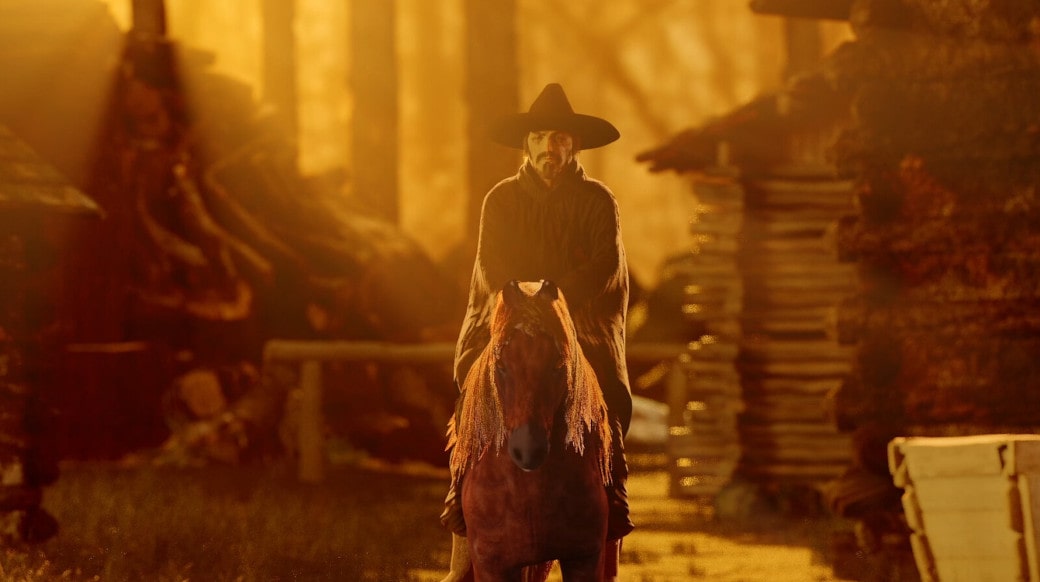
This concludes our discussion of the new Light Groups in Blender 3.2! Here is a comp of this and other looks I achieved after playing around with the passes even more.
I hope you found this useful and as always, Happy Rendering!
Register Now and Get $50 FREE Credits!