


NFTs have quickly become an outlet for artists to gain recognition for their work while allowing collectors to take part in the world of digital art. As 3d NFTs gain traction in the art scene, it's a valuable skill to know how to develop your 3d artworks from single images, into larger, more diverse NFT collections that allow you to share something unique with collectors. With this in mind, this guide will walk you through developing a basic Blender scene into an iterative and dynamic project capable of generating hundreds or even thousands of individual artworks.
In this articles, you'll earn how to create a dynamic 3D NFT collection in Blender using geometry nodes, drivers, and Blender's Python API to prepare the renders. Keep your workflow organized and find what you need to edit easily by organizing your collections and textures. Automate the creation of your 3D NFTs by using Python scripting to change geometry seed values and materials automatically.
To make 3D NFT art, use Blender to import or create a 3D model, optimize its performance, apply materials and textures, set up lighting and camera angles, export it in a compatible format, and mint it as an NFT on a marketplace platform. By following these steps, you can easily create and share your captivating 3D NFT art.
First Steps
Before working on automating creation of your 3d NFT collection, it's important to analyze how much variability you're looking for in your collection. Do you want a collection with truly random elements, or would you rather have finer control over what the final renders look like? For randomization, using geometry nodes or shaders could be enough to find your desired output. But if you need complex modifications, a short Python script or the use of specialized add-ons such as Blend_My_NFTs may be better contenders.

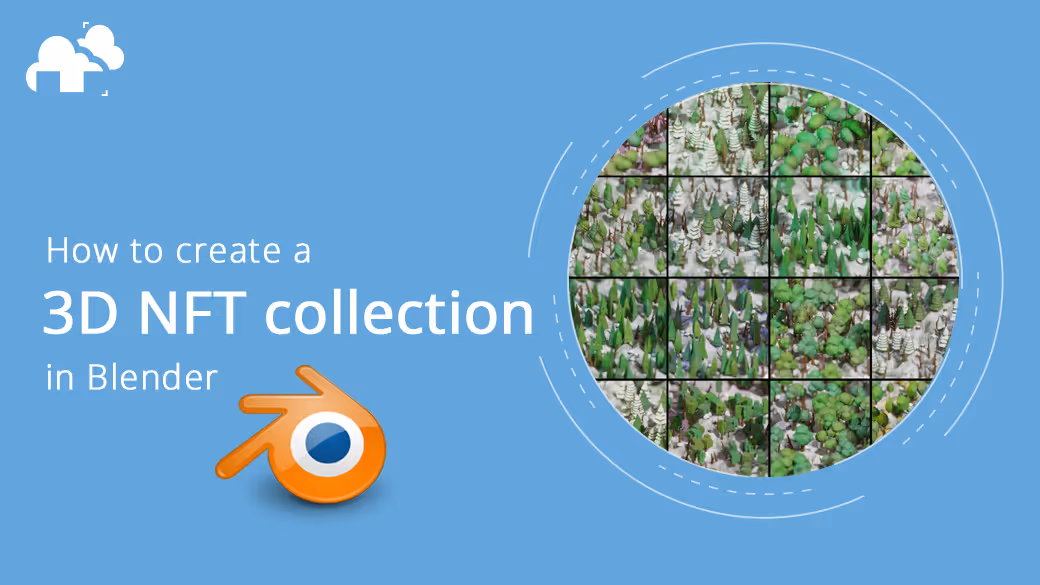
In this article, we'll explain how to create a 3d NFT collection based on this sample forest render and walk you through how we modified the blend file to create a large collection of individual, unique NFTs. To do this we'll be using geometry nodes, drivers, and Blender's Python API to prepare the renders. We'll start with a set of collections with different variations of the objects that our forest can be built from and some materials for the various elements of the scene, then we will work to edit these based on the keyframe of the scene, so that we can easily send our frames to a blender render farm without hassle!
Keeping things organized
Since we'll be using node trees and scripts to create our 3d NFT collection, it's essential to keep things organized so that we can easily find whatever properties we need to edit. I've organized our scene to have 8 collections of different types of trees that will serve as the base for the NFT collection and a "scene" collection to host the other elements such as our camera and floor object.


I've also set up the tree materials so that we can easily choose between different texture maps variations. Notice that each texture variation’s name has been changed to be numbered. This will be important later so that we can easily randomize what texture we're using simply by choosing a random number in a range. Lastly, be sure to keep your naming schemes consistent and organized for when we reference properties of objects later.
Generating and modifying Objects using Geometry Nodes
First, let's look at how we can automatically change our forest's trees, grass, and rocks using Geometry nodes. Geometry nodes on the surface are quite simple. The default node tree takes the geometry of an object and sends it directly back out via the Group Output node. Anything we place in between to either modify or completely replace the geometry will have total control over what you see in the viewport and render.
For example, an object can have zero vertices in edit mode, but be an infinitely complex mesh after we add geometry via nodes. This is what makes geometry nodes a little different from Blender's mesh modifiers.
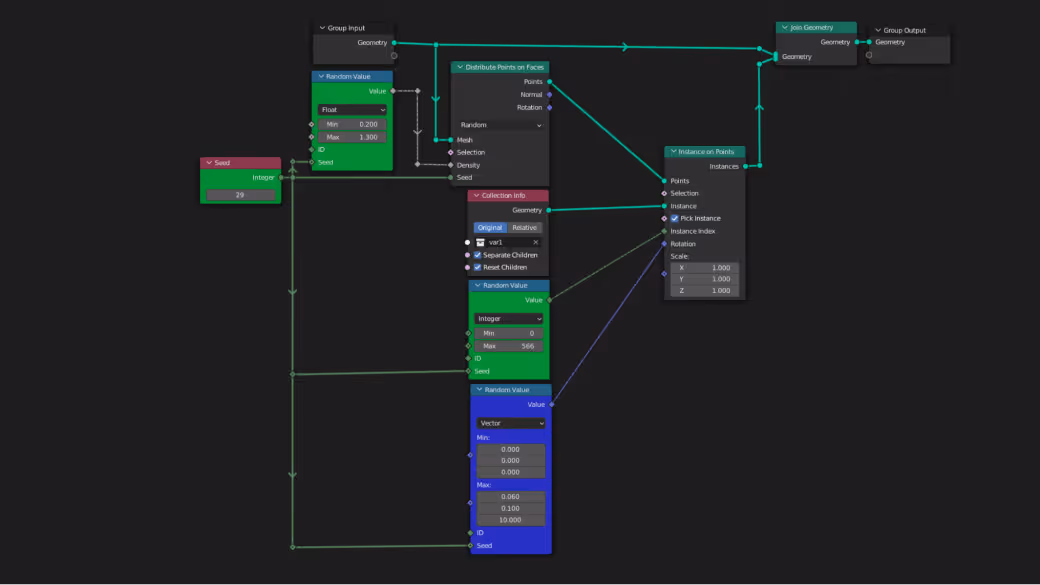
In our case, we want to start with our ground floor mesh and populate trees, rocks, and grass on top of it, then have an easy way to randomize what we've created. Populating our floor is quite easy, we can take the floor's geometry as our input, distribute points on its faces, then instance objects from one of our tree collections. After that, we can add a few random value nodes and set a seed that will allow us to easily randomize things by changing a single seed number.
This setup is the base of how we can generate all of our different renders. Next, we'll modify our setup so that we can change which collection our node tree uses to create the forest.
Unfortunately, geometry nodes don't have a one-click solution to randomly choose a collection. The good news is, with a few nodes, we can create a setup that mimics the randomness we're looking for. Adding a series of switch + subtraction nodes, we can set which collection to use based on a single integer value that we can easily set with a random number via a script later.
Each switch node uses a Boolean input to check if our number is above or below 1, then we subtract 1 from our input value and try again until we run out of numbers above 1. For example, if we set our integer to 2, we'll need to subtract twice before our Boolean returns false on the third switch and ends our "loop" on the third collection. All we need to do to set our collection now is choose a number between 0-7.

From here, we can basically duplicate this setup for whatever elements we need. In this case, we can add some rocks and grass and we get something like below!
Automating our changes using Python and Drivers
Now that we have a good base for making changes to our scene, we need to use some basic python scripting to automate changes. otherwise, we'd still need to change our geometry seed values and materials by hand each time we render an image.
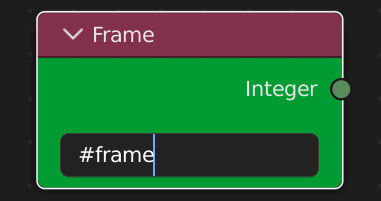
Starting small, we can change our geometry nodes seed value by using a driver to change the seed based on the frame. Since our geometry values are already random, we can avoid any complex scripting and just use the current frame as our seed. To do this, change the value of our Seed node to #frame. The hashtag indicates that we are using a function, and the frame function then recalls the current frame of our scene.
For the other random elements of our scene, we'll need to dig a bit deeper into Python. We know that we'd like our changes to happen on every frame we'd like to render, but unlike our seed value we need to return certain ranges of random numbers and actually link certain nodes together in our material setup. We can do this via a short python script setup in Blender's text editor that can change certain elements of our scene by referencing their data blocks.
Below shows the basis of a script we can run to change the elements we need to. To build your own, you can follow the same principles using the data blocks of your own scene's objects. Just copy the data path of any property by hovering over the field and pressing CTRL-SHIFT-C. Lines with # followed by text are comments to help you understand each line of the script.
Next, we can set this function to run every time our frame changes using a handler that appends our scripted changes to the frame change function, forcing the script to run each time. First, we nest what we have so far into a function, then append that function at the end of the script. Now we can click run and change the frame! If your result isn't working, you can check the system console for errors under Window > Toggle System Console.
As a final step, we can set the script to run whenever we open the blender file by registering it under Text > Register in the text editor. This means that we can upload our project file to a render farm without any special configurations while still using the scripts we set up.
From here we can basically add infinite variation using different meshes, geometry nodes, and materials. In my final scene, I've added some randomization for the light colors and ground floor on top of the other elements to create even more variability. The results are a truly vast number of possible renders.

If you’d like to see more about how this setup works, you can download the project file for this scene and dig into the files and renders for yourself!
You can also try out our Blender render farm and get 50$ free credits simply by signing up here!
If you're looking for more ideas on creating NFT collections, check out our recent interview with NFT artist Victor Duarte, a full-time 3d NFT artist or if you'd like to dig deeper into scripting your scene creation, the course Scripting for Artists from the Blender Studio is a great place to start.
Register Now and Get $50 FREE Credits!