


Just as any painting, sculpture or film benefits from retroactive examination, so do 3D renders. And while a render farm helps save us more time to edit work before rendering, we have some sophisticated tools at our disposal that allow us to make changes even after the finished frame. Cryptomattes are one such tool. Cryptomattes provide a way to make quick adjustments to specific elements in renders without having to worry about affecting the rest of a scene.
In this article, we'll explore how to use them in Blender and render them out along with your main output on a render farm service such as Garagefarm.NET. By leveraging the power of Cryptomattes, you can make significant changes to your work even after your frames are done. This article assumes you have a working knowledge of compositing and render passes in general and are familiar with Blender’s compositor.
If you haven’t already, you can register at our Blender Render farm and get $50 of free starting credits!
What are Cryptomattes
Cryptomattes are a powerful feature in most 3D rendering packages that allow for precise control over individual objects and elements in a render. They work by generating a separate matte for each object or element in the scene based on their unique properties. This allows for quick and easy adjustments to specific parts of an image without affecting the rest of the scene.
Cryptomattes are particularly useful for post-processing 3D animation since they bypass the need for creating masks and tracking them to moving objects in a compositor, for example. This saves valuable time for long sequences that would otherwise require artists to wait for a render farm job to complete before they can begin creating masks for the sequence. Any work that involves the use of masks for elements in a 3D shot can benefit from Cryptomattes. Let’s see how we can use them for an animated project in Blender that we’ll be sending to a render farm.
Enabling Cryptomattes in Blender
We can include Cryptomattes in our renders inside of the View Layer section of the Properties panel, via the Passes Dropdown as shown below.
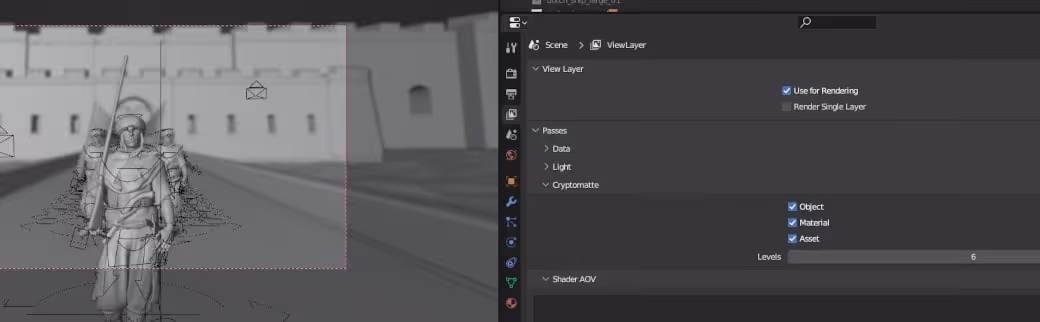
We can choose to enable three modes of Cryptomattes, each offering different levels of control over our scene elements.
Object will allow us to generate mattes for every object in the scene.
Material will allow us to generate mattes for every instance of a material present in the scene.
Asset will allow us to generate mattes for groups of objects that share the same parent. This can be especially useful for isolating entire characters or other rigged props.
In this instance, we have all types so we can explore each one.
Setting up Cryptomattes for Compositing
To make the most out of Cryptomattes, we’ll include some render passes in our renders.
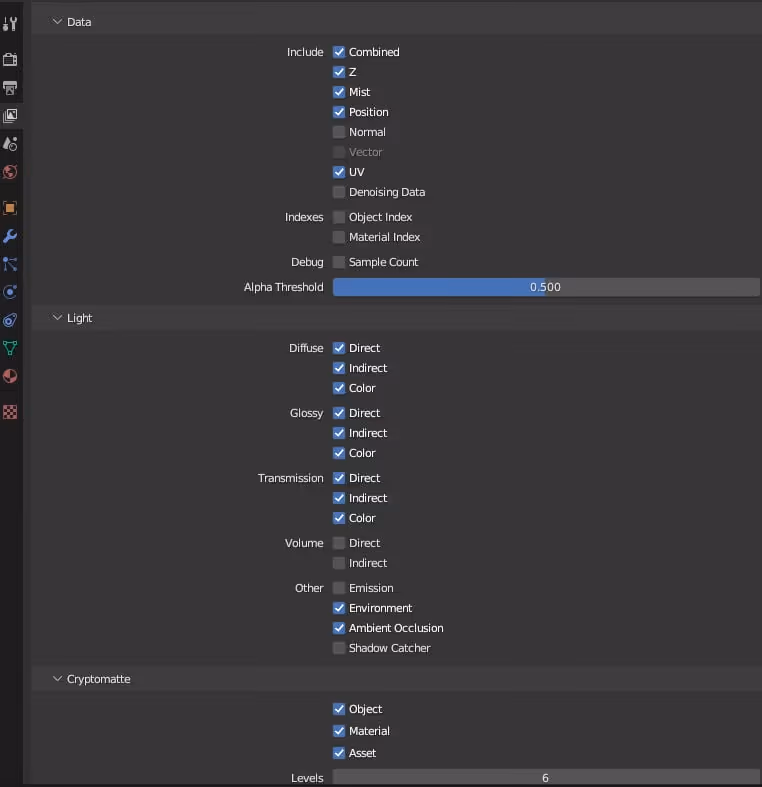
When we render an image, we will have access to all our enabled passes in the Compositor. The Cryptomattes will allow us to apply any of these passes on any specific element and open up new opportunities for stylistic enhancements to our work. Let’s start with a test render to explore how we might use Cryptomattes.
Exploring Cryptomattes
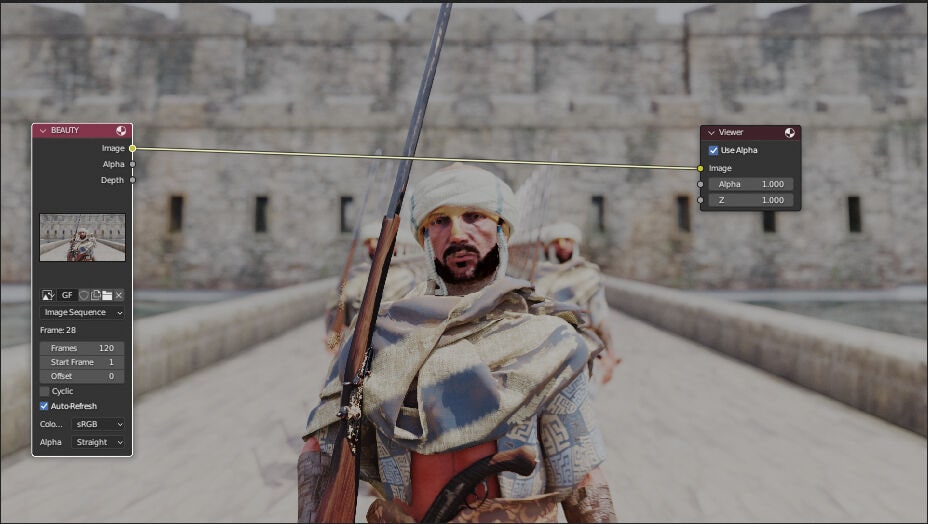
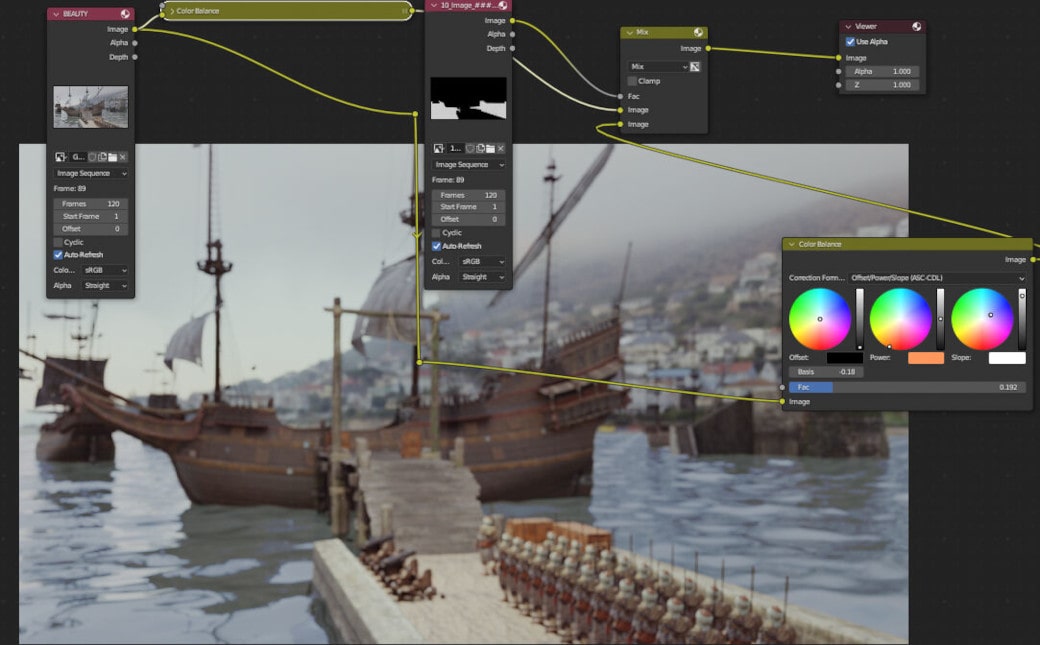
This render is a still from the first of three shots in our animation, viewed from Blender’s Compositor.
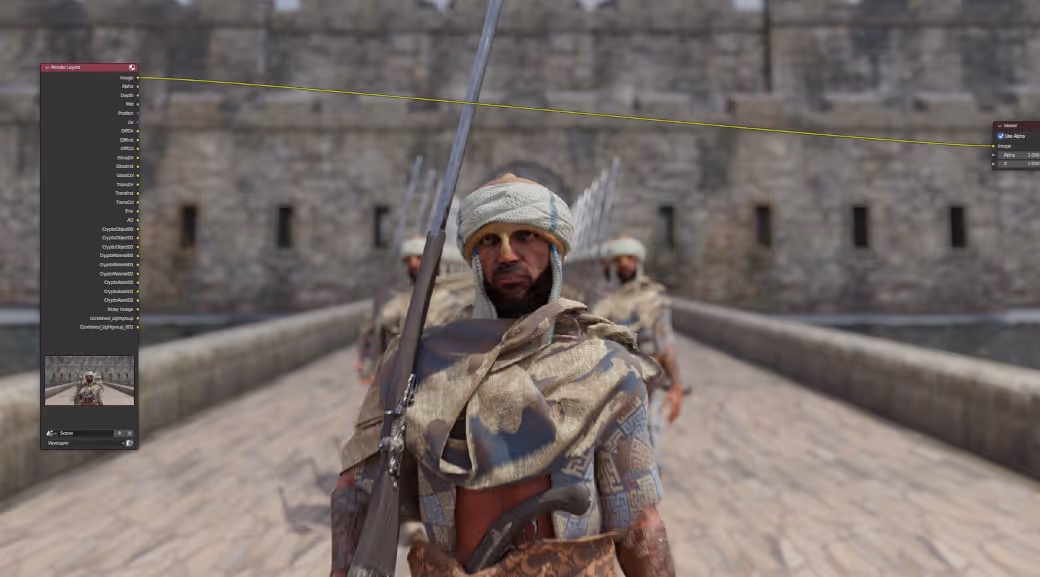
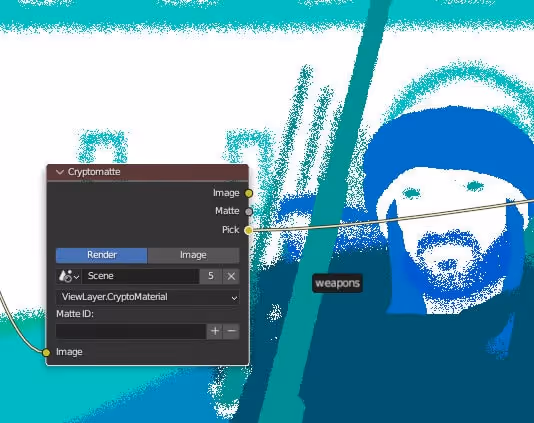
We might have noticed that the wood on the soldier’s weapons could serve as color accents for the character with some adjustment, so we’ll start by creating a Cryptomatte for them.
We can hit Shift+A and search for “Cryptomatte” to find the node and bring it into our compositor.
Then, let’s connect our render to the node’s image input and change the mode of the Cryptomatte to “ViewLayerCryptoMaterial”.


By connecting the node’s “Pick” output to our viewer node, we see colors pertaining to each of the unique materials present in our render. By hitting “+” we can hover over any color region and add that region to the Matte ID field. We’ll select the material named “weapons”.
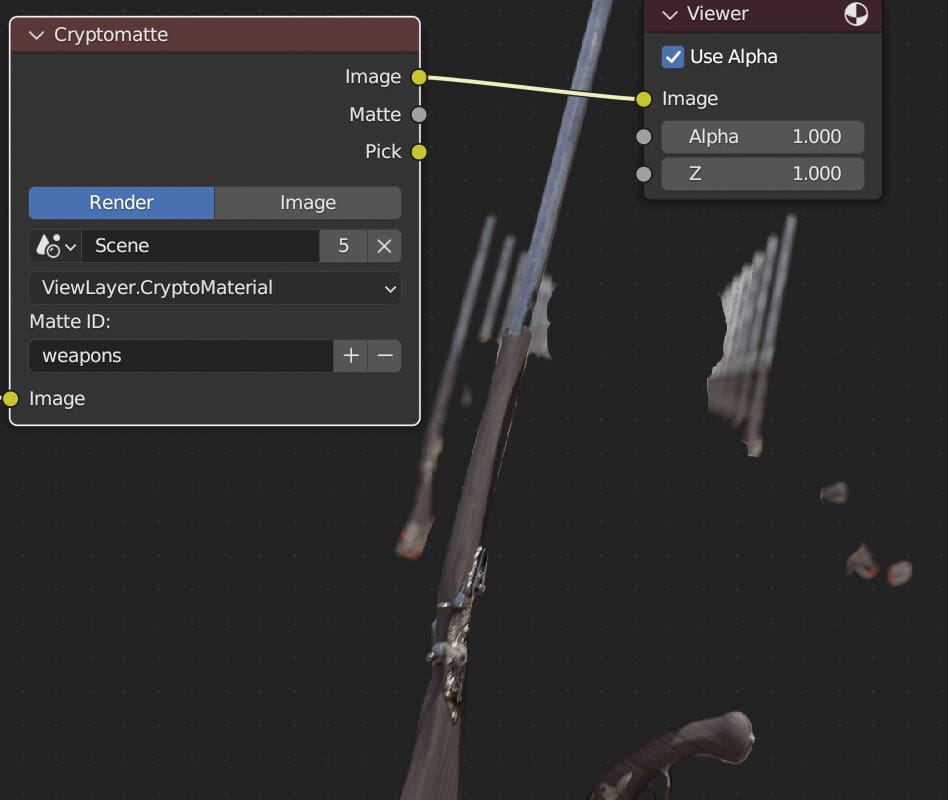
When we preview the image output of the Cryptomatte, we see all the weapons are now isolated, since they share the same material. The Matte output will produce a black-and-white image that we can use as a sort of layer mask to limit adjustments to the weapons. The white shapes determine what parts of a starting layer will reveal a new layer on top.

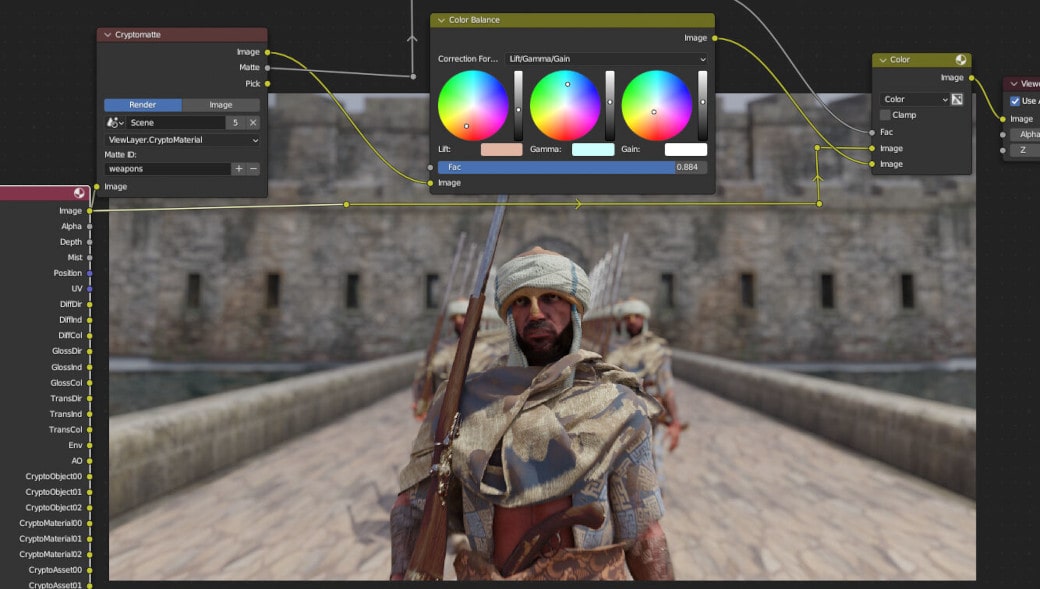
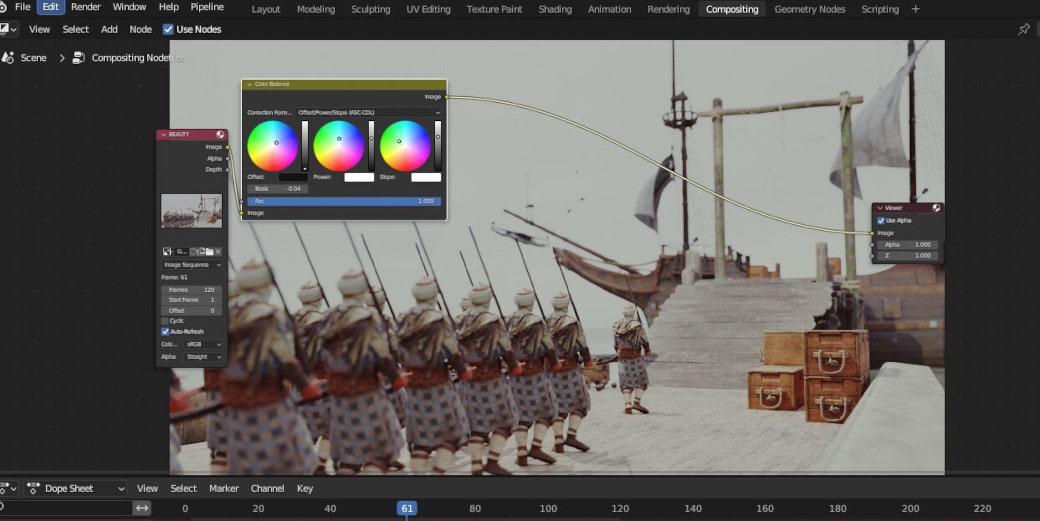
In the screen capture above, we can see that the weapons have been adjusted. Here’s a breakdown of what’s going on:
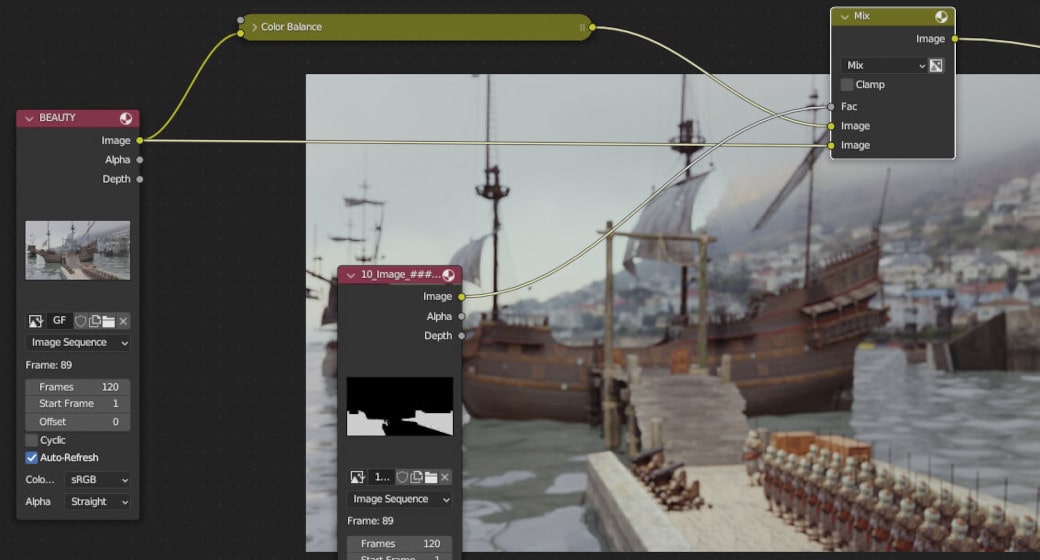
1. The Cryptomatte’s Image output runs through a Color Balance node where some grading is applied to the whole image.
2. It then connects to the second image input of a Color node that has the original render on its first image input.
3. The Matte output of the Cryptomatte node is connected to the Color node’s factor input, and tells the Color node to limit the visibility of the second image input to the weapons. If we were to make any additions to the node chain that connects to the second image input of the Color node, only the weapons will be adjusted. Any changes made to the chain leading to the first image input will affect everything else.
Preparing for the renderfarm
After dipping our feet a little, we now have an understanding of Cryptomattes and how they might serve us. So far, we can make any amount of adjustments to our shots, and we can have Blender render each frame with our changes applied.
However, it would be wiser to render our passes and Cryptomattes alongside our raw output so that we can make changes in post production and avoid having to spend on re-rendering sequences. For professional work, it might make sense to render mattes for all elements in a scene, but for the purposes of this demonstration, we’ll stick to a select few.
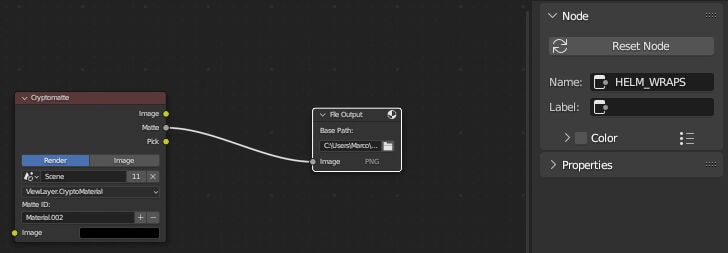
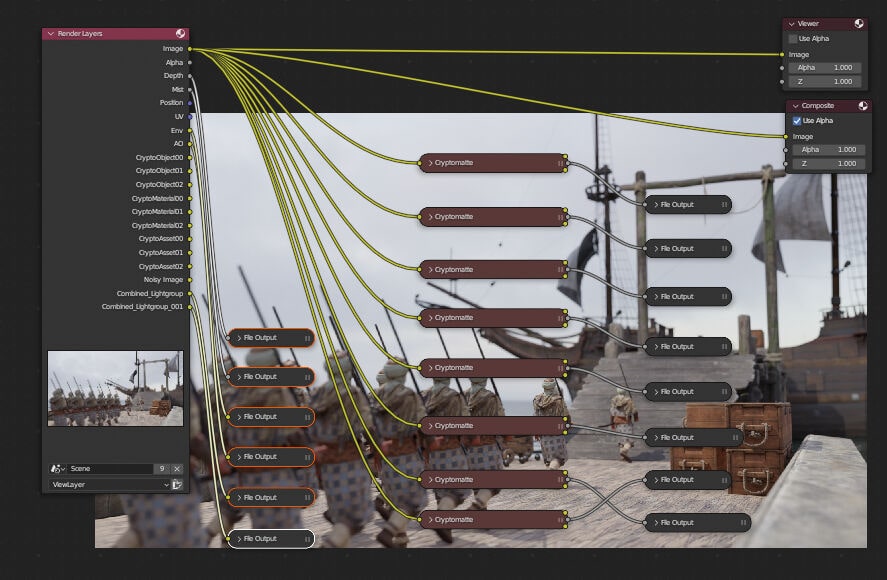
To tell Blender to save out our mattes and passes, we’ll need to assign a File output node for each additional output to save besides the raw render.


GarageFarm will use the names we’ve given our file output nodes to organize our frames when they’ve rendered.
In the image below, each pass and matte is connected to a File Output Node while the main render is connected to the Composite node. We now have our choice of passes and Cryptomattes ready to go!
Rendering at GarageFarm.NET
This section is a brief overview of the rendering process on our render farm. If you already use our service you can skip to the next section. Otherwise, should you have any questions after reading this section, feel free to contact our wranglers via our 24/7 Live Chat!
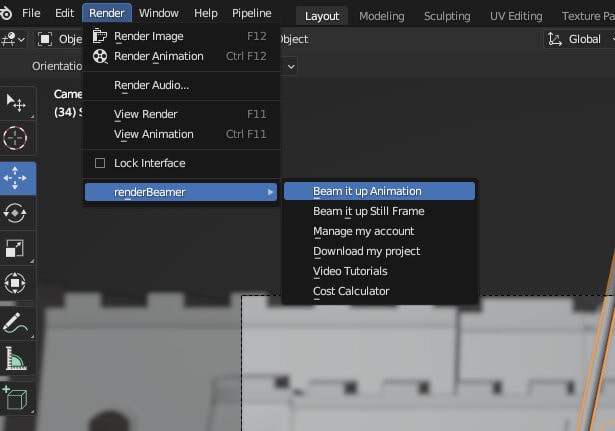
With everything ready all that’s left is to send our project over to GarageFarm.NET using the renderBeamer plugin, which, when installed and running, can be accessed directly in Blender.
When we select “Beam it up Animation”, renderBeamer will note the frame range we indicated in our settings, and collate all our linked assets, textures and other dependencies for us.

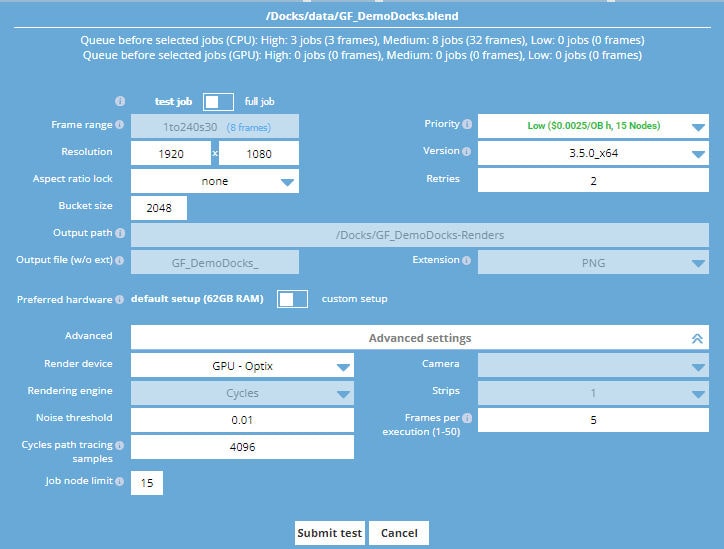
Our upload has been completed and we’ve been directed to the Web Manager Interface where we can adjust our settings before sending a job. We’ve been switched to “test job” mode by default so we can render a few frames to make sure everything is correct and get an estimate for the cost of the full render.
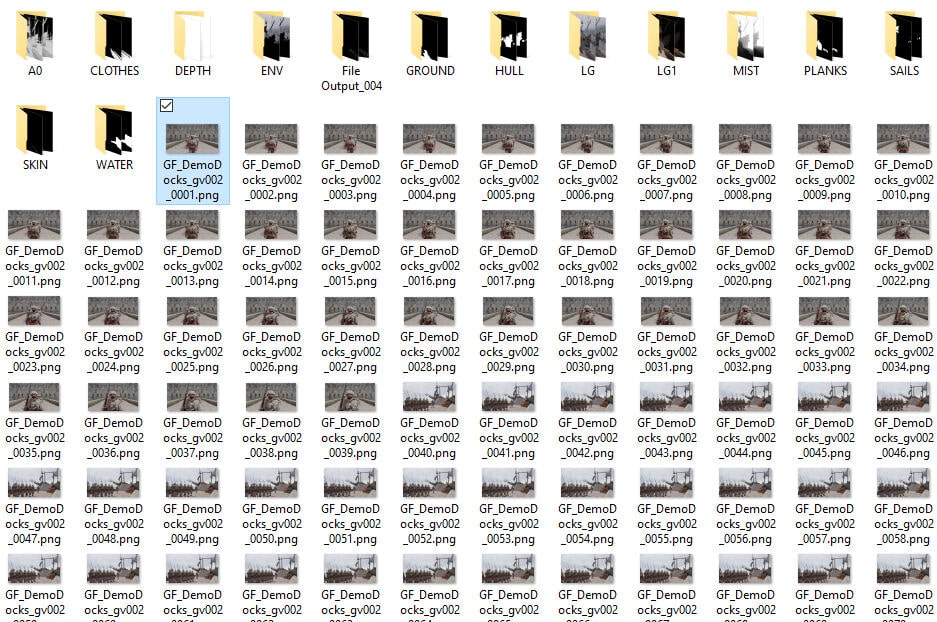
After checking our initial test frames, doing the last adjustments and re-uploading and rendering our whole animation, we can download our frames by right-clicking on our finished job in the Web Manager dashboard.


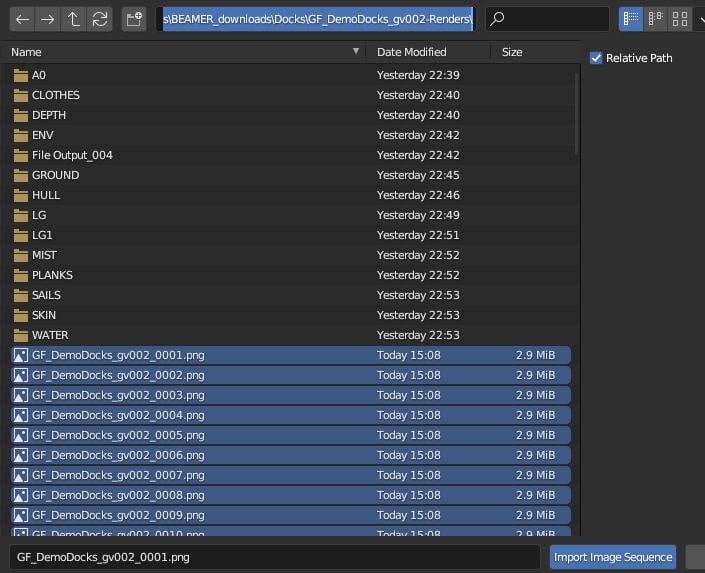
The frames in the Beamer Downloads folder located in the path specified during the installation of the renderBeamer app. Each File Output node is given its own folder and is named according to the label assigned.
Compositing the full animation
In a fresh Blender project, we can head over to the Compositor and add an image sequence input. As soon as we add the node, we can navigate to any image sequence and select the entire sequence to bring it into Blender. At this stage, every pass or matte we work with will be imported as an image sequence.

We can view our files as a list and sort by Name to make sure our sequence is imported in the correct order.
We now have our entire sequence loaded into our Compositor, and can gradually bring in mattes and passes as we post-process our work.
Let’s start by adding a subtle grade to introduce a little warmth into the scene.

Better! But now that we can quickly preview our changes on every shot, let’s scrub through our frames and see how they look.
In the latter frames it becomes evident that the water isn’t benefiting from our changes.
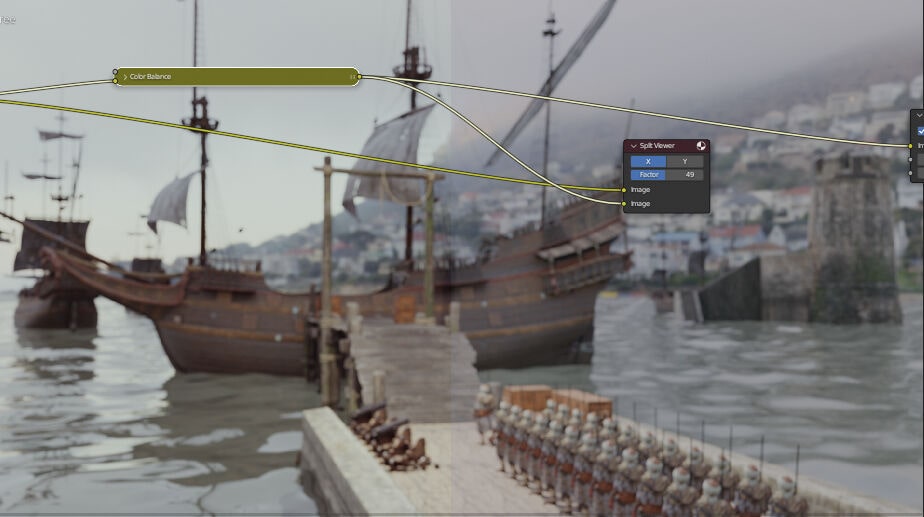
So we can bring in our Water Matte to help us remove it from the grade.
This time, instead of using the Cryptomatte node, we take the image output from our matte sequence and use it to drive the factor of a mix node. Thanks to the matte, we now have the warmer tones from our initial grade and the original water that we can adjust separately.
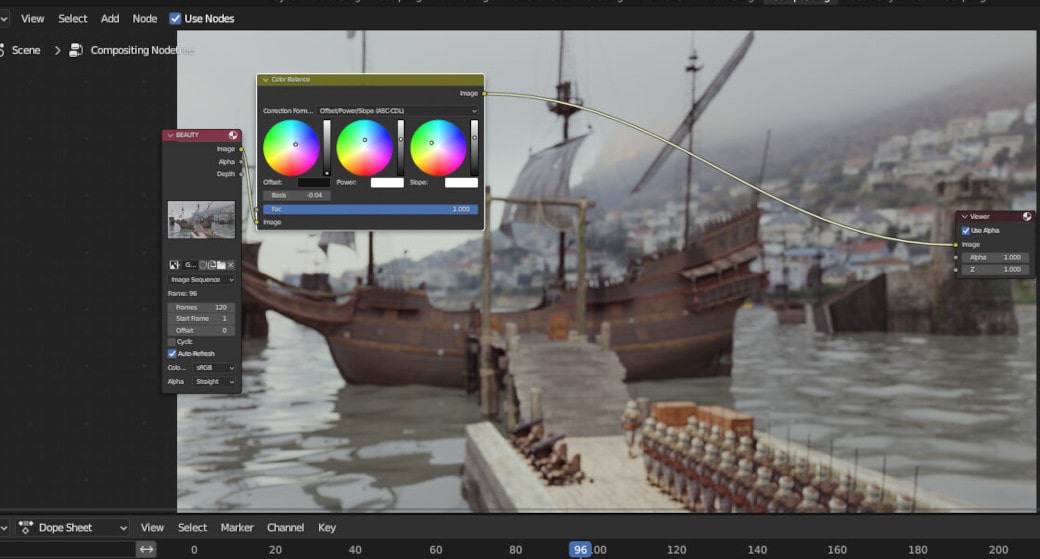
Let’s say for now the idea is to fine-tune the complementary colors in the scene and use value to lead the eye across each frame. We can use our mattes for the soldiers’ uniforms, the ship’s hull and the sails to do just that.
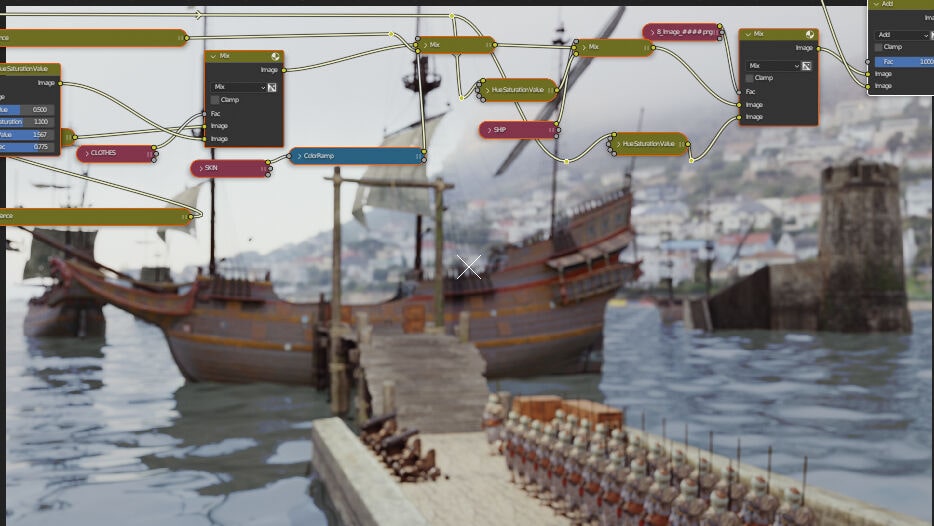
By replicating the method for driving mix nodes with mattes, we’ve created a node chain that has its own adjustments for key elements in our scene.
And with a few last additions, we’re ready to export our frames into a video!
Final Result:
Raw Render:
Final thoughts
The greatest advantage of Cryptomattes is how they allow us to perform post-processing operations on our work that would otherwise have required making adjustments directly in our scene. Cryptomattes become an even more valuable tool when working with animations and using a render farm since they negate many compositing workflows for creating masks and tracking them on moving elements, and save us money that would have been spent on re-renders.
Since mattes are essentially black-and-white transparency masks, we can also manipulate those masks to create interesting effects, and animating adjustment node or filter values in the compositor will lead to even more opportunities for enhancing our final output.
Register Now and Get $50 FREE Credits!


.avif)


