Introduction
The industry has been moving forward with each passing year. Advancements in technology consistently change our workflows and lead to new techniques being adapted for production.
For years, texturing in 3D was dependent on specific lighting conditions and was very limited in terms of deployability to different lighting environments. Thus, when Disney pioneered the PBR workflow, it changed the way we approached texturing, and the workflow became more consistent across all rendering platforms, including when working with render farms for complex projects.
Color space has been a very tricky subject for production to tackle. Luckily for us, there is now a unified way of handling color space as well, and having a good understanding of this subject can not only improve our workflow but also future-proof our work, making it easier to integrate our work into bigger productions. Let’s talk about color space.
What is Color Space?
ACES (Academy Color Encoding System) is a powerful color grading tool used in the film industry. It provides a standardized color management system that ensures accurate and consistent color reproduction across various devices and workflows. By implementing ACES, filmmakers and colorists can achieve better control over the look and feel of their projects while preserving the integrity of colors from production to final output.
Basically, Color Space refers to the system that translates colors into numbers. Whether you’re looking at colors in a game, movie, or print, those colors are being represented to you through color space.
The thing is, not all color spaces are the same. Depending on the medium that you’ll be viewing it, the color space will vary. That’s because of something called the color gamut. Color Gamut is the full range of colors that any given device can reproduce. Depending on the device that you’re viewing the image, the colors can look different.
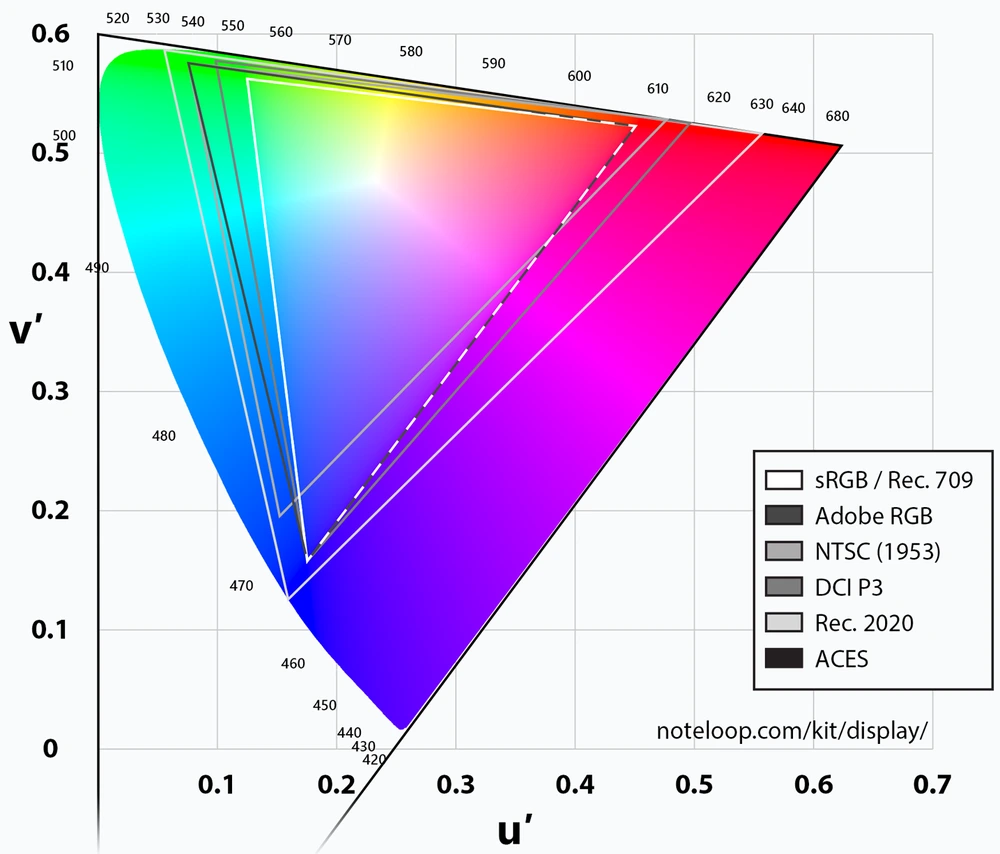
This is called a chromaticity diagram. It provides a visual understanding of color properties. In the image, you can see the color gamut for each color space. Most monitors and devices use the sRGB color space. The problem with this is that the sRGB color space was developed back when CRT monitors were still being used. While it’s the most common color space we encounter in everyday life, it’s not the best color space to use for modern production pipelines in film, VFX, and games.
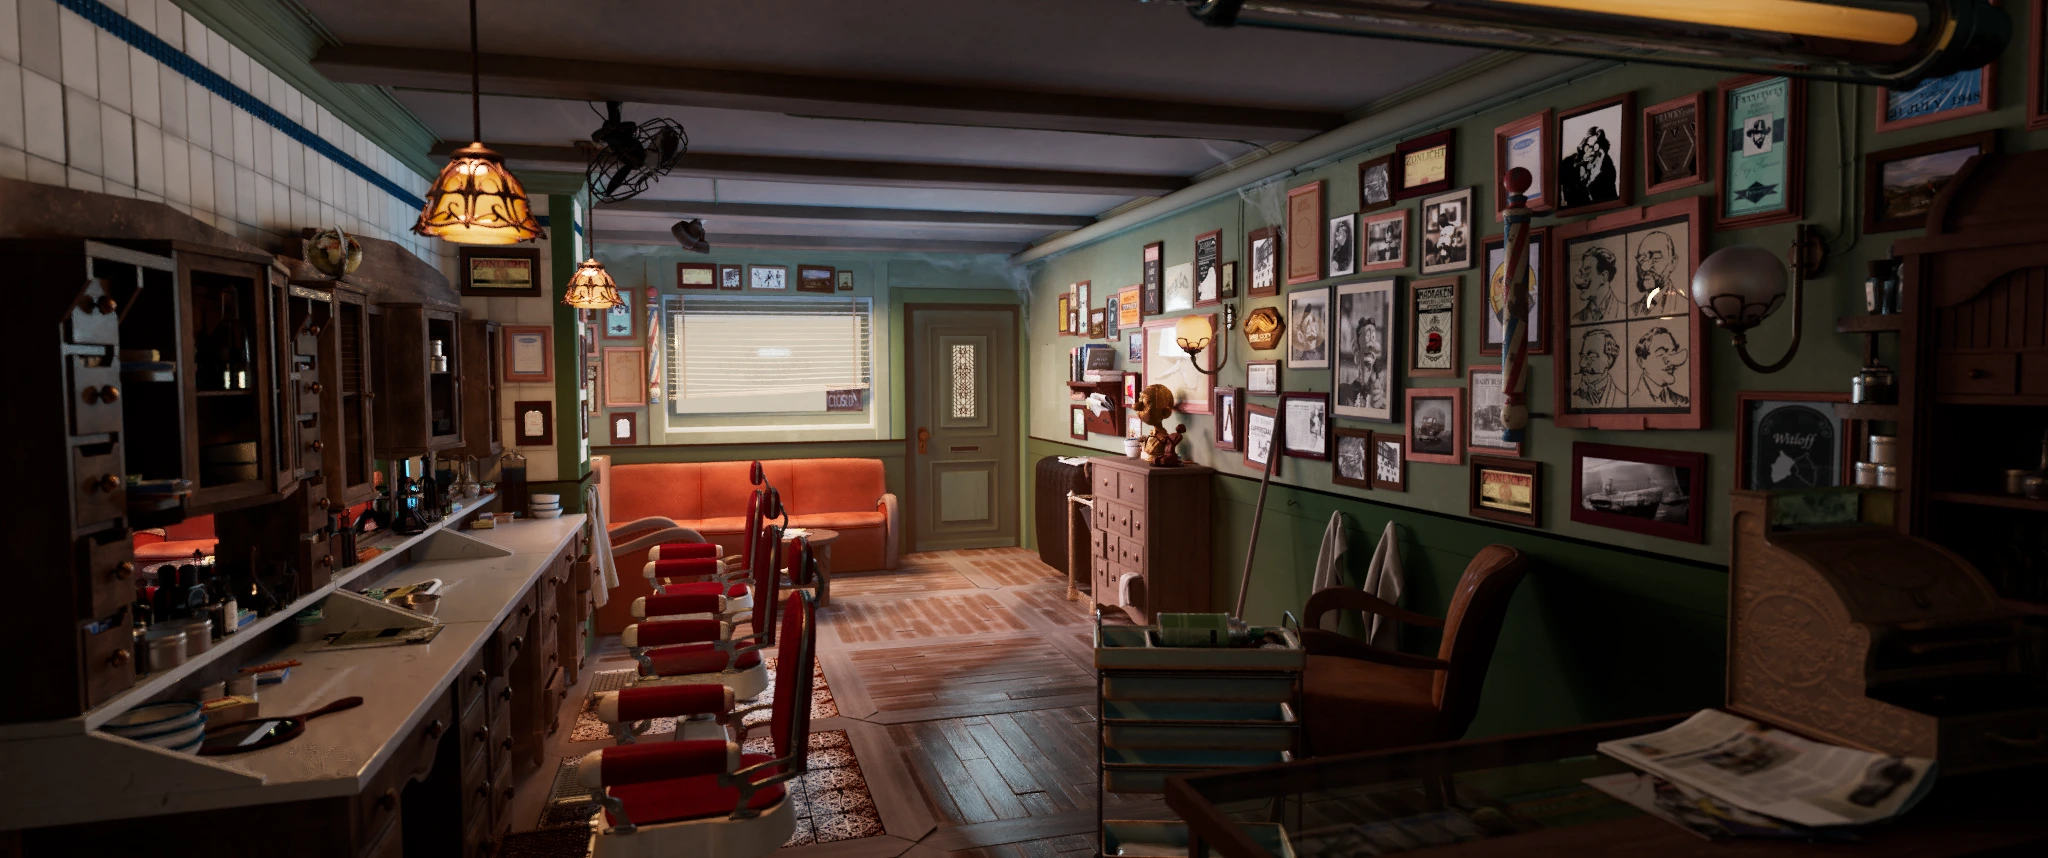
One example would be viewing your render on a monitor compared to viewing it on film. If you look at the image above, you’ll notice that the colors for the film render look washed out. Because film has a much wider color gamut, colors that you chose for your render won’t look the same because you worked on a monitor with a smaller color gamut.
As you can imagine, this presents a few problems in production.
Color Grading in Production
In production, there’s usually a lot of different input sources ranging from cameras to different VFX studios working on CGI. The problem with this is that each camera works under their own unique patented color space (IMAX, RED, etc.), not to mention the fact that digital assets are also being produced to match up with the footage that was already shot. Because of this, a lot of time is spent on making sure all of the different input sources match up first before any proper color grading work can be done. This is the problem that ACES aims to solve.
What is ACES?
In short, ACES (Academy Color Encoding System) is a free, open, device-independent color management system that standardizes color space between different input sources. Using ACES results in more photorealistic renders due to its wider dynamic range and ultra-wide color gamut. Additionally, it provides a wider array of colors to choose from, making it a more future-proof option within production pipelines.
For digital artists, the biggest reason to use ACES is that renders look and feel more “photorealistic”. That’s because of the wider dynamic range.
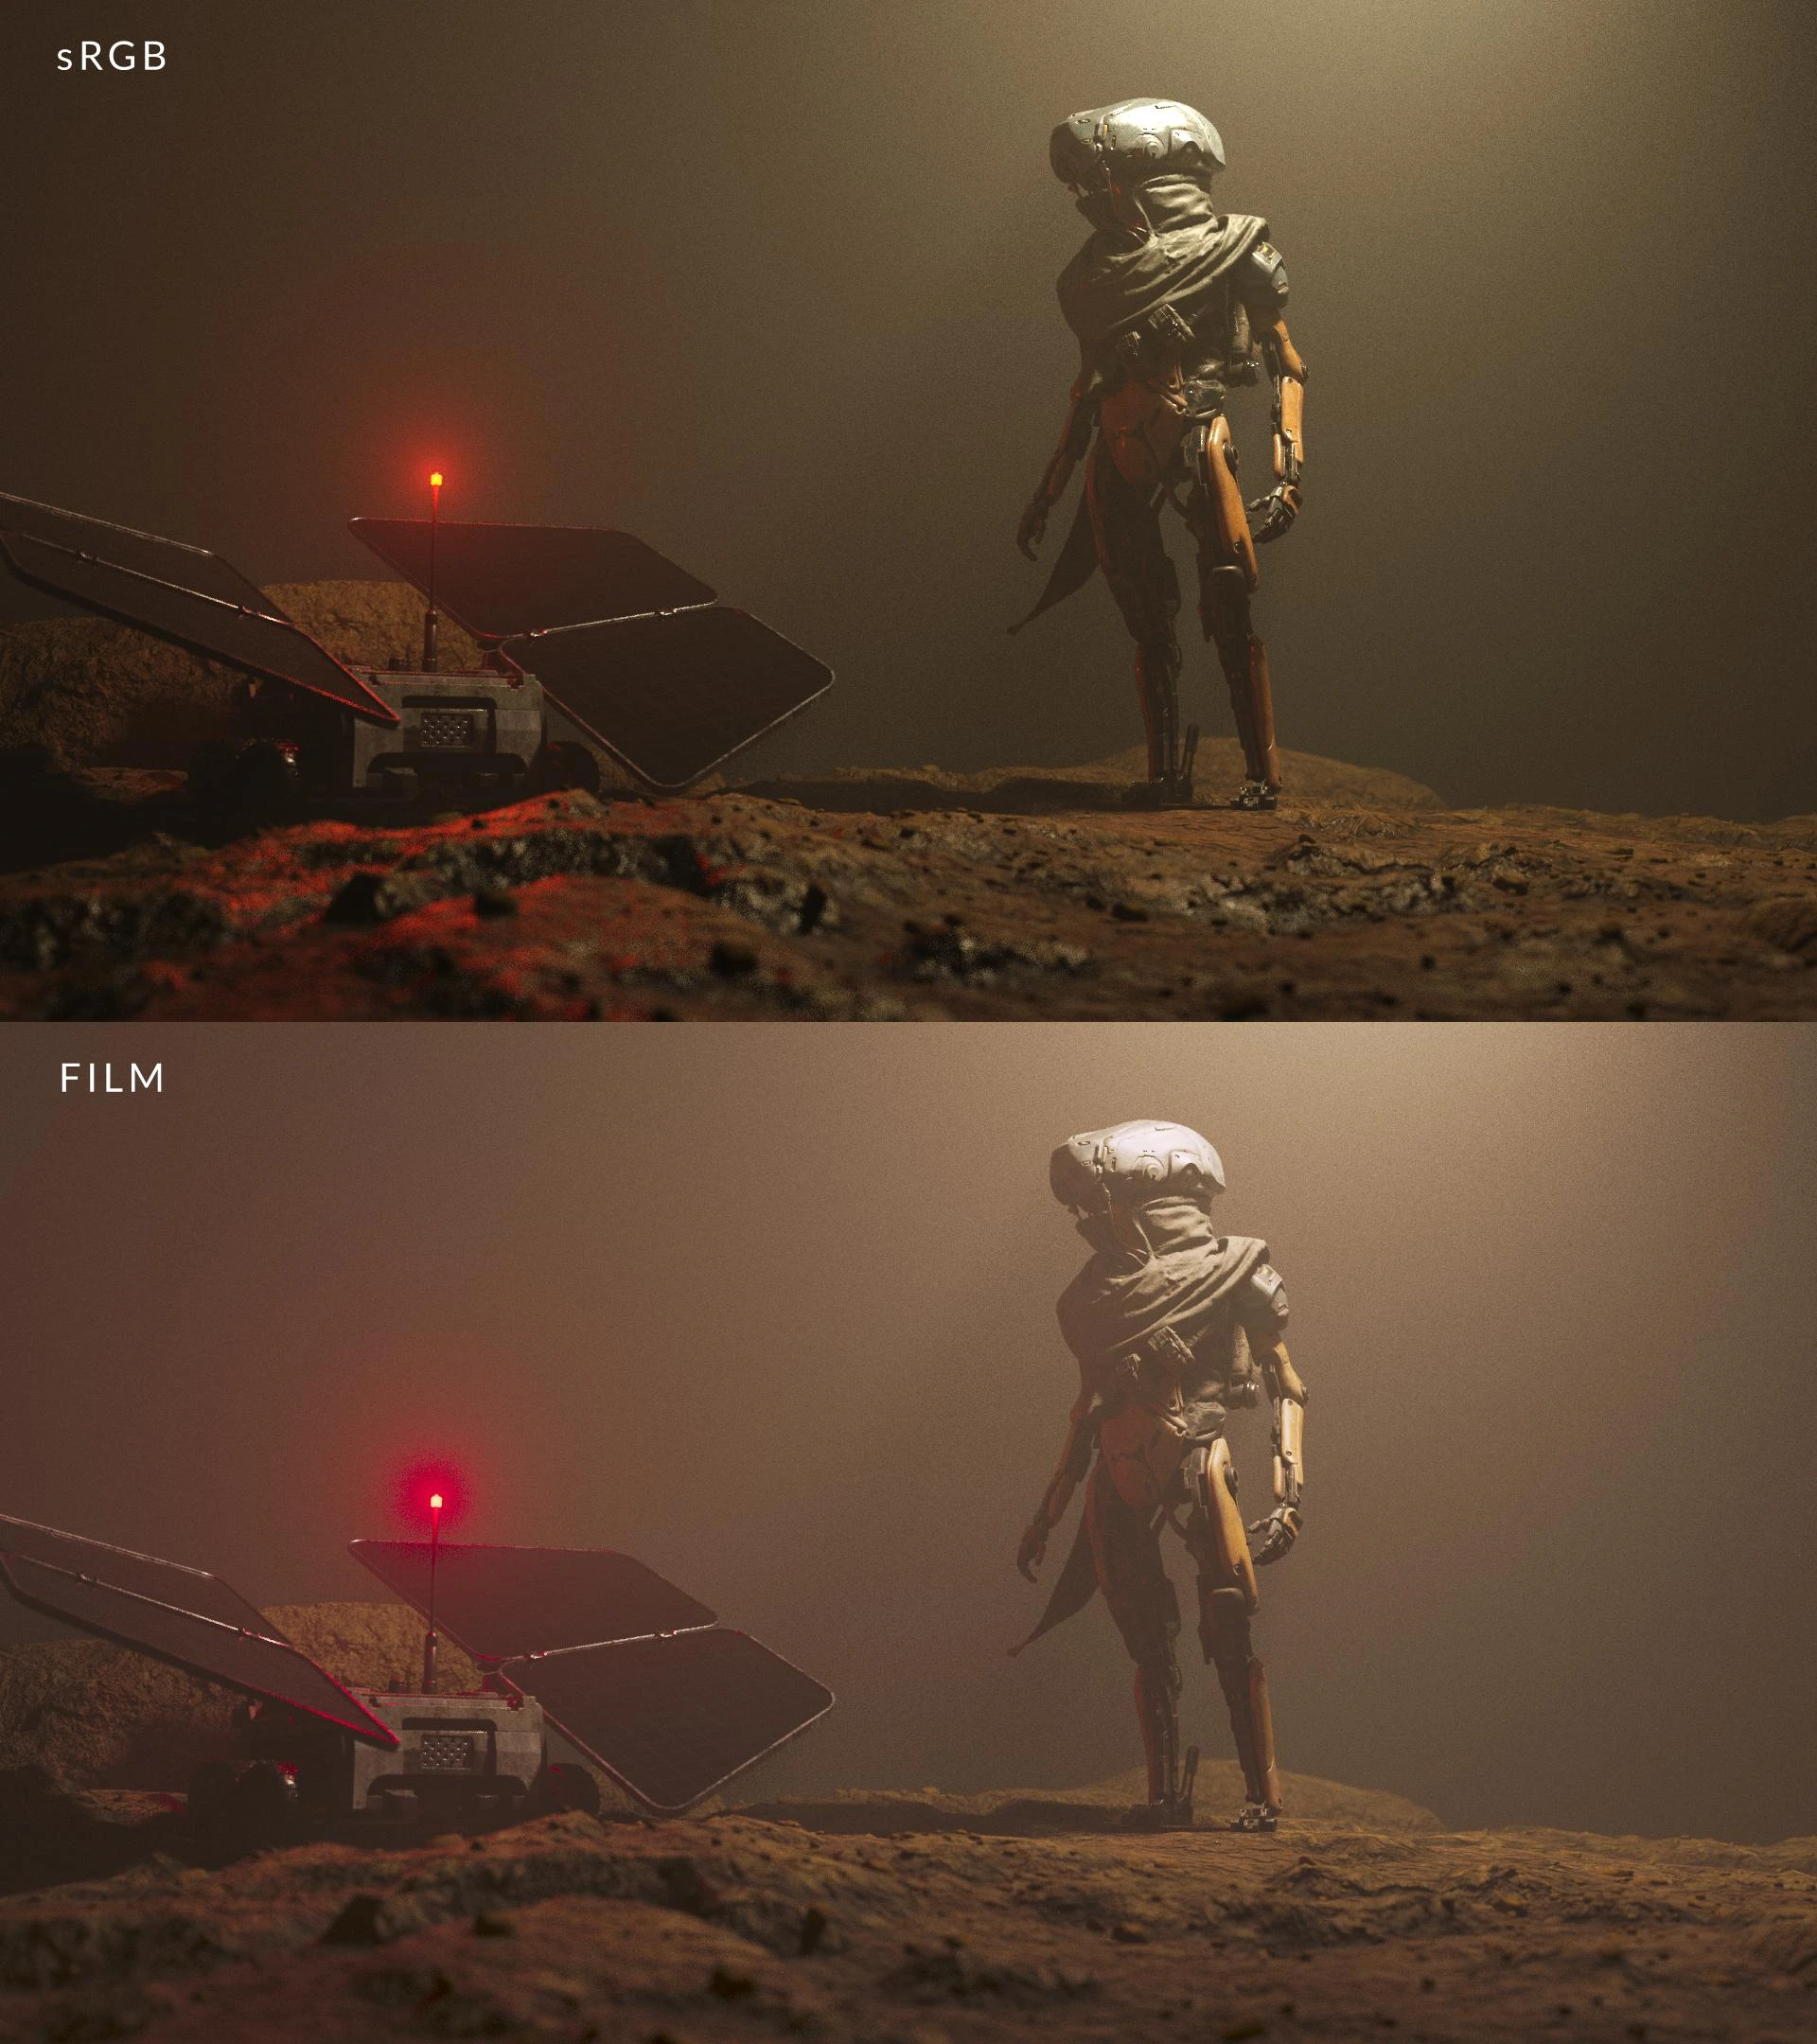
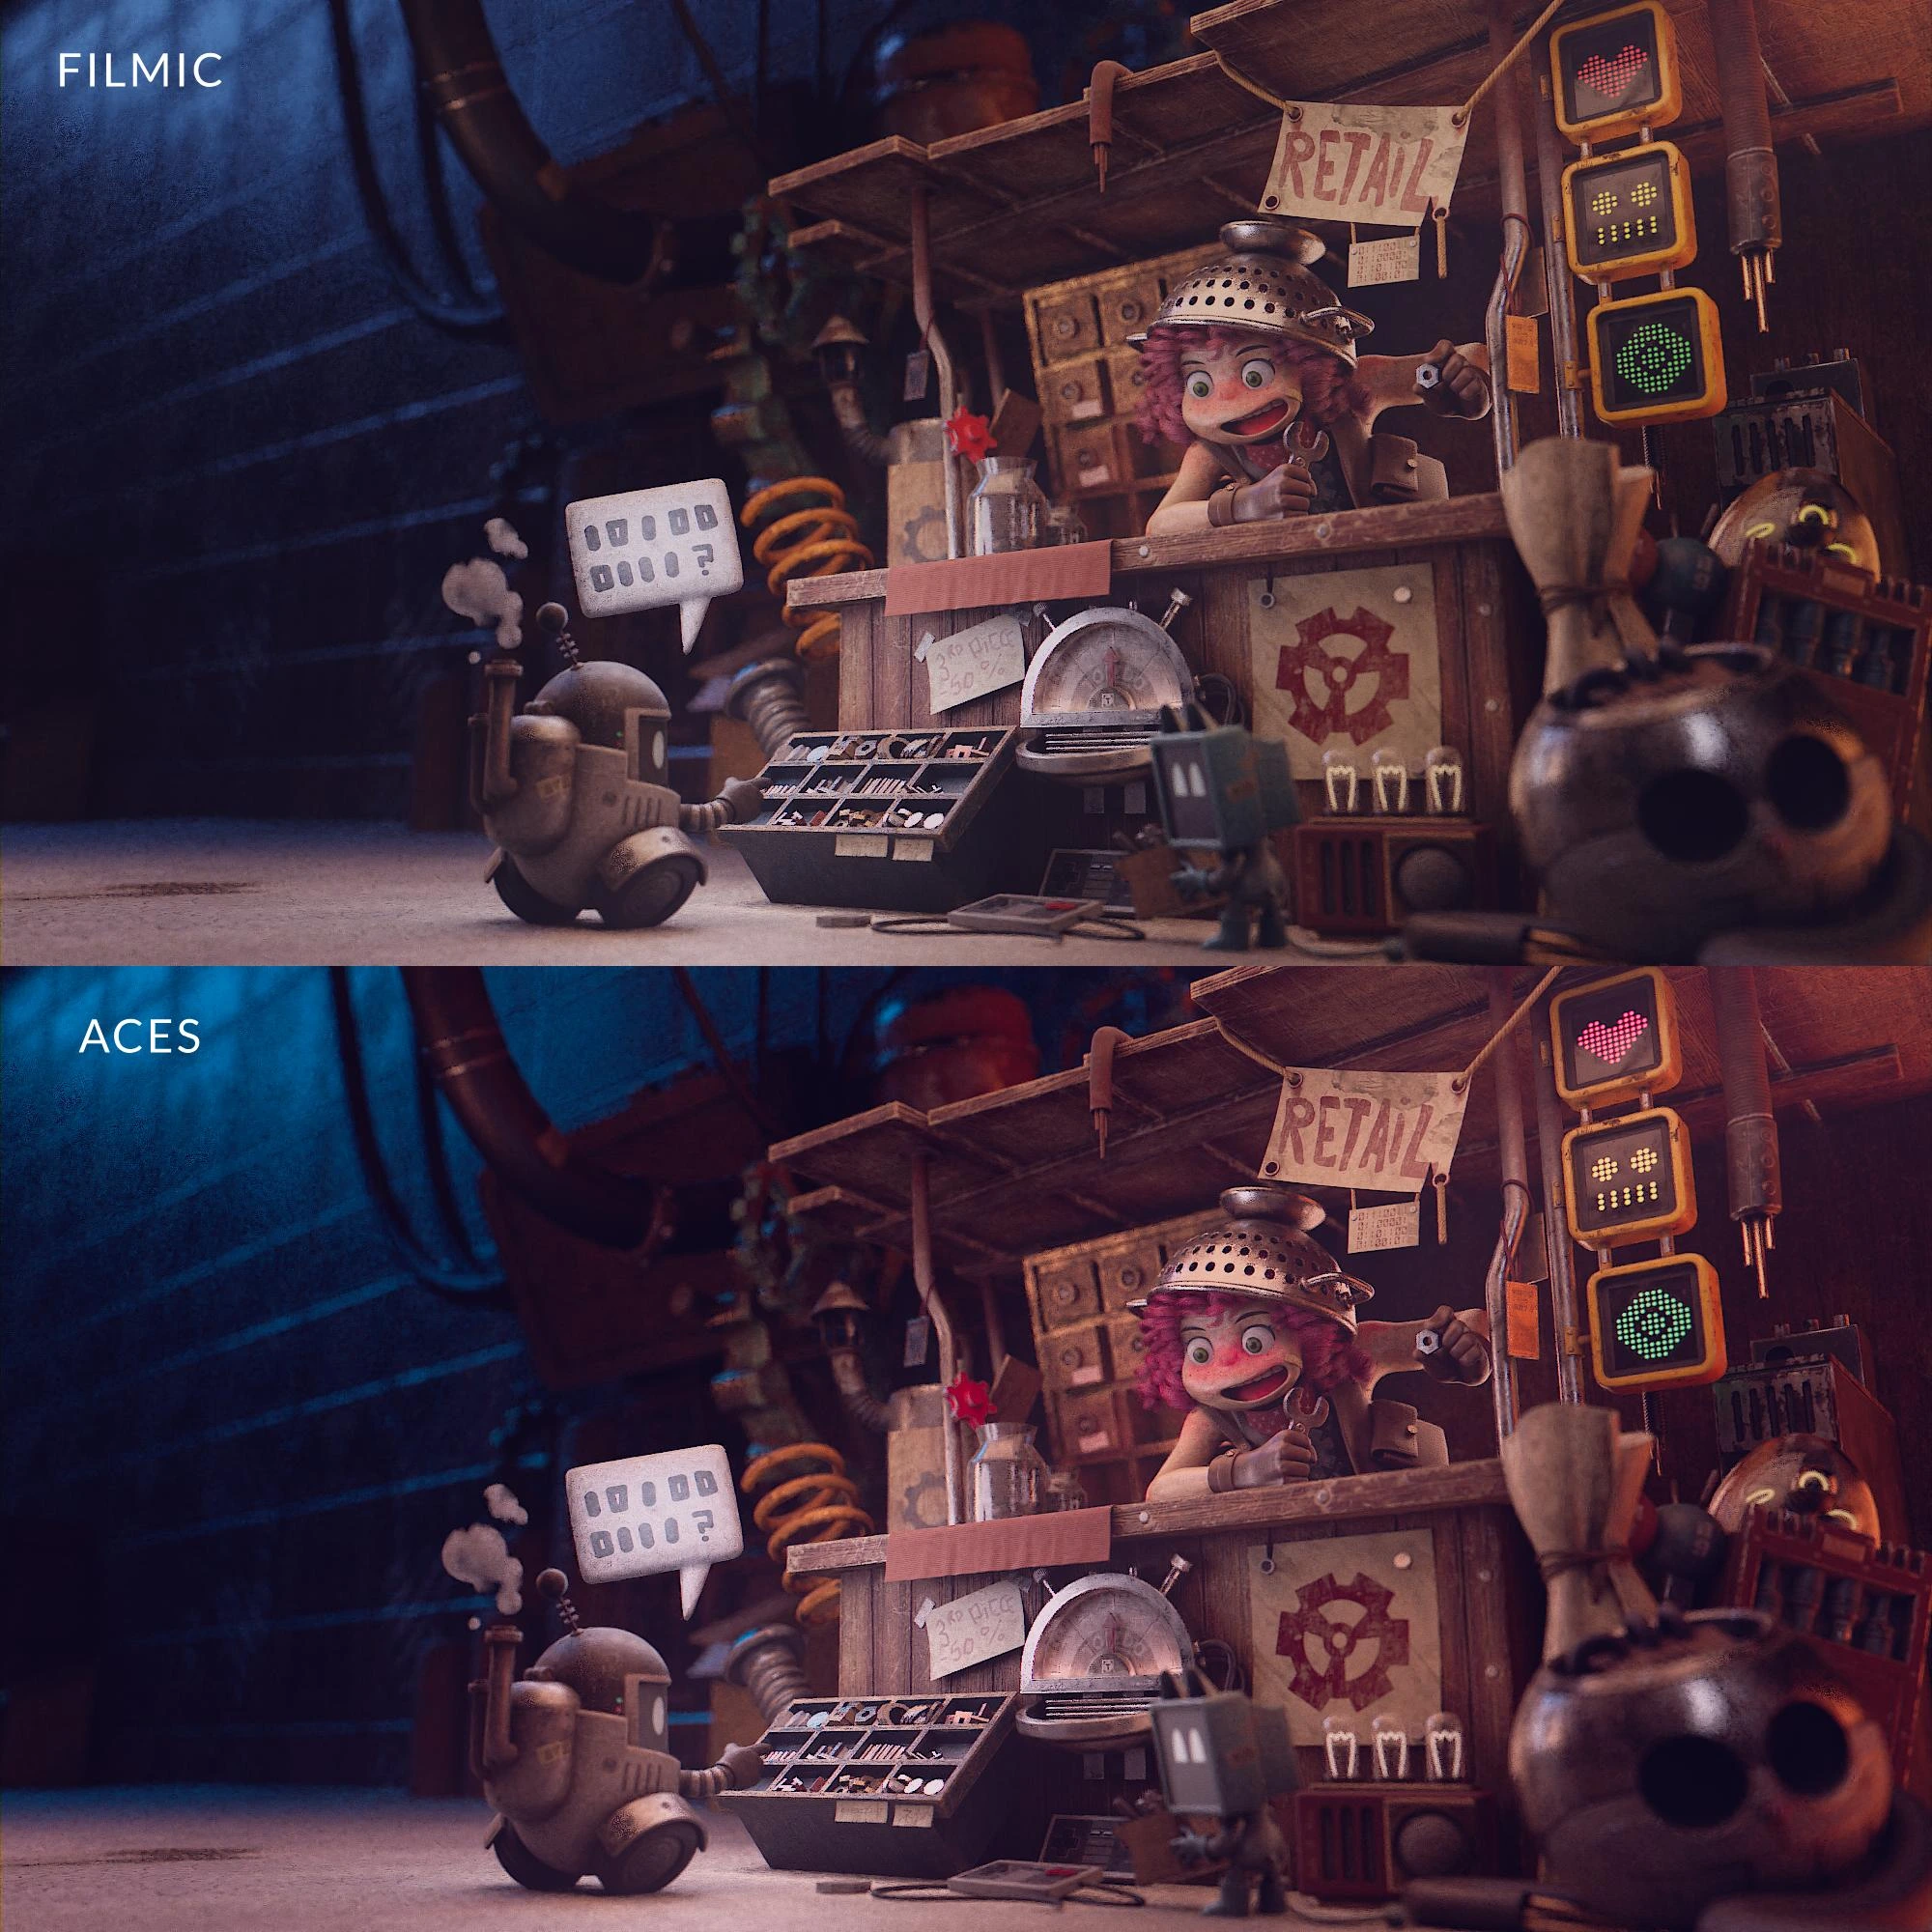
If you look at the image above, the colors for the sRGB render look more muted and you can see the highlights clipping.
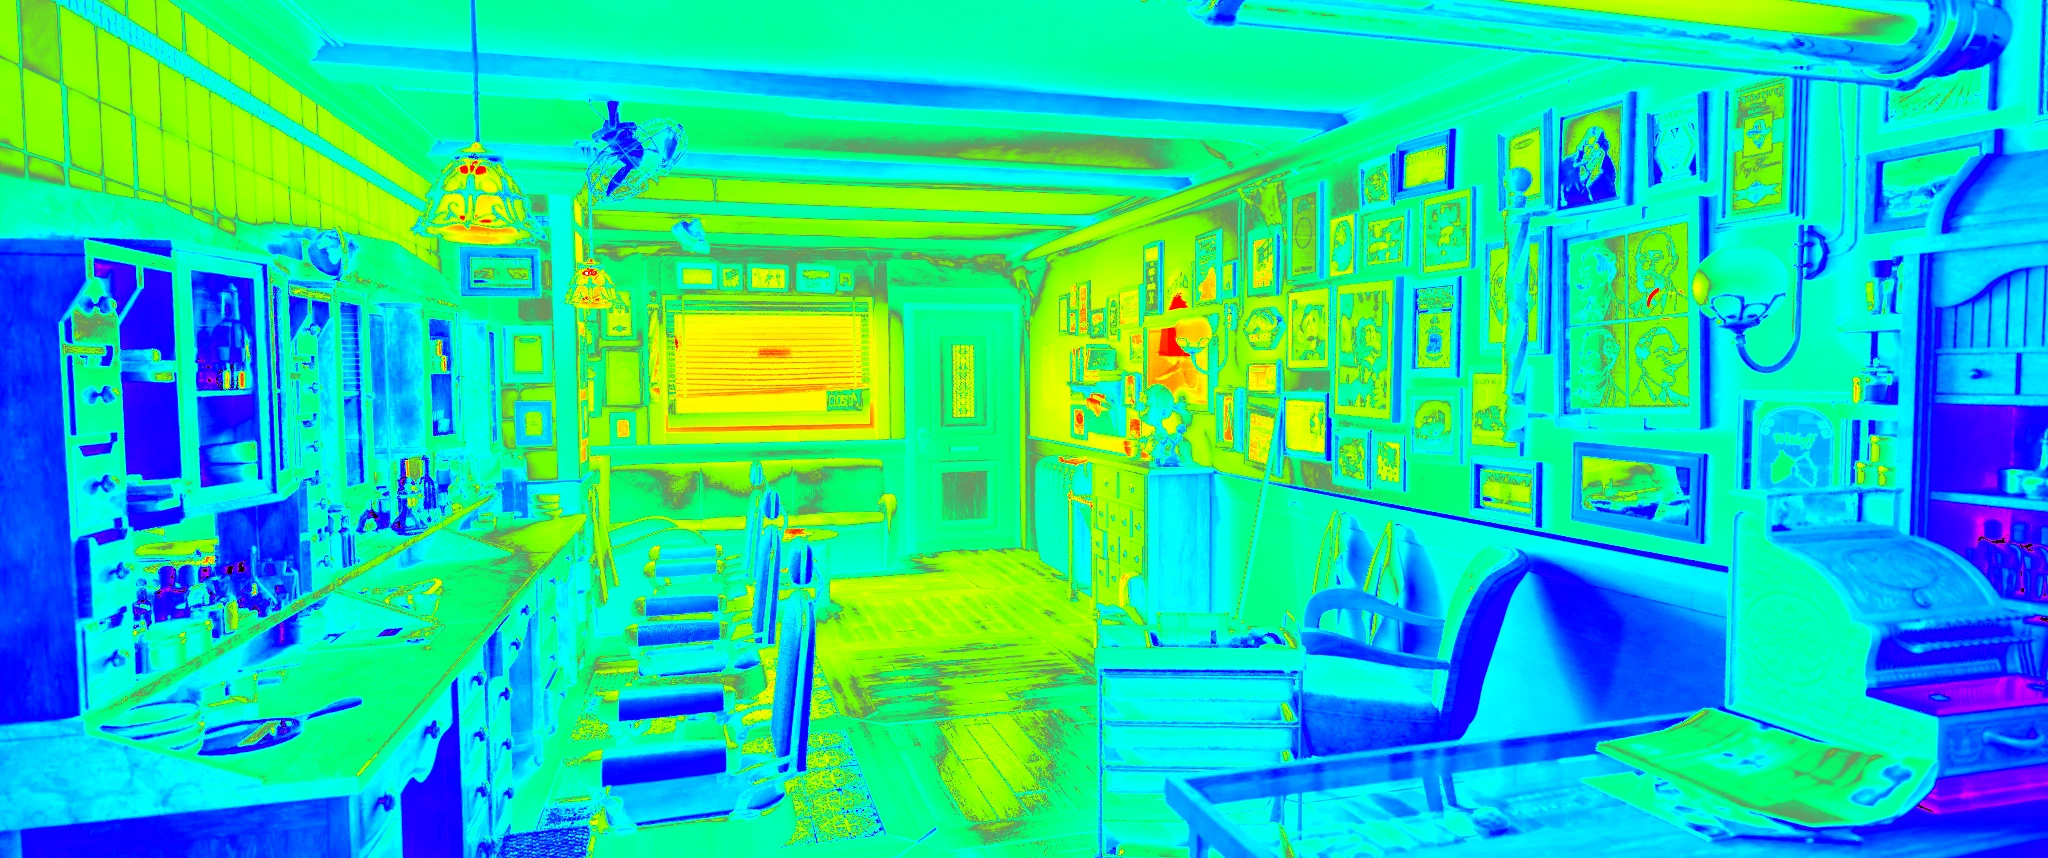
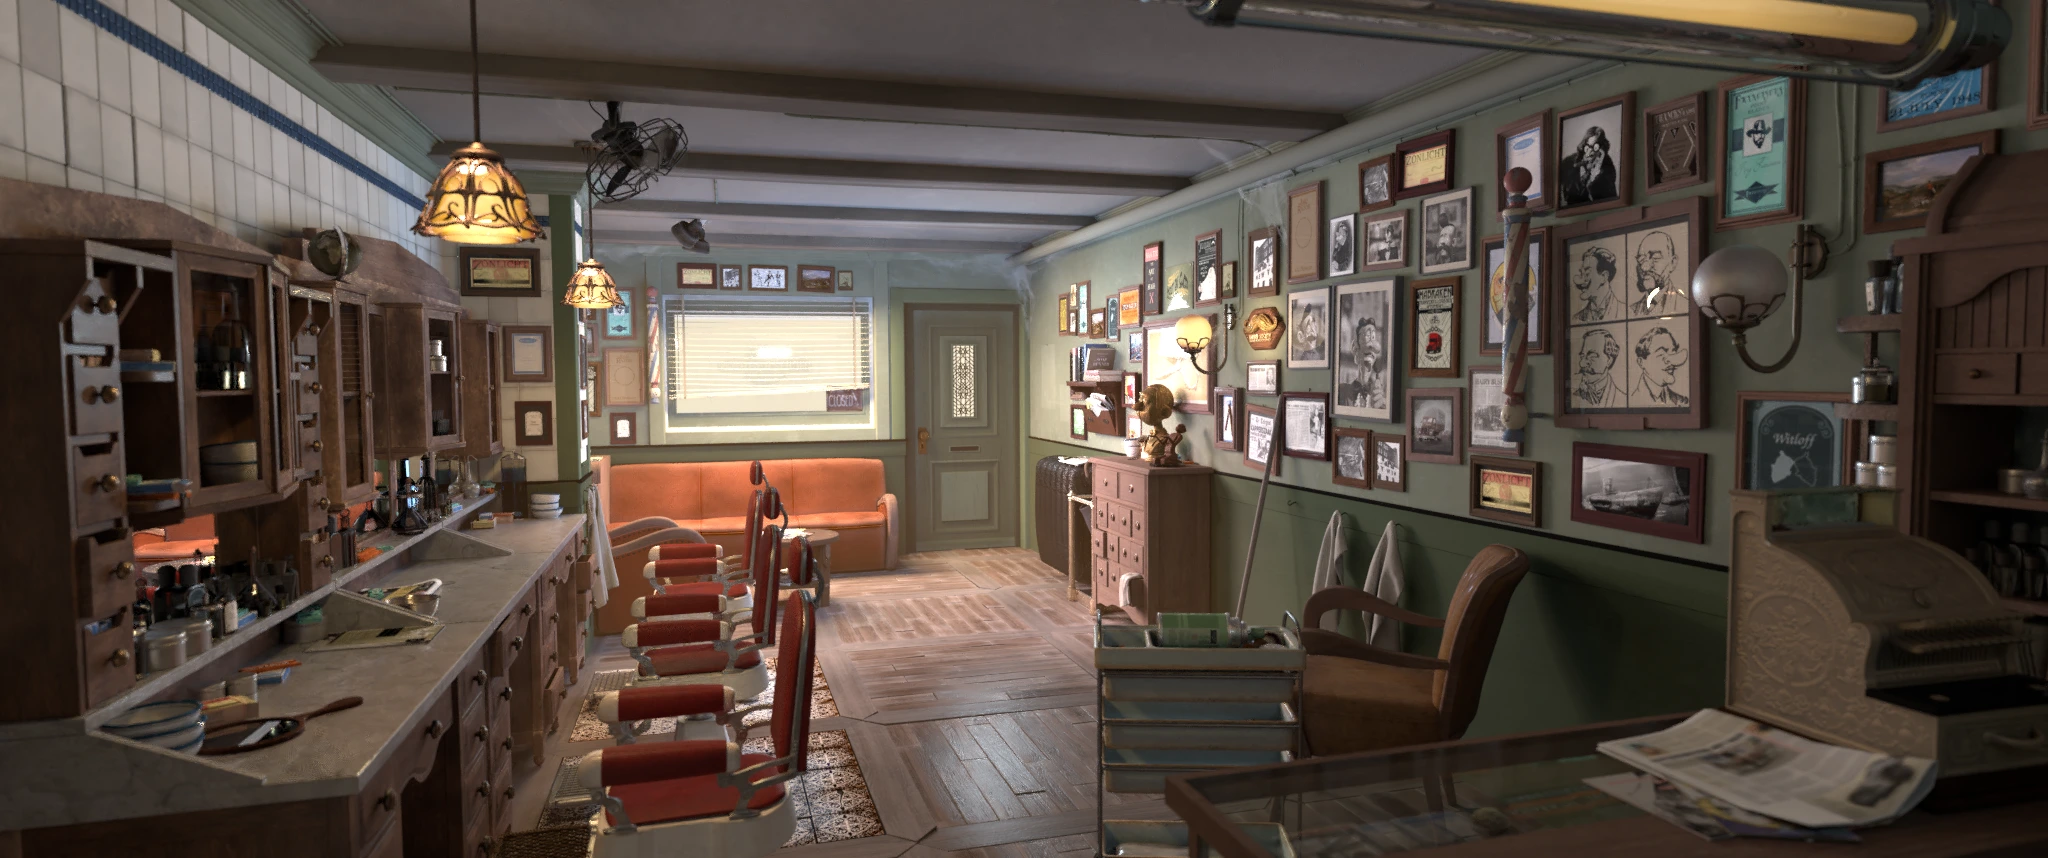
You can see it more clearly in this render using Blender’s “False Look” view to see the overall exposure of the image. Notice how in the areas that are in red, those are the areas where the light is over-exposed and because of that, there’s lost detail. That’s because of the poor dynamic range that comes with the sRGB color space.
Compare that to the ACES render and you’ll notice how the highlights retain their detail and that the colors have become more vibrant. Because of the much wider color space that ACES provides, we can take advantage of that to achieve a more photorealistic result.
Another reason to use ACES is that thanks to its much bigger color space, we have a wider array of colors to choose from. In the image below, you can see how much more the colors “pop out” in the render. This gives the artist more freedom to pick and choose what type of colors will best suit the image.
Not only does it give our renders a better result with our lighting and colors, but it also makes our work future-proof within production pipelines when the time comes to repurpose our work for redistribution on future devices with bigger color gamuts.
The ACES Workflow
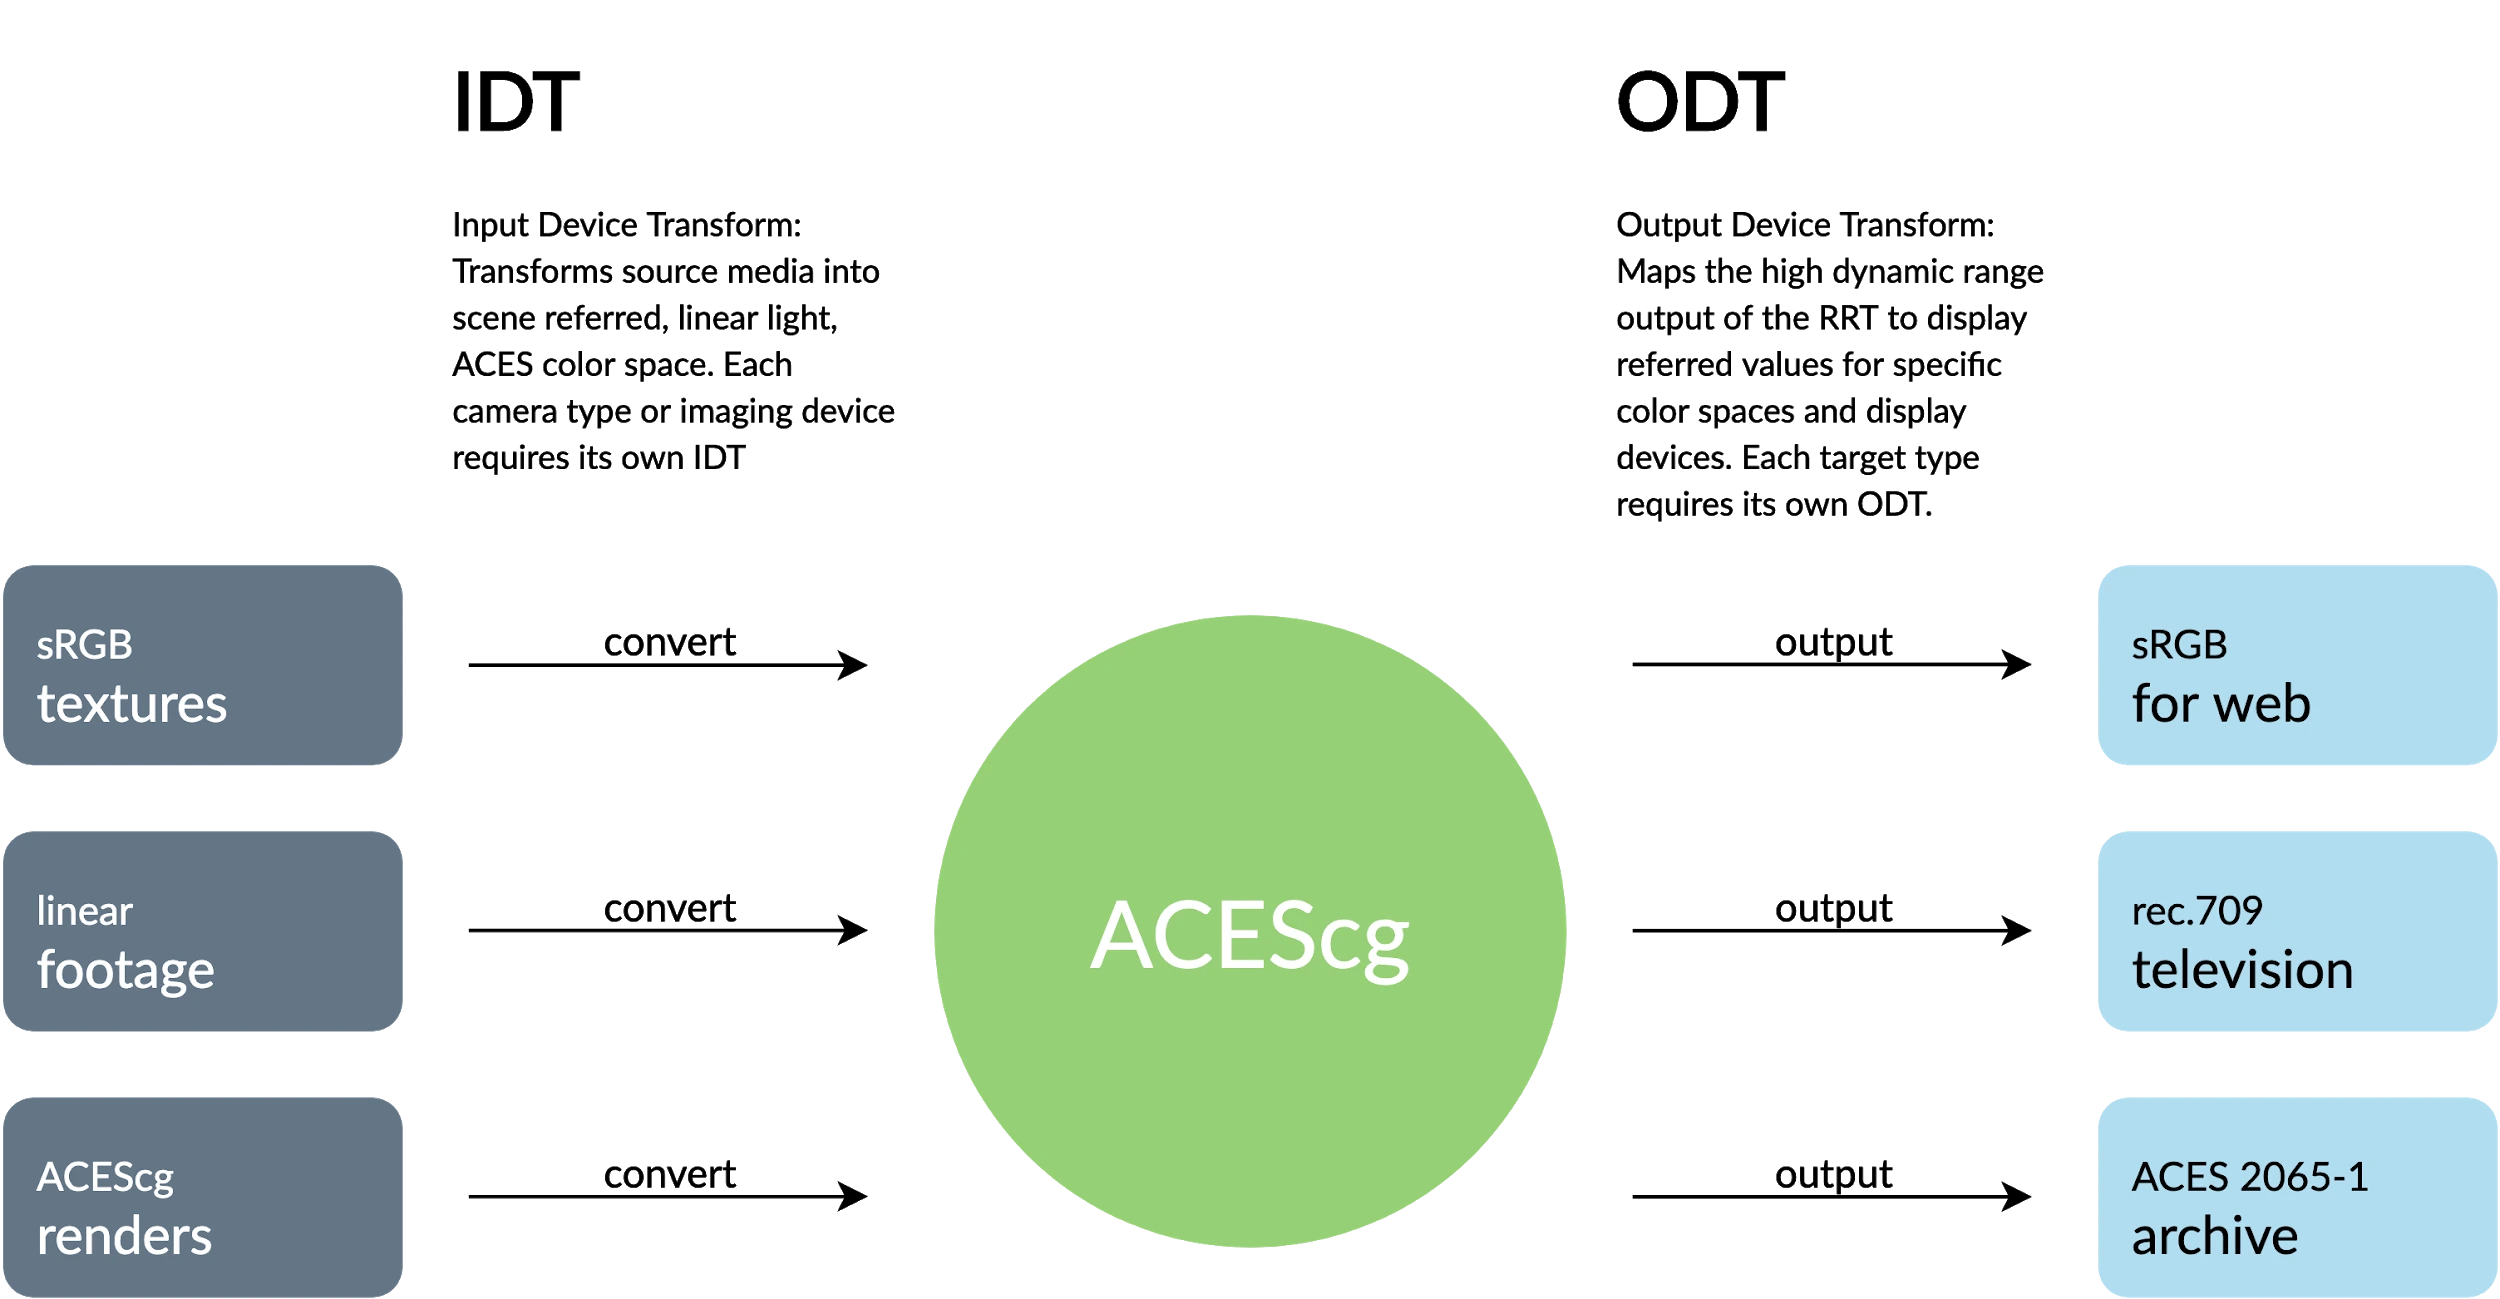
In order to use ACES, you must first input your source media into an IDT (Input Device Transform) and convert the data to ACES color space. ACES color grading is then applied to the footage/render and then exported to the specific display device for viewing.
Using ACES in your software
When importing textures for texturing 3D objects, it’s important to note that you have to be aware of what kind of image format your textures will come in so that you can convert them properly for ACES.
For conversion, the color spaces to remember are:
- Utility - sRGB - Texture for 8-16 bit sRGB image textures (usually applies to the Albedo/Diffuse/Base Color map)
- Utility - Raw for textures that don’t require any conversion (roughness, normal, metallic, displacement, etc.)
- Utility - Rec.709 - Camera for sRGB images, 8-16 bit (lightmaps, matte paints, etc.)
- ACEScg for images that have already been converted to ACEScg

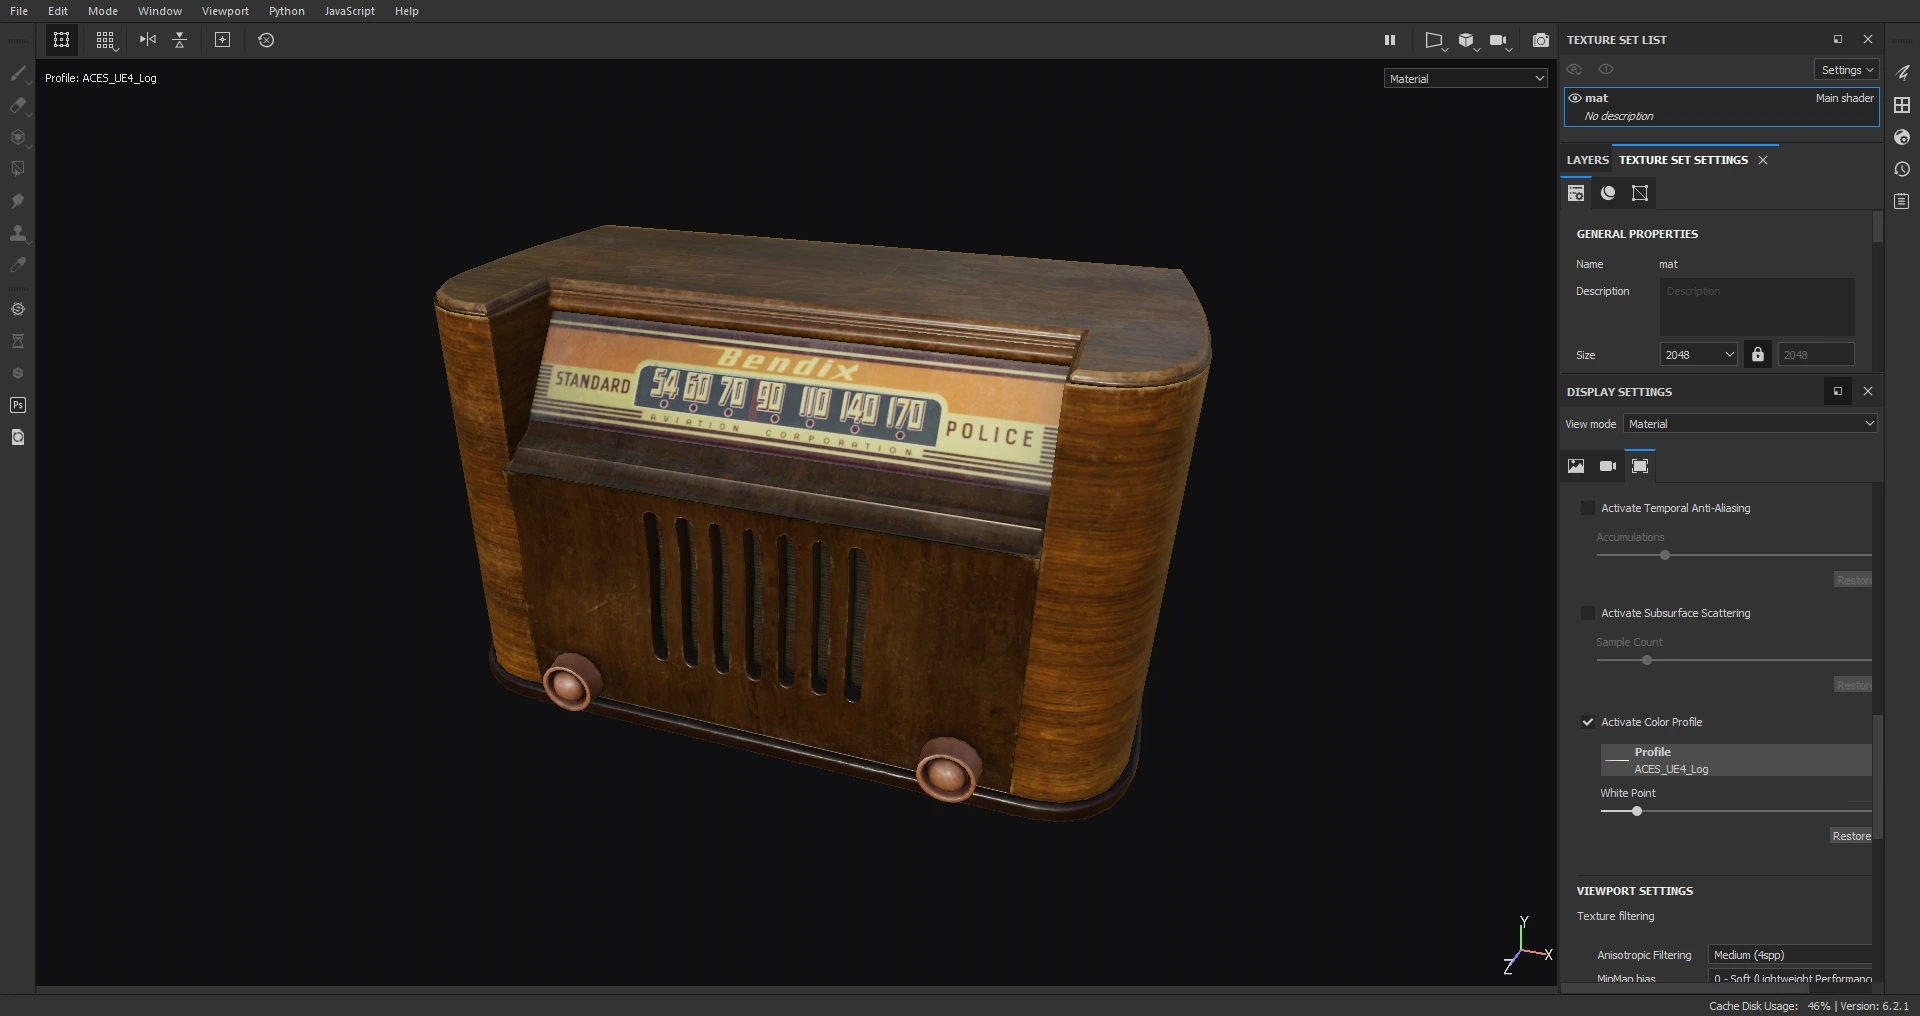
In the image above, you will notice that the Base Color is set to “Utility - sRGB - Texture” while the rest of the maps (metallic, roughness, normal, opacity) were set to “Utility - Raw”. In the image below, you can see Substance Painter running under the ACES color profile.
Each software has its own way of handling ACES, just look at the documentation for your 3D software to see how you can implement it for your own work.
Conclusion
As you can see, there are many use cases for ACES. While it may be tempting to stick with the workflow that you’ve grown comfortable with, considering how daunting the concept of ACES color space can be, it’s crucial that we stay up-to-date with industry standards. If you’re interested in reading more about the technical side of ACES, I highly recommend you to read up on these following guides:
ACES Primer:
https://acescentral.com/uploads/
ACES in CG:
While switching to the ACES color space might be the right choice on a technical level, it won’t save a render from bad lighting, shoddy materials or poor composition. Perhaps that can be a topic for another day.
* The image featured in this article uses a graphic from 'Holger kkk Everding / CC BY-SA'.

Bio:
Amiel Goco is a freelance 3D artist who's worked on the 3DBee asset library as a prop artist. He's also worked on game assets and environment art.
Register Now and Get $50 FREE Credits!