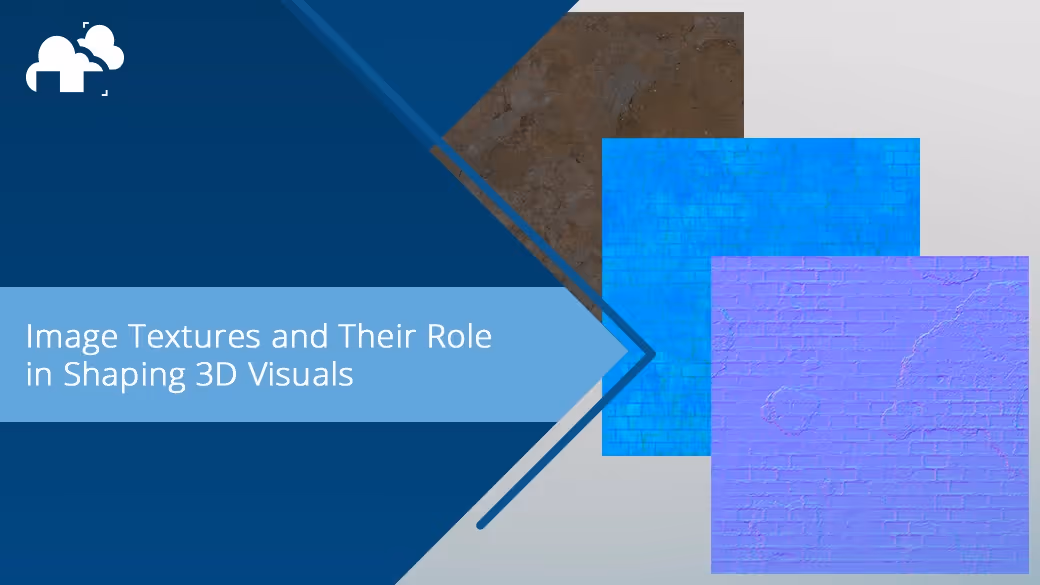


In the vibrant world of 3D graphics, nothing adds life to a model like a well-applied texture. Whether you’re rendering cinematic scenes, game environments, or product visualizations, texture mapping plays a pivotal role in achieving realism and cohesion. In this guide, we’ll explore the fundamentals of texture mapping, delve into the different types of maps and coordinate systems, and share practical tips for applying and optimizing textures in your workflow. If you're aiming to simulate convincing surfaces or wondering why your model looks a bit off in render—this one's for you.
What Is Texture Mapping and How It Works in 3D
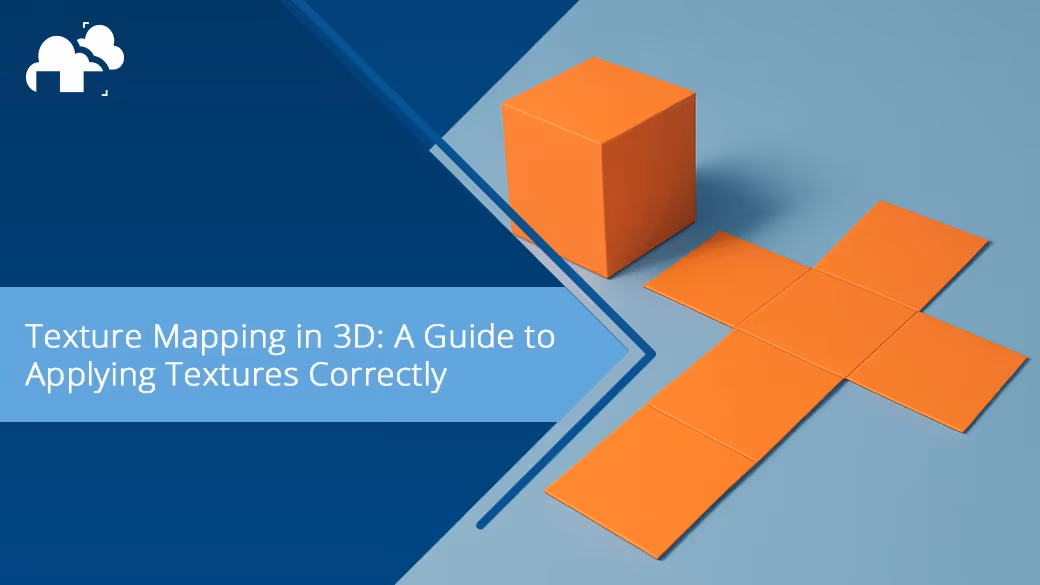
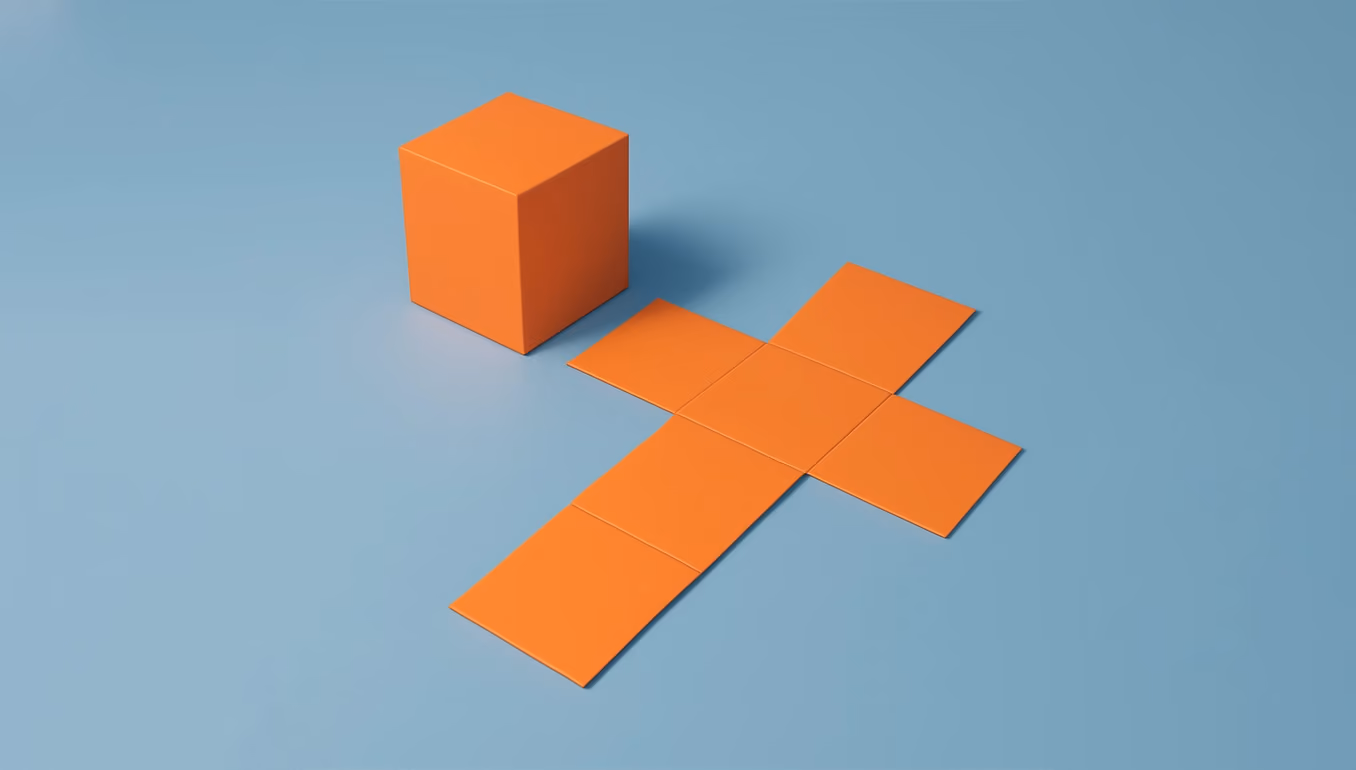
At its core, texture mapping is the process of projecting a 2D image (a texture) onto a 3D surface. This technique allows artists to simulate color, detail, and surface characteristics without having to model every tiny detail into the geometry. Imagine painting a pattern onto a paper model except here, the "paper" is your polygon mesh, and the paint is a bitmap image filled with visual data like color, roughness, or bumpiness.
In computer graphics, this mapping relies on UV coordinates, a 2D coordinate system that tells the software how to wrap a flat texture around a 3D shape. The “U” and “V” represent the horizontal and vertical axes of the texture space, used instead of X and Y to avoid confusion with 3D space axes.
So how does it work?
- Unwrapping the Mesh: Your 3D model is unwrapped to create a 2D representation of its surface (like unfolding a box).
- Assigning UVs: UV coordinates are assigned to vertices to determine how texture pixels (texels) align with polygons.
- Applying a Texture: A 2D image is placed within this UV space, essentially “sticking” the image onto your 3D object.
From here, render engines sample this texture during rasterization, matching texels to pixels on screen.
Understanding Texture Maps and Texture Coordinates
Textures go way beyond color. Depending on the desired effect, multiple texture maps can be used together to simulate how a surface interacts with light, reflects its surroundings, or even alters its geometry. Here’s a breakdown of the most common types:
- Diffuse Map: Also called an albedo or base color map, this defines the color information of a surface.
- Specular Map: Controls the reflectivity and shininess of a surface.
- Normal Map: Encodes surface direction details using RGB values to give the illusion of complex geometry.
- Occlusion Map (AO): Simulates soft shadows in crevices, enhancing realism.
Texture coordinates, your UVs, are what guide these maps. Each vertex in your mesh holds data about which part of the 2D texture it corresponds to, enabling complex visual effects with minimal geometry. Avoid stretching or overlapping UVs unless you're aiming for a specific effect. Poor UV layout can distort textures and ruin realism.
Exploring 3D Texture Space and Its Role in Rendering
The concept of texture space is critical. This is the coordinate system used to map texels to a model’s surface. One of the most important things to get right in this space is Texel Density, the ratio of texels per unit of surface area in your 3D model.
Inconsistent texel density is one of the fastest ways to break immersion. You may have noticed this in games where one wall looks crisp while the adjacent one is blurry, that’s texel mismatch.
Maintaining Consistent Texel Density
To maintain visual cohesion:
- Use a checker map as a visual guide to scale your UV shells proportionally.
- Tools like the Texel Density Checker addon in Blender can automate and normalize density across assets.
- For optimization, share UV layouts where feasible and consolidate similar textures.
Texel Optimization Tips
- Reuse Texture Maps: Share UV spaces when assets don’t need unique texturing.
- Texture Streaming: In games and real-time applications, dynamically load high-res textures only when needed.
- Mipmapping: Create downscaled versions of your texture to improve performance and reduce aliasing.
Think Like a Camera: Texel density matters most where the camera is close. Plan your detail levels based on framing and draw distance.
How to Apply and Optimize a Texture Map in 3D Projects
UV Unwrapping
Start by unwrapping your 3D model to create a usable UV layout. Blender, Maya, 3ds Max, and Cinema 4D all have powerful unwrapping tools. Choose unwrapping methods based on model complexity, box unwrap for simple forms, manual seams for complex meshes. A good unwrap ensures that textures won’t stretch or distort and provides a clean foundation for painting or procedural workflows.
Texture Painting and Editing
You can create textures using procedural methods through software such as Substance Designer, or paint them manually in software like Substance Painter. mage manipulation software like Photoshop or GIMP can also be used. For hand-painted or stylized work, 3D paint tools like Blender’s Texture Paint mode allow you to apply color and detail directly on the model’s surface.
Baking Maps
If you’re using high-poly to low-poly workflows, baking is essential. Bake normal, ambient occlusion, and displacement maps to transfer surface detail from a sculpted model to a low-resolution version. This lets you retain high fidelity in your render while optimizing performance, particularly in real-time environments.
Assigning Maps in Shaders
Use your render engine’s shader editor to assign and blend maps. Whether you’re in Blender's Cycles, Arnold in Maya, or Redshift in Cinema 4D, shaders allow you to combine multiple maps, diffuse, normal, specular, and more, into layered materials that simulate complex real-world surfaces.
Optimizing for Render
Use anisotropic filtering and bilinear interpolation to smooth textures, especially at oblique angles. Choose texture resolutions based on proximity to the camera: high resolution for close-up hero assets and lower resolutions for background props. Compress textures to save memory and consider texture streaming for real-time workflows to avoid loading unnecessary data into memory.
Types of Texture Mapping
UV Mapping
UV mapping is the most common and versatile method. It involves unwrapping a 3D mesh into a 2D representation using U and V coordinates. This map defines exactly how a 2D image is wrapped over the surface of a 3D object. UV mapping is ideal for models that need precise control over texture placement and is essential for tasks like texture painting and baking.
Projection Mapping
Projection mapping applies textures to 3D objects using geometric projections rather than UV unwrapping. This approach is often faster and more procedural, especially during look development or when dealing with simple geometry. Common forms include box mapping (projecting from six directions like wrapping a cube), spherical mapping (ideal for globes or eyes), and cylindrical mapping (great for pipes, bottles, and rounded objects). While projection mapping is quick and useful for background assets or environmental elements, it may introduce distortions or seams that require manual correction if higher fidelity is needed.
Procedural Mapping
Procedural mapping does not rely on image textures but instead uses algorithms to generate patterns, like noise, marble, or wood grain, on-the-fly. These maps are resolution-independent and tile seamlessly, making them powerful tools for creating non-repetitive surface details with minimal setup.
Texture Mapping in Practice: A Note on Realism and Lighting
Good texture mapping is inseparable from good lighting. The way a texture appears is often more about how light interacts with it than the image itself. In your shaders, emphasize interplay between diffuse, specular, and ambient components. Consider using Gobo lighting techniques to simulate complex lighting patterns through texture map projection. By projecting textures through lights, you can create rich atmosphere and surface detail that reacts dynamically to camera and light movement.
Conclusion: Painting with Pixels in 3D Space
Texture mapping isn’t just a technical process, it’s a creative act. When you master the use of texture maps, coordinate systems, and texel management, you gain the power to simulate everything from subtle wood grain to the shimmering skin of an alien creature. So take your time with your UVs, consider your texel density, and don’t be afraid to combine procedural, painted, and photographic textures in pursuit of realism or style.
Register Now and Get $50 FREE Credits!