Whether you're sculpting fantasy landscapes, crafting photorealistic product renders, or building stylized game assets, chances are you're leaning heavily on image textures. They’re the unsung heroes of 3D art that bring flat-shaded meshes to life with the illusion of depth, wear, detail, and storytelling. But what exactly are image textures and how can you use them effectively? In this article, we break it all down.
At its core, an image texture is just a 2D bitmap. This can be a JPEG, PNG, TIFF file, etc. They get mapped onto the surface of a 3D model and carry color, detail, and even material information. When applied using UV coordinates, it wraps around your object like a digital skin. Image textures are also widely used to simulate complex surfaces like wood grain, skin pores, fabric weave, or worn-out paint, as models do not need to have every microscopic detail if they are using image textures. For artists working in Blender, rendering texture-heavy scenes can be demanding—using a Blender render farm can significantly reduce render times while keeping the visuals sharp and detailed.
To understand how an image texture fits onto a 3D object, we need to talk about UV mapping. UV mapping is similar to unwrapping a candy bar where you take a 3D object and unfold its surface into a flat 2D plane so that you can "paint" onto it with an image. That 2D plane or layout is called a UV map.
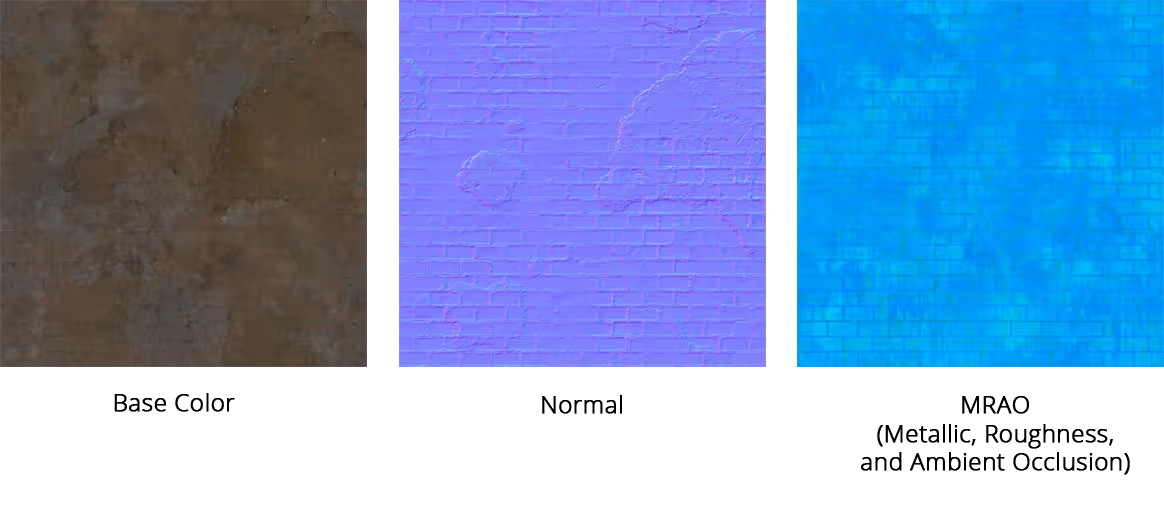
Once your model is unwrapped, textures are applied using texture coordinates that match up pixels (or texels) on the image to points on the model. The software then uses interpolation to make sure the image wraps around smoothly, even across curved or angled surfaces. Image textures aren't limited to color either. Here are some common types of textures:

By layering these maps, you can create highly convincing materials that respond to light in realistic ways. There are also a few other maps such as Ambient Occlusion, Specular, and Displacement.
Image textures can come from anywhere. It can be a photo you took on your phone, a scan of a real surface, or even a digital painting you whipped up in Photoshop. Here are the main sources:
Snapping your own photos of materials like bark, bricks, or leather is a great way to build high-quality, organic textures. With good lighting and sharp focus, these images can serve as the base for convincing, real-world surfaces.
High-resolution scans capture fine details and color accuracy, making them ideal for materials like fabric, paper, or human skin. These textures often come with built-in maps for realism straight out of the box.
For stylized or artistic projects, hand-painted textures offer full creative control. Tools like Krita, Photoshop, and Substance Painter let you craft unique looks that go beyond realism.
Websites like AmbientCG, Textures.com, and Megascans offer a massive range of free and premium textures. These libraries are convenient, high-quality sources for everything from dirt maps to ornate tiling patterns.
While not image-based by default, procedural textures can be baked into maps and used just like image textures. They're flexible, resolution-independent, and great for generating seamless patterns or variations.
This is where things get a little technical. But if you've ever noticed one object in your scene looks crisper than another, you're already familiar with texel density.
Texel Density refers to the number of texture pixels (texels) applied per unit of 3D surface area. A higher texel density means finer texture detail, but it also eats up more memory. A lower density can help with performance, especially in real-time engines, but risks blurry or pixelated surfaces.
Keeping texel density consistent across your models ensures that texture detail appears uniform throughout the scene. A common approach is to apply a checker texture to a reference object, calculate its texel density, and then match other models to that value. You can refine the results by adjusting texture sizes or sharing UV layouts between similar assets to optimize space and visual balance.
Beyond the basics, image textures can bring nuance and narrative into your scenes. Below are some ways on how to enhance realism with image textures:
Adding elements like dirt, scratches, or decals can give surfaces a lived-in feel and support the story your scene is telling. A weathered wall or a chipped helmet instantly communicates history and context in a way flat textures can’t. Studying a material also helps in adding to the believability, such as creating a layer of mortar before adding a brick texture to a brick wall material.
Blending image textures with procedural elements like noise or gradients allows for more organic transitions and surface variation. This technique is perfect for effects like moss creeping over stone or rust forming along metal edges.
Using bump or normal maps introduces fine surface detail without altering geometry. For deeper or more pronounced effects, especially in close-up shots, displacement maps can push actual geometry to enhance realism.It can give the illusion of geometry being there when it isn’t.
Even minor texture details, like leather grain or the soft reflection of brushed concrete, can transform a model from plain to believable. Imperfections lend authenticity and prevent surfaces from looking too clean or artificial, so when in doubt, add imperfection.
This issue typically stems from poor UV mapping, where the texture doesn't align properly with the model's surface. Adjusting UV seams or optimizing the UV layout can help reduce distortion and ensure the texture wraps cleanly.
This can happen when different parts of a texture don’t line up properly at UV seams. A texture paint pass or clone stamp can help blend areas.
Often a result of low-resolution textures, mipmapping, or incorrect texel density. Check your image file size, sampling settings, and UV scale.
Mastering image textures is a blend of art and science. They are fundamental to 3D storytelling and define the look, feel, and believability of a 3D scene. From conveying material detail to supporting the story your render tells, they’re a core part of what makes digital worlds feel real. And with a solid grasp of how they work and why they matter, you can turn even the simplest models into visually rich, immersive pieces. In short, image textures are about more than fidelity, they’re about worldbuilding, storytelling, and making the invisible tactile. So next time you unwrap a UV or drop in a map, take a moment to appreciate just how much power a flat image can hold.