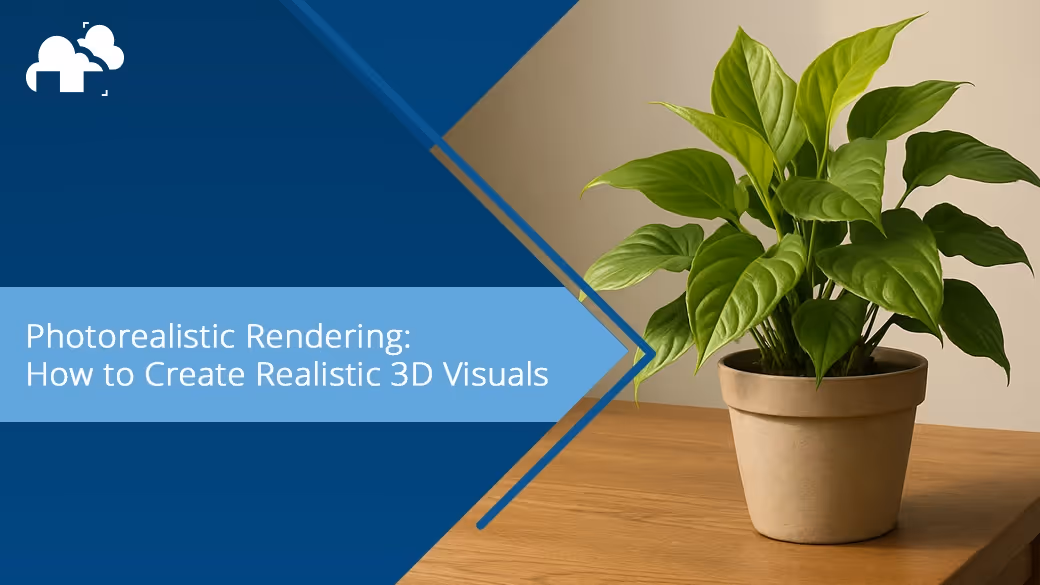


Creating 3D images that are indistinguishable from real-life photography is the holy grail for many 3D artists, designers, and architects. Known as photorealistic rendering, this approach combines technical precision and artistic sensibility to simulate the visual world in a lifelike and convincing manner. Whether you're crafting architectural visualizations, product designs, or immersive environments for games and films, mastering photorealism means mastering light, materials, and the small imperfections that make images feel real.
What Is Photorealistic Rendering and Why It Matters
Photorealistic rendering is the process of using 3D computer graphics to create digital images that are virtually indistinguishable from photographs of real-life objects. This involves simulating how light, materials, and camera angles interact in the physical world to produce a final image that is visually accurate.
Why Photorealism Is Crucial in 3D Rendering
- Communicates Design Concepts Clearly: For architects and product designers, accurate rendering helps stakeholders visualize a project before a single brick or prototype is produced.
- Reduces Need for Physical Prototypes: In industrial design, realistic rendering can simulate products under different lighting conditions, streamlining design decisions.
- Enhances Visual Storytelling: In media and entertainment, photorealistic images immerse viewers by closely mimicking real-life photography.
Lighting, Texture, and Materials in Realistic Rendering
Light: The Backbone of Realism
Lighting in 3D isn't just about visibility, it’s about storytelling and perception. As shown in film and traditional art, the way you illuminate a scene can dramatically change how it's read. Some key concept include:
- Key Light defines your subject.
- Fill Light softens shadows and adds detail.
- Back and Rim Lights separate the subject from the background.
- Ambient Light gives overall tone and depth, often achieved using HDRI maps.
- Gobo Lights simulate natural obstructions (like light through leaves or blinds) to add texture and depth.
Using soft and hard lights strategically, by tweaking parameters like light radius, lets you define volume, set mood, and achieve realism.
Texture and Materials: The Surface Story
No matter how accurate your lighting, your 3D model won’t look photorealistic without believable surface properties.
- Reflectivity and roughness must match real-world materials.
- Imperfections (scratches, smudges, fingerprints) enhance believability.
- Texture mapping of high-resolution maps with consistent texel density ensures materials don’t break immersion.
How to Create a Photorealistic Rendering: Key Tips and Techniques
Start With Real-World References
Study photographs, lighting in your environment, and physical objects to understand how materials and light interact. Collecting real-world references gives you a benchmark for accuracy. Whether it’s how sunlight hits a wooden floor or how a glass mug reflects its surroundings, these subtle cues help guide your material choices and lighting setups. Over time, training your observational skills will drastically improve your ability to recreate believable visuals.
Block Out The Lighting
Before you model every detail, establish the lighting conditions for your scene. Use a basic light rig to simulate the sun, fill lights, and background ambiance. This step helps set the tone and mood early on, saving you from major reworks later. Blocking lighting also gives you a chance to test how light interacts with your forms, identifying hot spots, shadows, and reflections that need to be addressed as you refine the scene.
Set Texel Density and Optimize UVs
Use checker maps to unify texel density, avoiding blurry or overly sharp textures. Share UV spaces among models for faster rendering times and improved memory usage. Maintaining consistent texel density ensures visual uniformity across different objects in your scene. It also plays a major role in optimizing performance, especially in complex scenes or animations. Tools like Texel Density Checkers in Blender can streamline this process and help you pack UVs efficiently.
Use Gobo Lighting for Depth and Detail
You can simulate Gobo lights by projecting texture maps through a spotlight. This adds layered realism without modeling every detail. Gobos are a cost-effective trick to suggest environmental context (like tree shadows or window blinds) without overloading your scene geometry. Their subtle visual cues can break up flat lighting and introduce storytelling elements with minimal render cost.
Embrace Imperfection
Add small flaws to surfaces like finger smudges on metal, dust on glass, or slight dents. These imperfections cue the viewer’s brain that the object exists in a real world as perfect surfaces look synthetic and break immersion. Imperfections introduce variability, which the human eye subconsciously expects. You can create these details using roughness maps, bump textures, or decals, adding personality and believability to your models.
Depth of Field and Camera Angle
Use depth of field and strategic camera angles to mimic photographic lenses. A well-chosen lens angle can reinforce scale, mood, and focus. Shallow depth of field can isolate your subject and add cinematic flair, while wide-angle lenses can exaggerate space or perspective. Experiment with focal lengths, tilt, and framing as if you were composing a photo because in photorealistic rendering, your camera is just as critical as your models.
Post-Processing and Compositing
In tools like Blender, 3ds Max, or Adobe Photoshop, adjust contrast, color grading, and add effects like bloom or chromatic aberration for final polish.
There are even more techniques to achieve photorealism as well, as this is something that can take some time to learn. You can also consider looking up additional resources for more advanced or special techniques.
Photorealistic vs. Non-Photorealistic Rendering: Key Differences
While both rendering styles serve unique creative goals, understanding their distinctions is crucial when deciding how best to visualize and communicate your design concepts.
Goal
Photorealistic Rendering aims to replicate real-world photography with high fidelity. Non-Photorealistic Rendering (NPR) is more about artistic expression, abstraction, and stylization.
Lighting
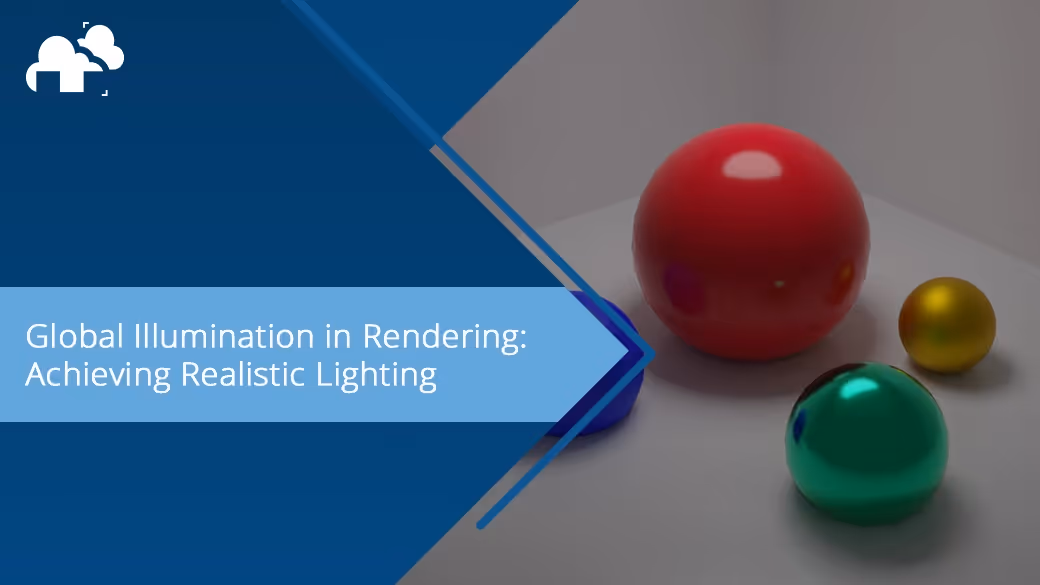
Photorealistic Rendering uses physically-based lighting with accurate shadows, reflections, and global illumination. NPR often simplifies lighting to serve graphic readability or stylistic tone, such as in toon shading or illustrative workflows.
Texture Detail
Photorealistic Rendering relies heavily on high-resolution, detailed textures that match real-world materials. NPR can use flat colors, hand-painted textures, or symbolic patterns to convey information or mood.
Rendering Techniques
Photorealistic Rendering uses ray tracing, physically based rendering (PBR), and accurate light and material simulation. NPR employs stylized shaders like outline rendering, cross-hatching, or cel shading.
Use Cases
Photorealistic Rendering is commonly used in architecture, product design, film VFX, and interior visualization. NPR thrives in video games, animated films, concept art, and technical illustrations.
Tools and Workflows for Achieving Photorealism in 3D Rendering
Rendering Engines
- Cycles (Blender): Physically accurate ray-tracing renderer, great for realism.
- Arnold (Maya/3ds Max): Industry standard for VFX and film.
- V-Ray: Known for interior design and architectural visualization.
- Octane Render: GPU-accelerated and favored for fast, high-quality results.
Recommended Workflow
- Model in Blender/Maya/3ds Max using clean topology.
- Unwrap UVs and manage texel density from the start.
- Texture with PBR workflows in Substance Painter or similar.
- Light the scene using 3 point light setup
- Render with a path-tracer like Cycles or Arnold.
- Post-process in Photoshop, Blender's compositor, or other software for realism boosts.
Hardware Considerations
Realistic rendering is resource-intensive. Use render farms like GarageFarm.NET to accelerate the process, especially for animations or large scene renders. Farms also allow you to experiment with advanced rendering techniques without being limited by your local machine.
Conclusion
Photorealistic rendering isn’t just about mimicking reality, it’s about communicating effectively. Sometimes the goal is to sell an idea, evoke a feeling, or simply demonstrate what a finished product will look like. Whether you’re simulating sunlight streaming through curtains in a bedroom render or showcasing a new product prototype, the goal is always the same: to make the viewer believe. By mastering lighting, materiality, and the camera, and applying various techniques, any 3D artist can elevate their craft to photorealistic heights. The tools are there, now it’s a matter of learning how to see like a photographer and create like a digital sculptor.
Register Now and Get $50 FREE Credits!