

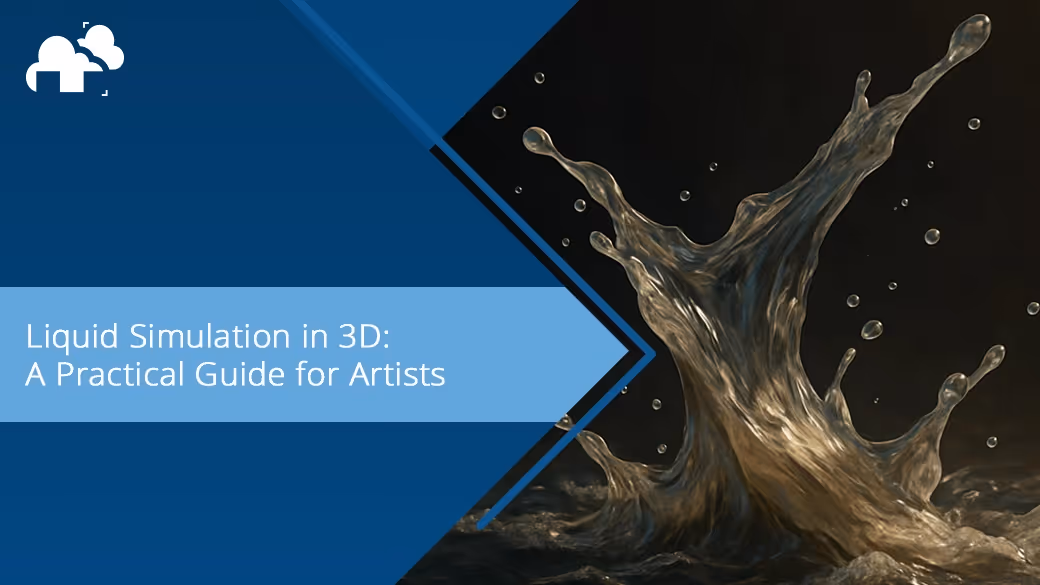


Liquid simulation is one of those 3D techniques that feels almost magical when done right. Whether you're watching water cascade down stairs, syrupy goo stretch between surfaces, or explosive waves crash against a cliff, the visual payoff can be immense. But liquid sim isn’t just eye candy; it’s a technical feat that combines fluid physics with creative direction, making it an essential tool for VFX, stylized animation, and product visualization.
Understanding the basics of fluid simulation
Fluid simulation in 3D is the process of using math and physics to recreate how liquids like water, oil, or lava move and behave. It works by solving special equations that describe how fluids flow, and these simulations consider things like speed, pressure, thickness (viscosity), and gravity to make the motion look realistic. Depending on the method used, fluids can be simulated using particles or a 3D grid, allowing artists to create everything from calm water surfaces to explosive splashes.
Particle-based methods
Particle-based techniques such as Smoothed Particle Hydrodynamics (SPH) and Fluid-Implicit Particles (FLIP) treat liquids as collections of tiny points or particles that react to gravity, pressure, and other forces. This method is great for small-scale, energetic simulations like splashes, pouring liquids, or turbulent flows.
Grid-based methods
Grid-based or Eulerian approaches divide the simulation space into a 3D grid and compute how the fluid moves through it. These methods are ideal for simulating large bodies of water or smooth, wave-like motion, such as an ocean. They tend to require more memory but offer smoother results for broader motion.
Hybrid solvers
Hybrid solvers blend the best of both worlds. FLIP, for example, combines particle tracking with a grid for force calculation, offering stable and detailed results. These are widely used in production environments due to their balance of detail and performance.
Preparing for a simulation
Before hitting "bake," it's important to lay the right groundwork so your simulation behaves as expected and doesn’t chew through your resources unnecessarily.
Scale setup
Always ensure that your scene uses real-world scale. Simulations depend heavily on accurate measurements such as gravity, viscosity, and motion all respond to the physical scale of your models. A mis-scaled scene can result in fluid that’s sluggish or wildly unstable.
Collision geometry
Any object the fluid will interact with must be watertight and possess some physical thickness. Thin planes or models with open geometry can confuse the solver, leading to artifacts or leaks. Clean modeling practices go a long way here.
Domain configuration
The simulation domain defines the bounding box for your fluid. This invisible container holds all the fluid particles and determines the simulation’s resolution and memory usage. Keep it as tight as possible around the action to minimize resource consumption and keep bake times reasonable.
Tips for realistic results
Even with a basic setup, a few tweaks can elevate the believability of your liquid simulation.
Resolution control
High resolution improves detail but significantly increases simulation and render times. It's best to iterate with low settings and only ramp up resolution once you're confident in the fluid's movement.
Viscosity and simulating different fluids
Different fluids such as water, syrup, lava all behave differently. Use the viscosity setting to simulate their properties. Lower viscosity gives you water-like behavior, while higher values simulate slower, thicker fluids like honey.
Enhancing with secondary particles
To sell realism, add secondary elements like foam, spray, or bubbles. These are especially useful in simulations involving oceans, turbulent water, or any interaction where fluid hits a surface at speed. Software such as Blender allow for baking these effects separately.
Software for liquid simulation
Blender
Blender’s fluid simulation system, powered by Mantaflow, makes it a great all-in-one solution for indie creators and smaller studios. It supports both liquid and gas simulations and offers features like mesh-based and particle-based fluids, viscosity control, and domain-level caching. While it’s not as scalable or granular as Houdini’s FLIP fluids, it’s continually improving and fully integrated within Blender’s workflow. For quick iterations and satisfying results, especially in stylized or medium-scale projects, Blender more than holds its own.
Houdini
Houdini is widely used in film and high-end VFX for a reason. Its FLIP fluids are fast, scalable, and offer fine-grained control. The node-based system allows for procedural setups, meaning you can adjust sims on the fly without restarting from scratch.
RealFlow
RealFlow is a standalone simulation suite known for its realistic liquid behavior. It’s used heavily in commercials and cinematics and integrates with 3D packages like Cinema 4D, Maya, and 3ds Max. It’s a mature, reliable tool if your workflow is focused on fluids.
Bifrost in Maya
Bifrost is Maya’s native simulation framework that supports high-quality liquids, smoke, and particles. Its liquid solver combines particles and volumes for realistic results, including splashes, foam, and viscosity. With built-in presets and direct integration into Maya’s workflow, Bifrost makes it easy to simulate and render fluid effects without external tools
Game engines: Unity and Unreal
For game and VR applications, real-time fluid simulations are usually approximated using shader effects or vertex animation textures. While they’re not too physically accurate, they can look great and perform well with minimal overhead.
Applications of liquid simulation
Liquid sims aren’t just for epic flood scenes. They're used across a wide range of disciplines, each with unique demands and creative opportunities. Here are some of the popular applications of liquid simulation:
VFX in film and television
In film and television, fluid simulation is crucial for creating impactful moments like water rushing through various structures or blood sprays in action scenes. These simulations help ground visual effects in reality and are often the centerpiece of high-stakes sequences. The realism achieved through simulation is difficult to replicate through other means.
Video-games
While real-time constraints limit the complexity of simulations, video games often rely on baked fluid animations, vertex shaders, or texture-based solutions to approximate realistic water, lava, or slime. More advanced engines may use simplified fluid solvers or hybrid systems for interactive elements like puddles, rivers, or splash reactions. The goal is to strike a balance between visual fidelity and performance, adding immersion without bogging down gameplay.
Product visualization
In advertising, fluid simulations are often used to create perfect pours of beverages, smooth applications of lotion, or dramatic splashes of paint. These scenes showcase a product’s qualities in a way that's both eye-catching and informative. Because they’re entirely digital, these simulations can be endlessly iterated to find the most appealing motion and framing.
Scientific visualization
Liquid simulation also plays an educational role. From demonstrating how blood flows through veins to showing the dynamics of chemical reactions in a petri dish, simulations can illustrate processes that are too fast, too small, or too dangerous to observe directly. These simulations combine scientific accuracy with visual storytelling, aiding both education and research.
Common issues and how to fix them
Exploding simulations
If your fluid starts exploding uncontrollably, the most likely culprits are incorrect scaling, excessively high inflow rates, or overlapping geometry. Double-check your object sizes and reduce any extreme velocity or pressure settings.
Passing through objects
If the fluid appears to pass through objects or has holes in the mesh, it’s often due to a low-resolution bake. Increase your resolution or mesh particle count, and use substeps if needed to improve accuracy. It could also be because of the object’s thickness so increasing the surface thickness could also help. If it is still not working, you can also check the collision object for inverted normals, as it could also be another cause. Make sure that the normals are pointing in the right direction so the fluid interacts with it properly.
Flickering or inconsistent surfaces
This issue usually stems from unstable mesh generation. Try enabling mesh smoothing and filtering. Also, check that your bake path isn’t being interrupted or corrupted mid-simulation.
No fluid
If you find that no fluid is coming out of the flow object, it could be because of the thickness. Try to increase the thickness of the flow object or increase the surface emission. You should also consider the size of the flow object as if it is too small, it might not emit any fluid either. Scaling up the object could help solve that issue.
Conclusion
Liquid simulation is both a technical challenge and a creative playground. It combines mathematical accuracy with expressive storytelling, giving 3D artists the tools to breathe life into their scenes in ways that few other effects can. Whether you're working on a high-budget VFX shot, a stylized short, or a product commercial, fluids can elevate your work from functional to unforgettable.
The key is to experiment, iterate, and study real-life references. Start small, learn the quirks of your chosen software, and grow your skillset over time. With practice and patience, you’ll turn puddles, splashes, and flows into powerful storytelling devices.
Register Now and Get $50 FREE Credits!

.avif)


