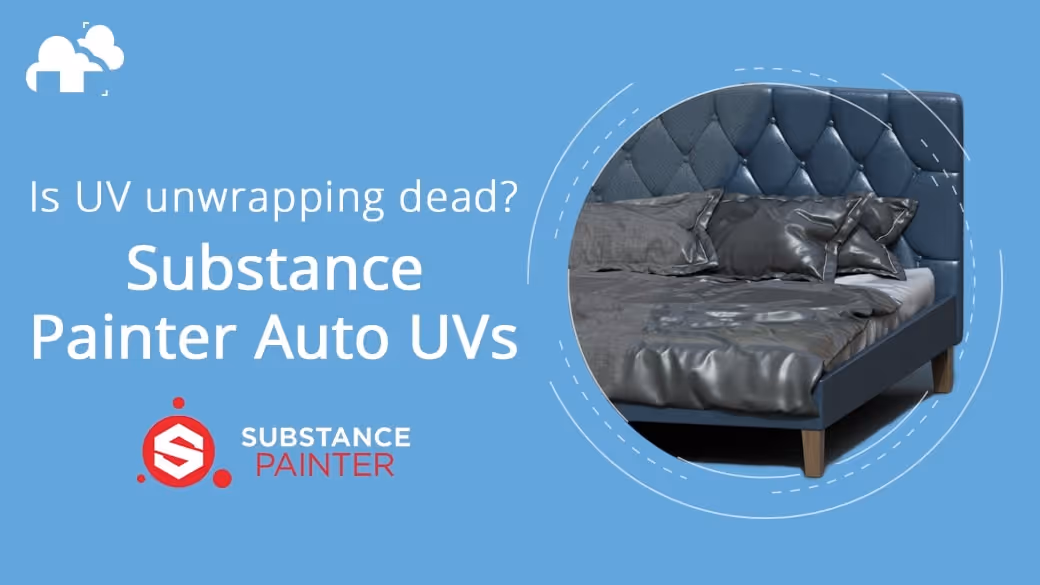


UV unwrapping: one of the most divisive aspects of 3D. Some people love it, and everyone else? Not so much.
In this article, you’ll be seeing assets all from the 3DBee asset library. But the twist here is that most of them were unwrapped inside Substance Painter!
With that, we’ll be taking a look at Substance Painter’s Auto UVs feature and find out the answer to the age-old question: Can we finally skip UV unwrapping?
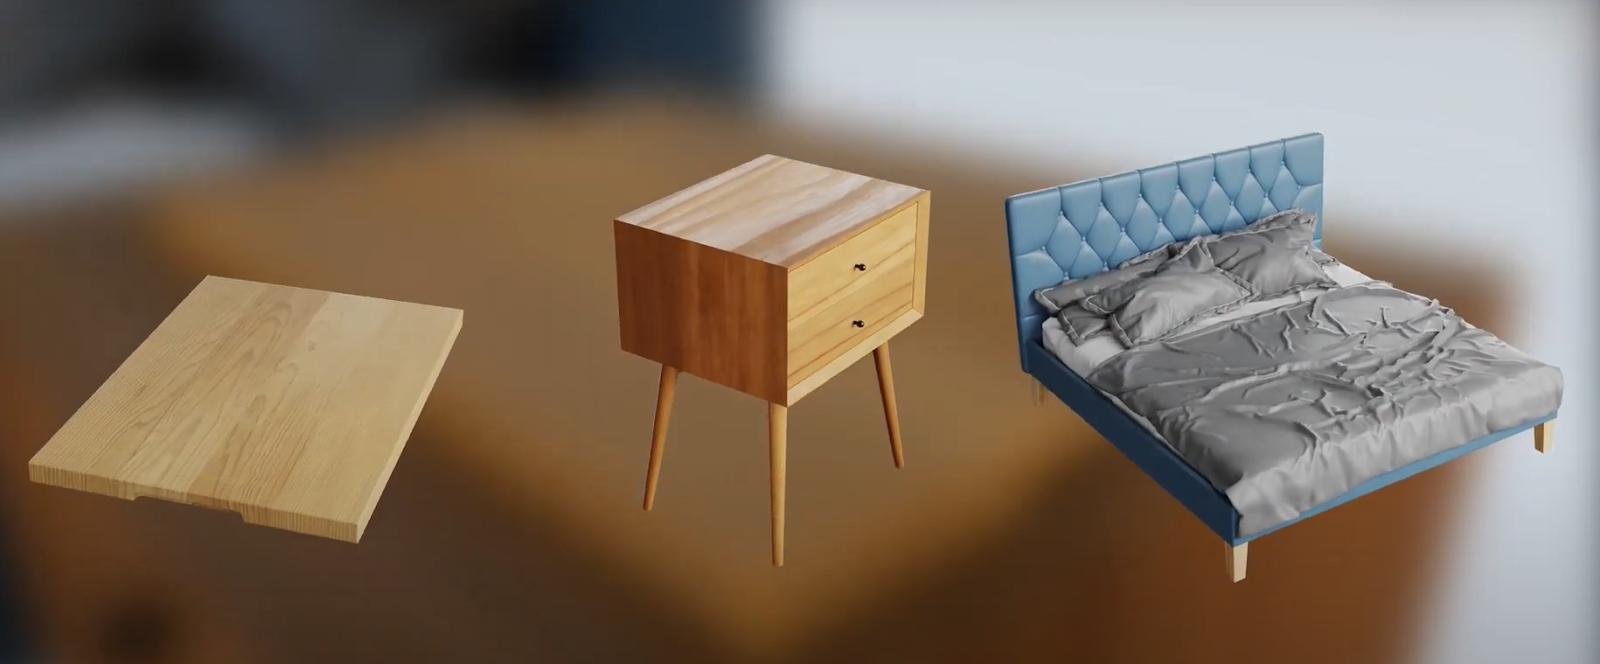
For our test, we’ll be taking 3 assets with varying levels of complexity from 3DBee.IT and comparing the results of the Auto UVs Feature inside Painter with the original UVs of each asset.
Then we’ll texture them inside Painter and figure out whether or not this feature can be a feasible way of working for your projects.
Getting Started
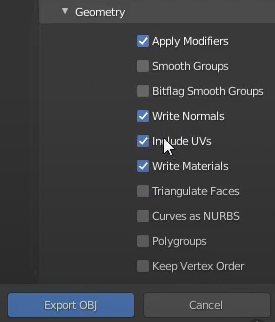
1. Export the meshes - The easiest way to export the mesh without UVs is to:
a. Select your mesh.
b. Go to Export then OBJ.
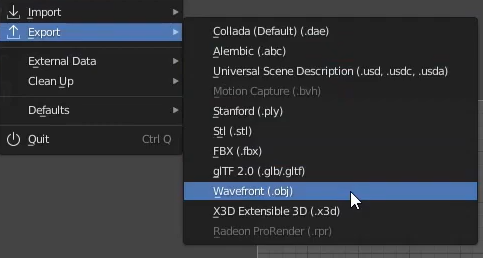
c. Make sure it’s on Selection Only.
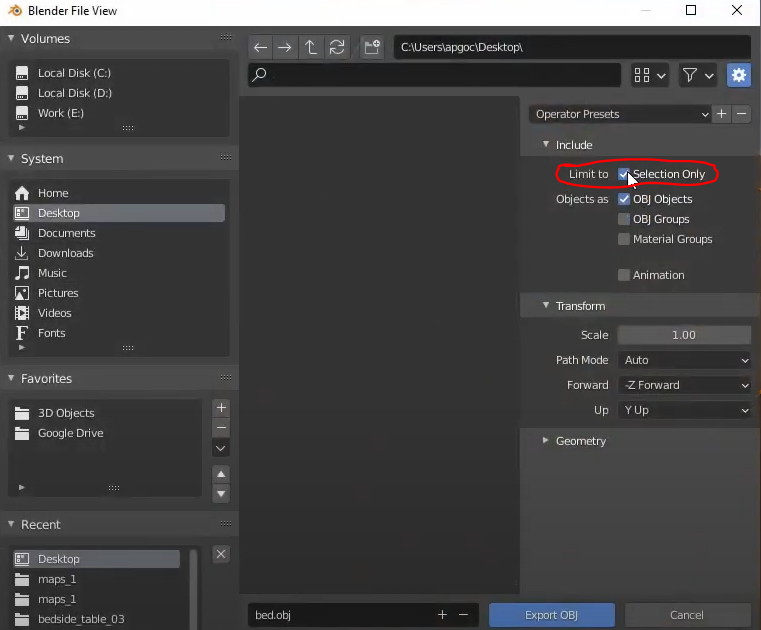
d. Uncheck Include UVs.
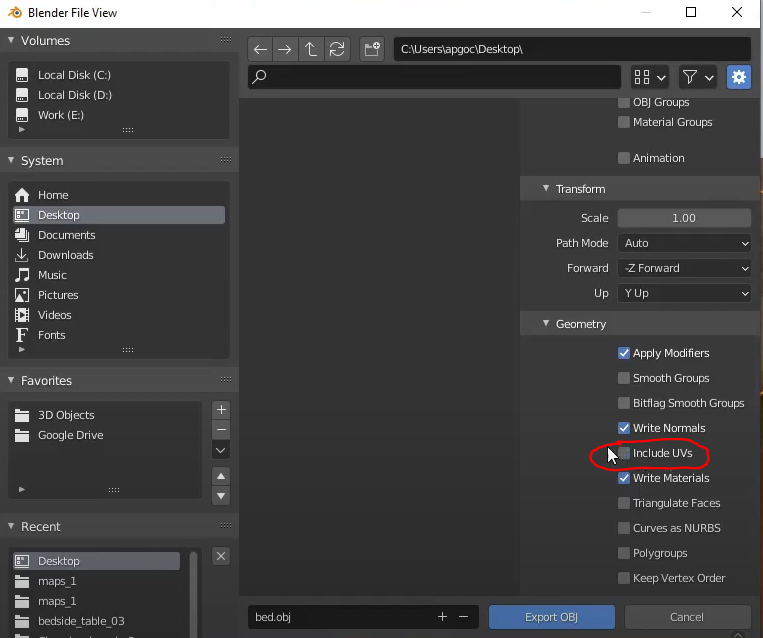
e. Click on Export.

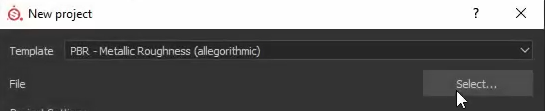
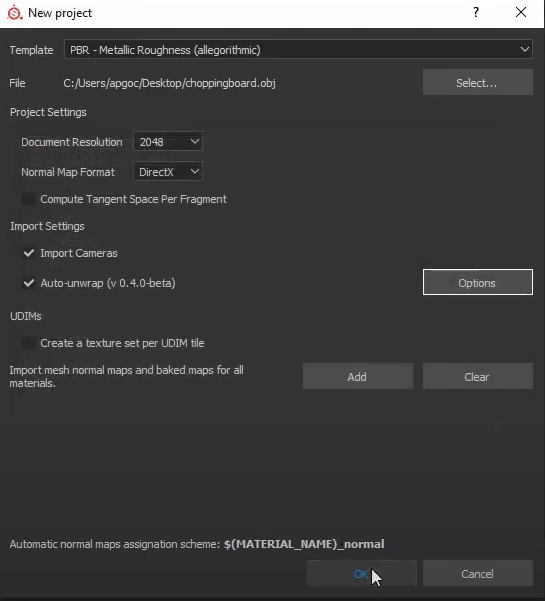
2. Import the meshes into Substance Painter by:
f. Clicking on File then New.
g. Select the Mesh.
h. Under Import Settings, make sure Auto Unwrap is checked.
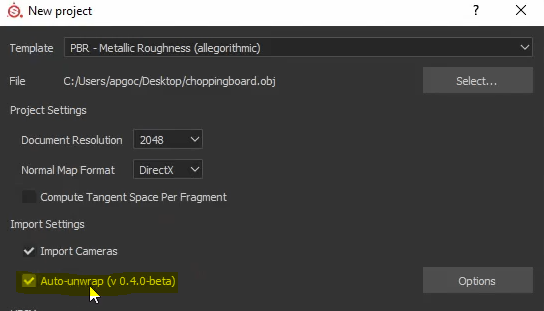
i. Next to it, there is an Options button that has options on how Painter will handle the auto unwrap.

Recompute All will ignore any pre-existing UVs you have on your mesh.
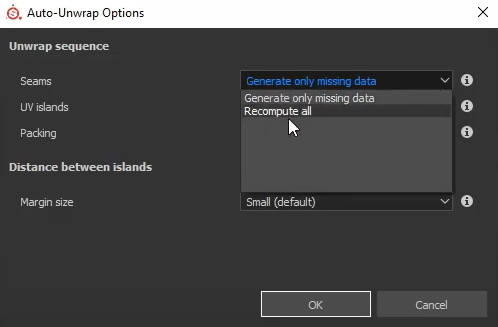
But for this case, I’ll be leaving everything as it is.
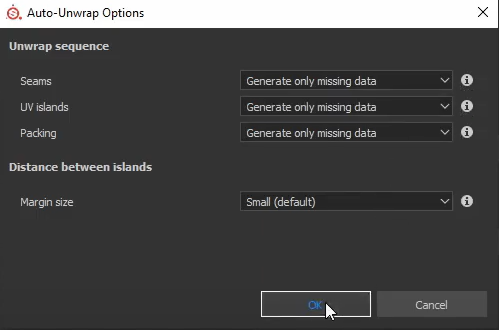
j. Hit Ok and give it a few seconds to unwrap.
Level 1
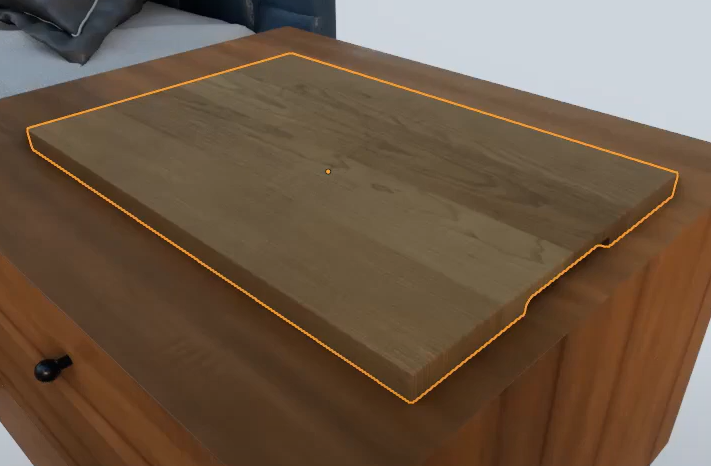
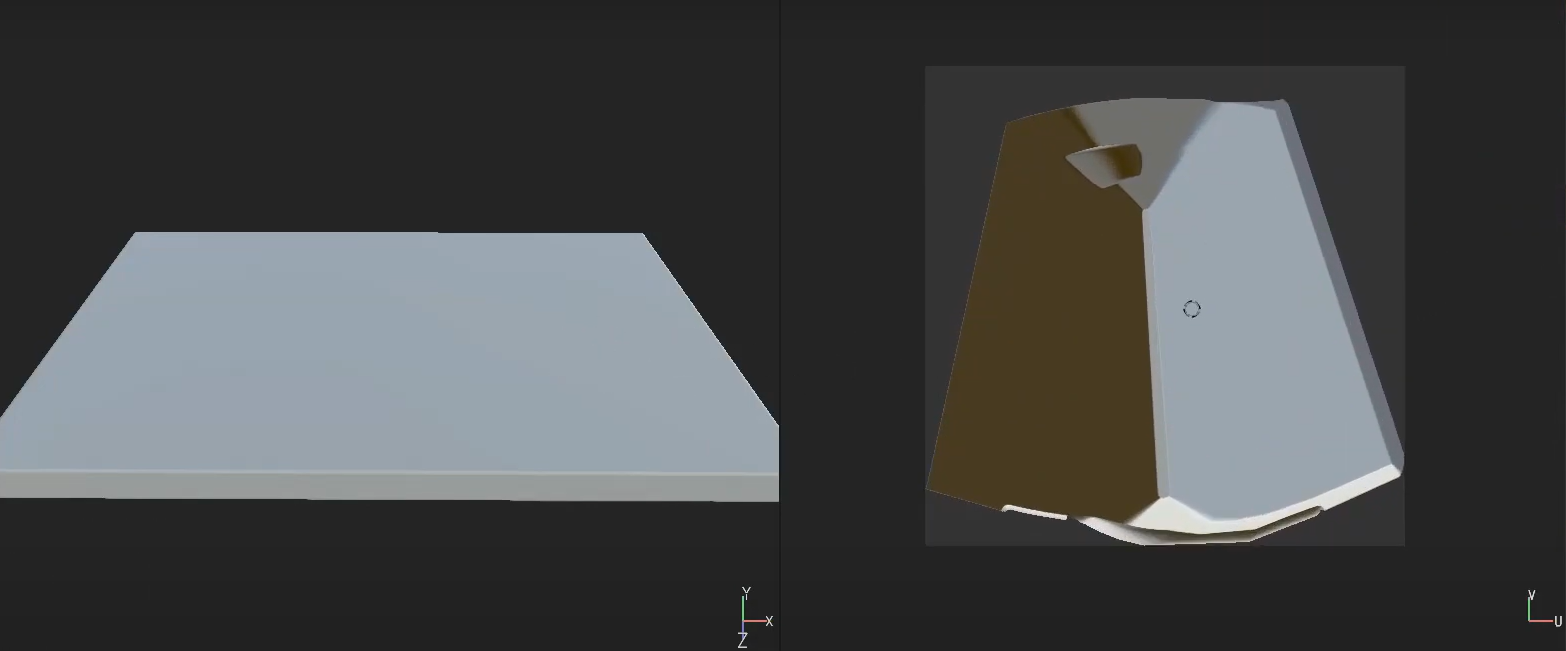
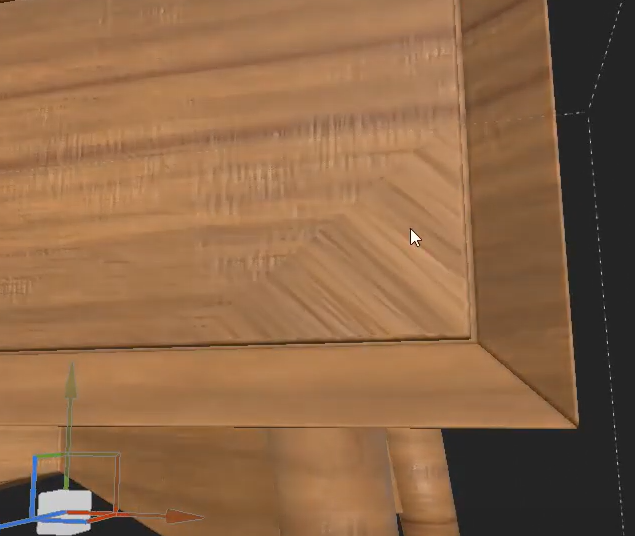
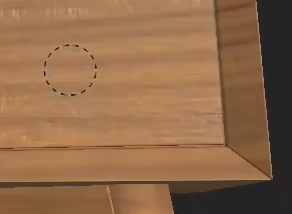
Taking a closer look at the mesh’s UVs, they are unwrapped in such a way that it follows how the wood grains would wrap around the edge in real life.
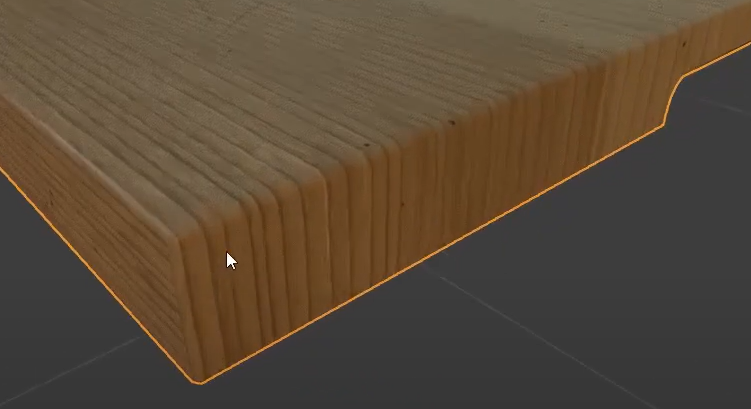
If we try dragging a wood material to the auto-unwrapped mesh, we can see that the material looks warped because of the way it was unwrapped by Painter.
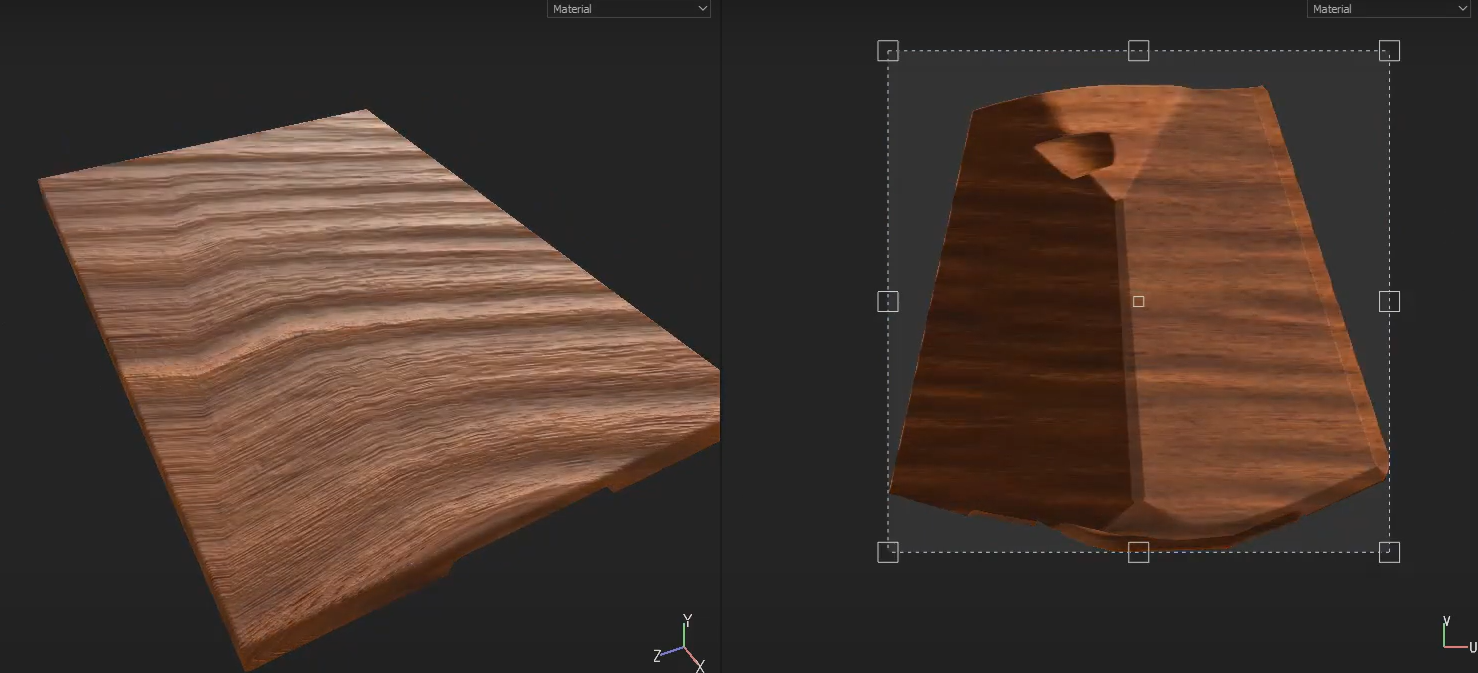
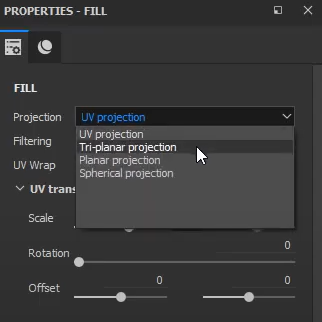
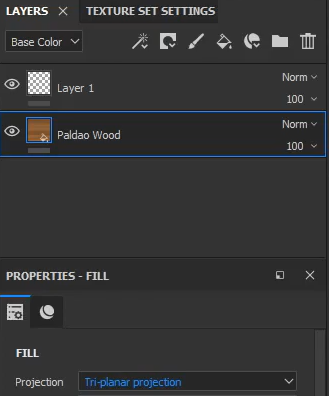
To get around this, we can switch the Projection Mode from UV Projection to Triplanar Projection.
Although there will probably still be some stretching when you look at the mesh up close, it now looks much better than it did originally.
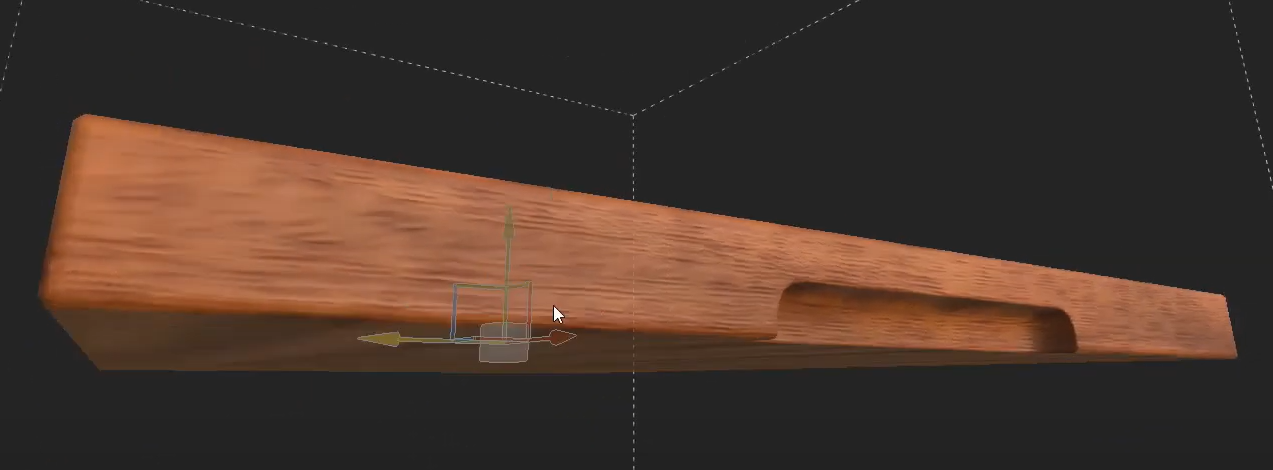
For an asset in the background, it isn’t noticeable. However, for an asset that needs to follow a certain flow like wood, and considering how easy it is to add seams in the corner, Auto UVs
don’t make the cut.
Level 2
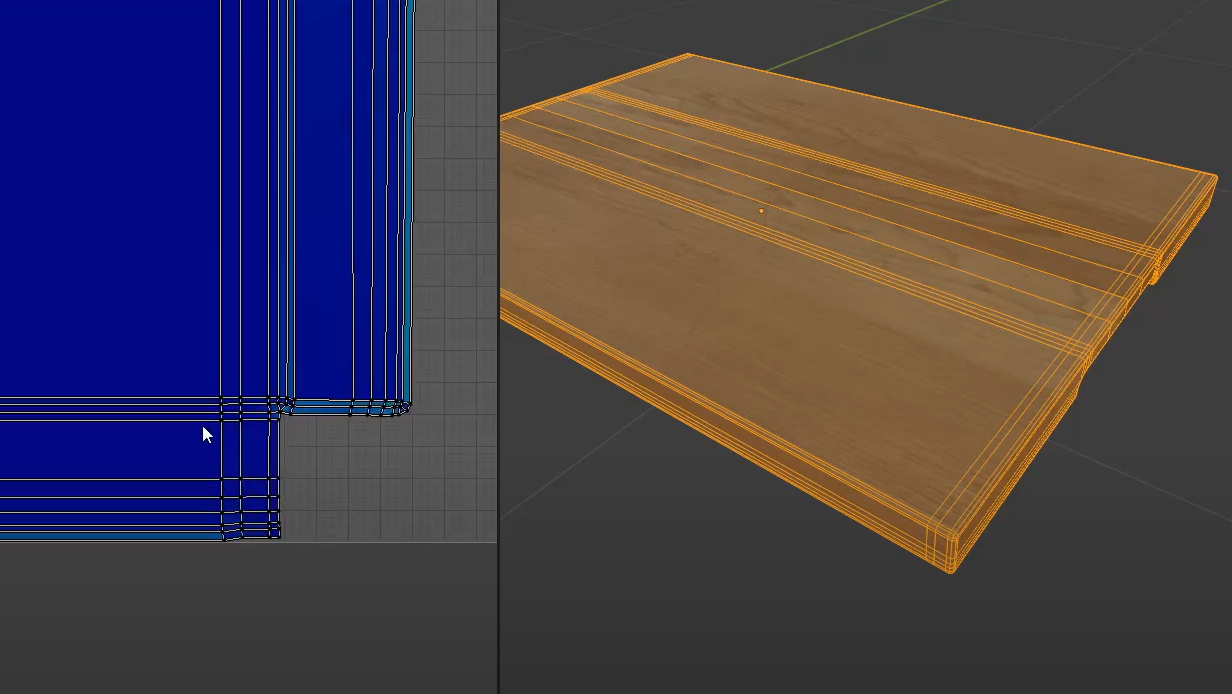
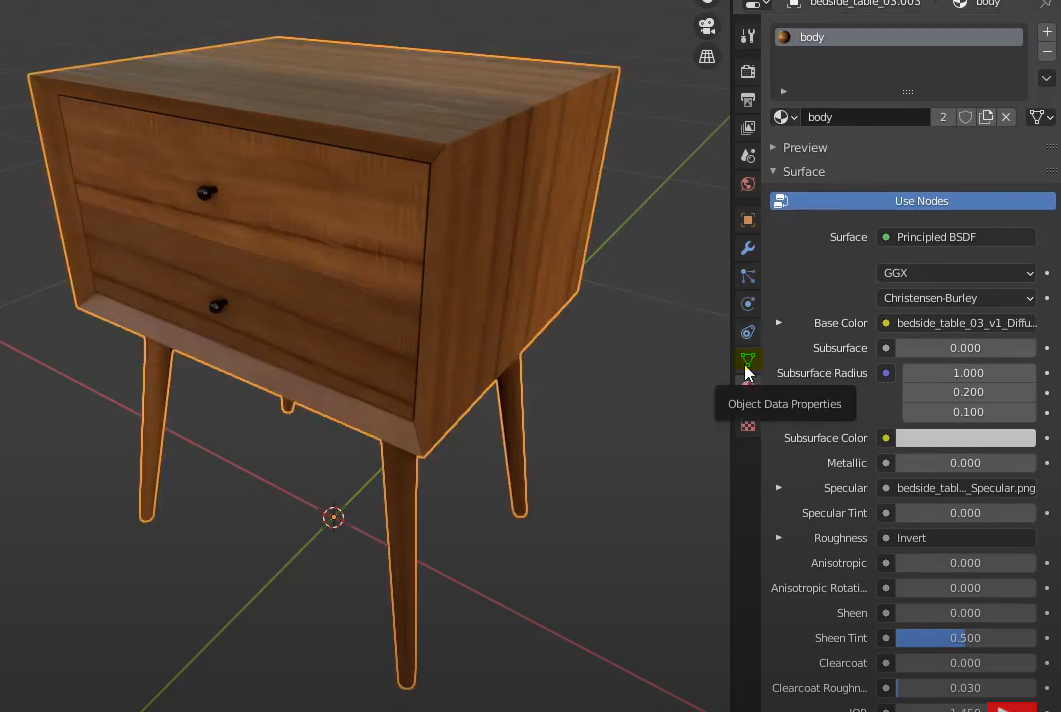
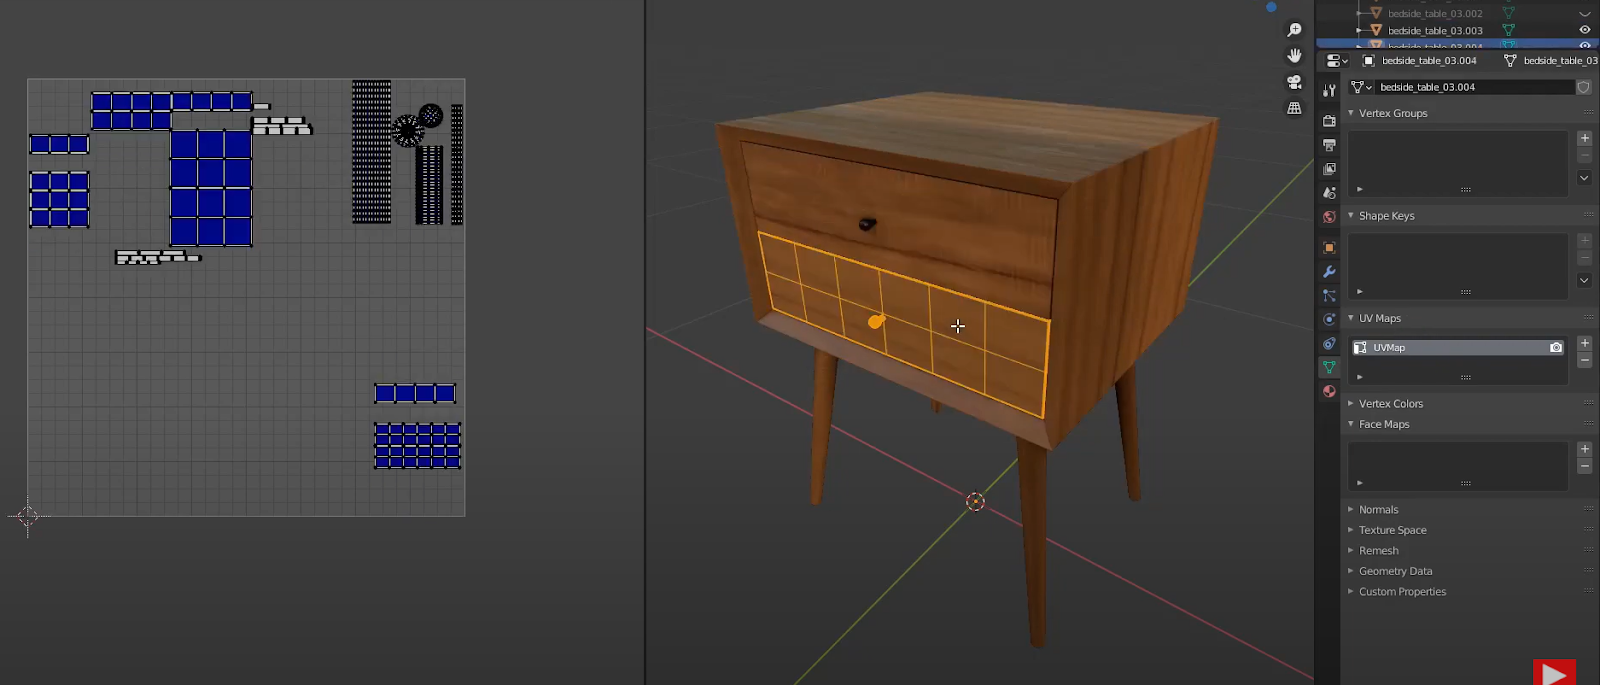
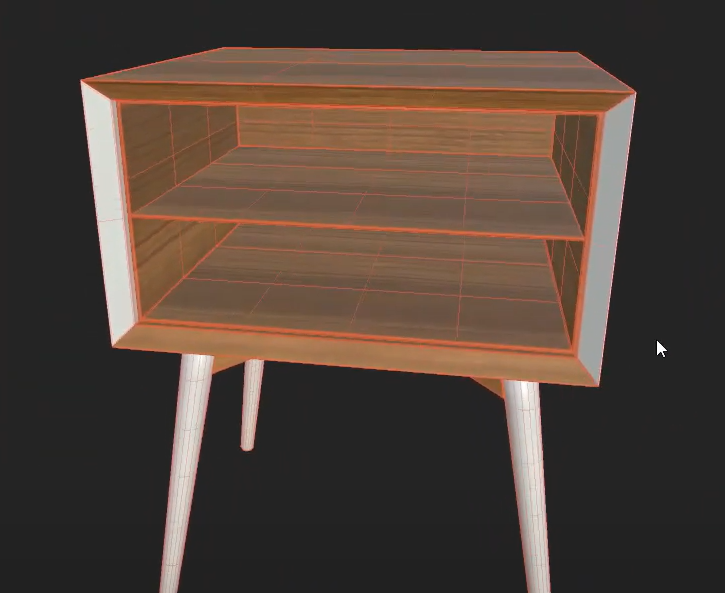
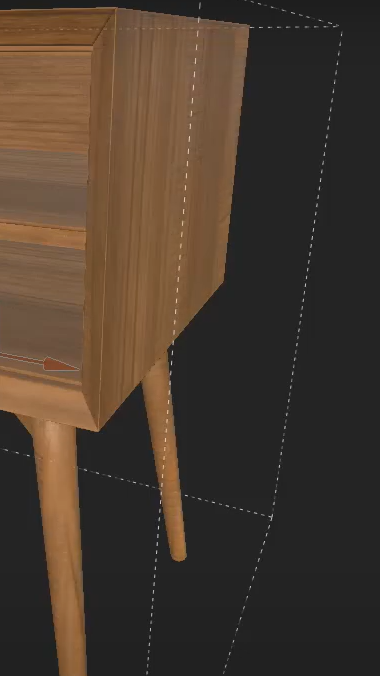
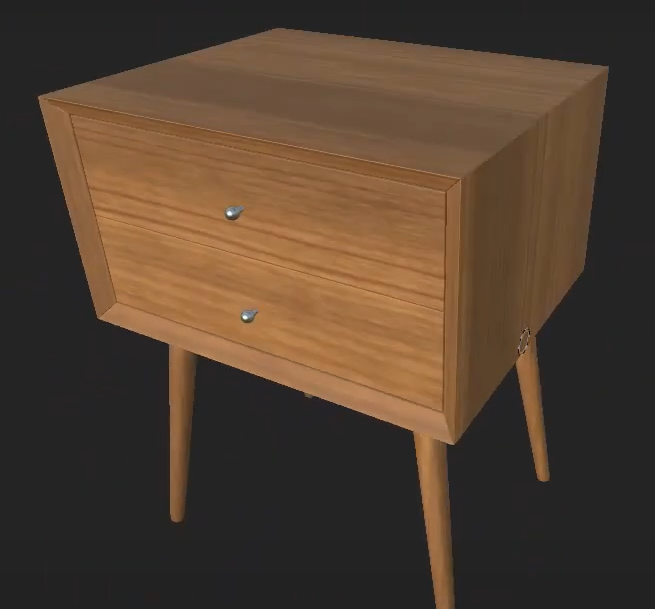
For level 2, we have a bedside table with two materials: one for the body and another for the drawers.

If we look at the model, the wood grains flow along each panel.
If you were to unwrap this manually, you would need to make sure that each side is layed out consistently.

This is so that if you drag in your wood material, the wood grains would look correct.
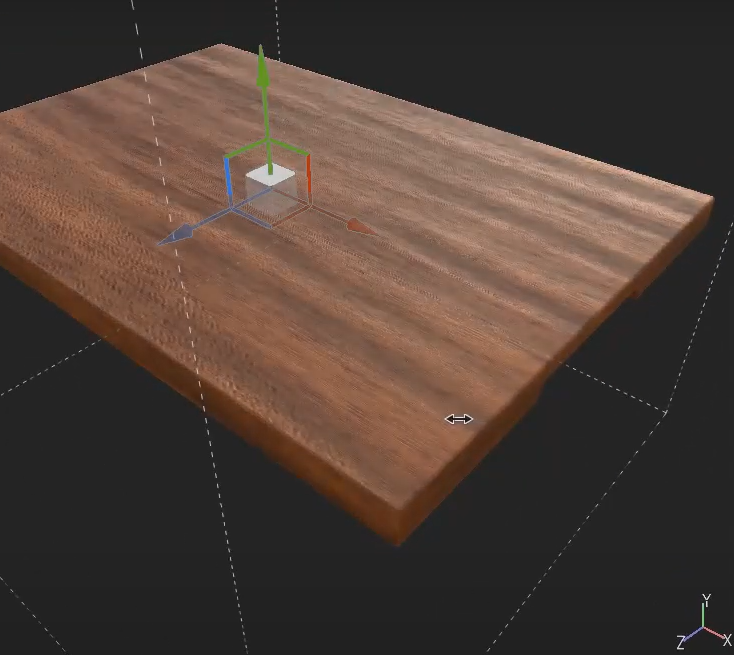
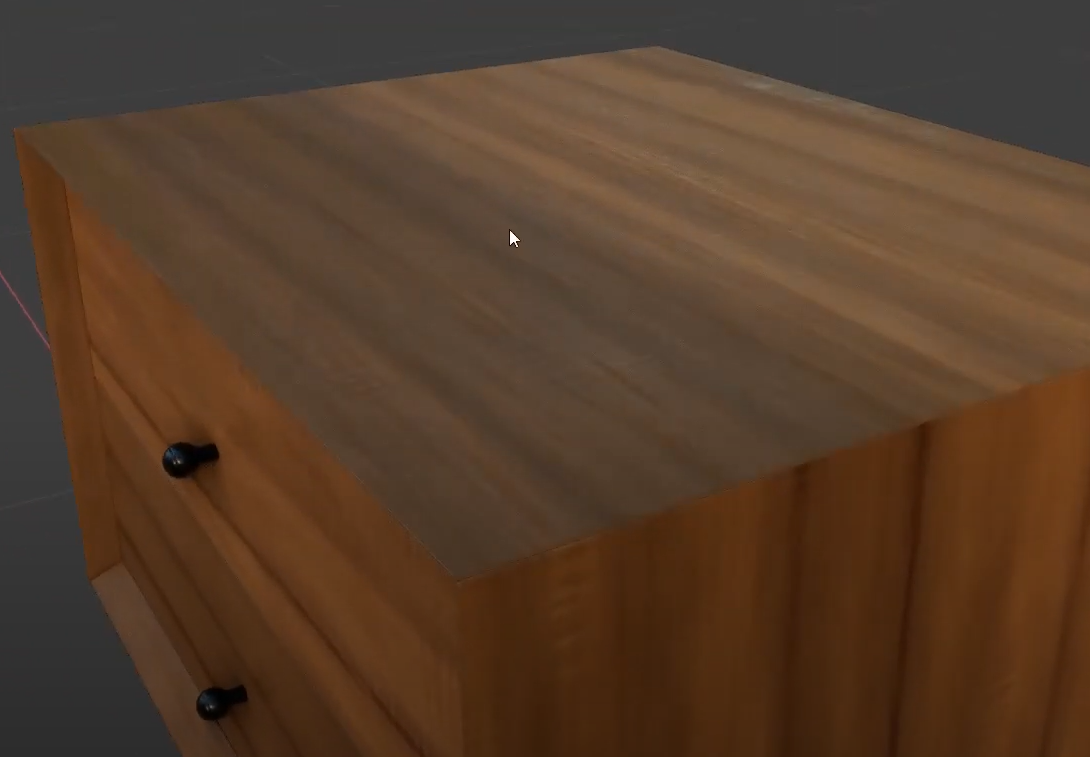
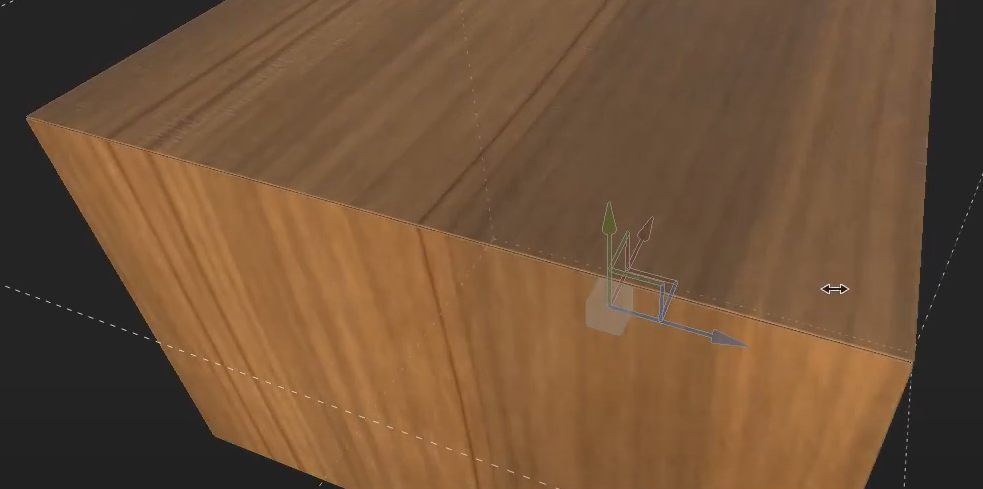
If we auto unwrap it with Painter, drag in a wood material to the body, and change the projection mode to Triplanar Projection, we can see that there are no longer any weird stretching.
But when we do the same for the drawers, we see that there is some nasty looking stretching by the corner.
To fix this,we can head back to Blender with the model already unwrapped. Under Object Data Properties, under UV Maps, we can see our active UV map on our mesh.
Select the body and delete the UV map.
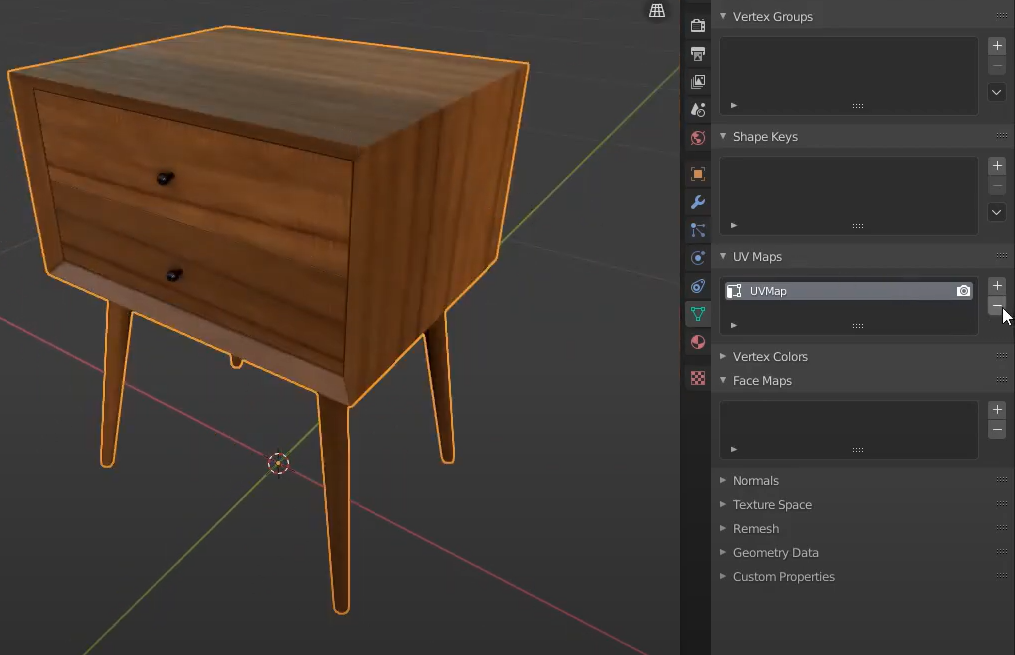
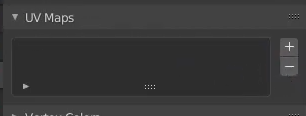
For the drawers, we’ll be leaving it as is with its UVs.
Now, we can export this mesh again but turn on Include UVs this time.
Going back to Painter, under Edit then Project Configuration, select the meshes we exported.
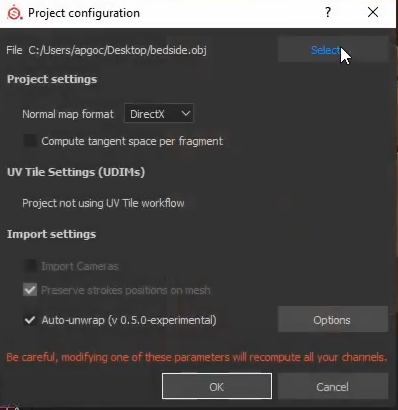
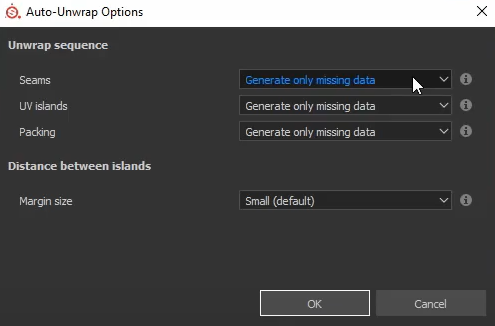
We can also change the Seams in our auto-unwrap Options to Generate Only Missing Data (if it isn’t like that already), so the UVs for the drawers will be imported while the body’s UVs will be recomputed since there aren’t any UVs.

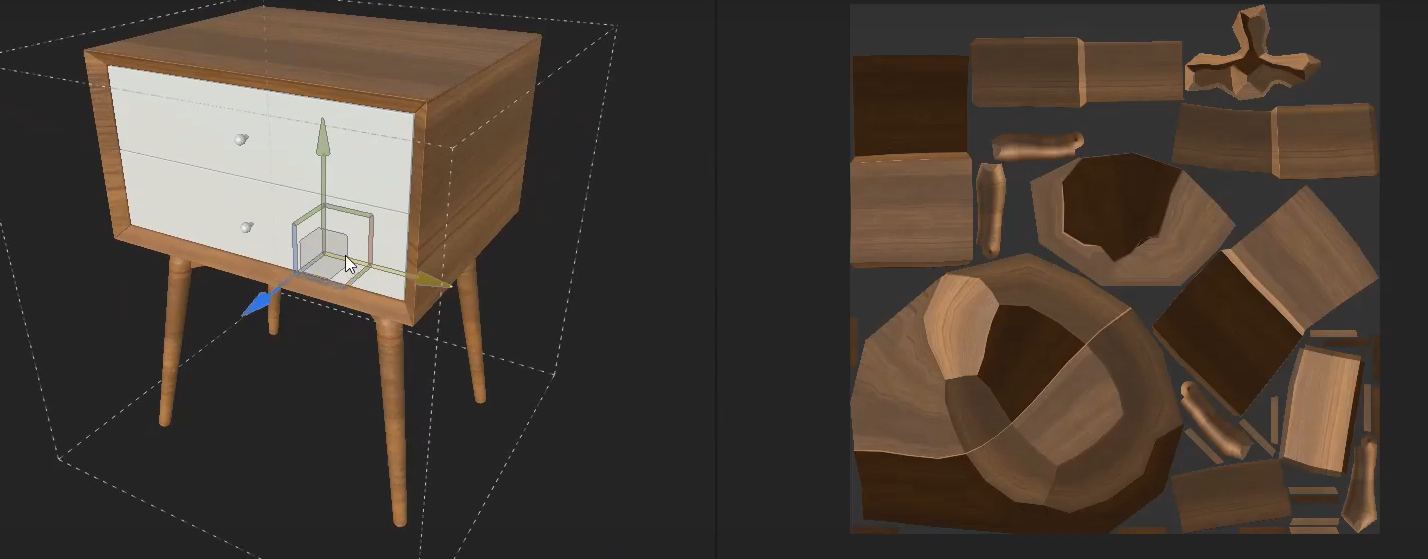
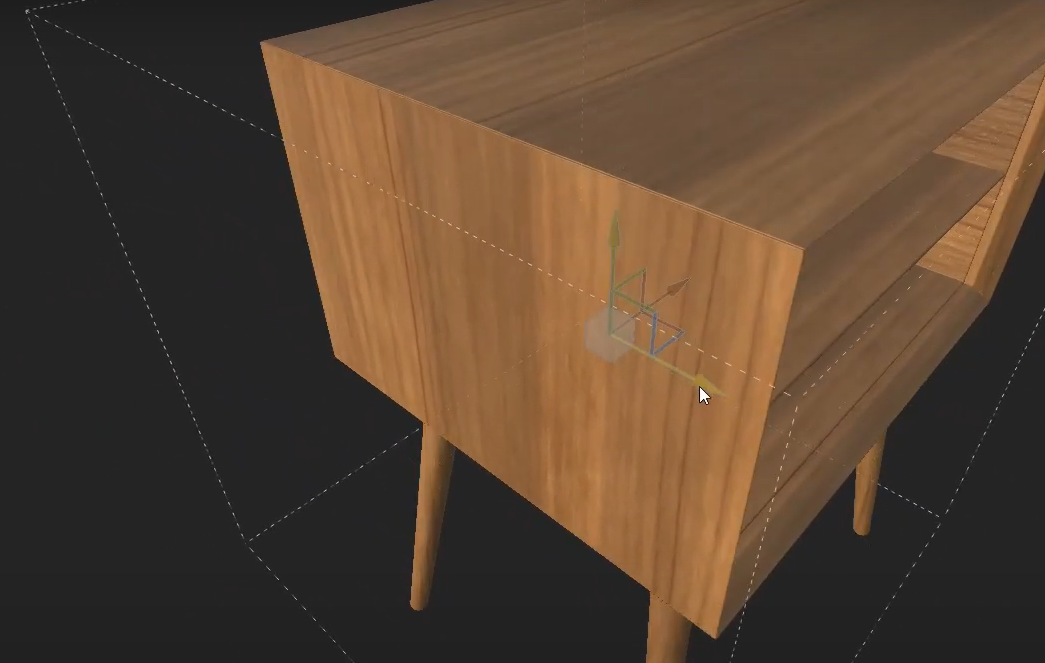
After doing this, we can see that the drawer’s texture is no longer stretching and we can start texturing!
As we can see, some parts of the mesh have the wood grains facing the wrong direction.
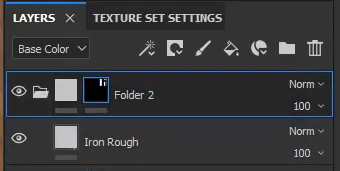
To get around this, a cool trick is to put the material inside a folder, right-click and add a black mask.
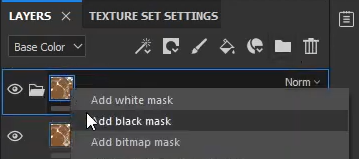
Select everything, press X to invert the selection color, and click on the pieces with the wrong direction.
Afterward, duplicate the folder, right-click on the mask and click on Invert Mask.
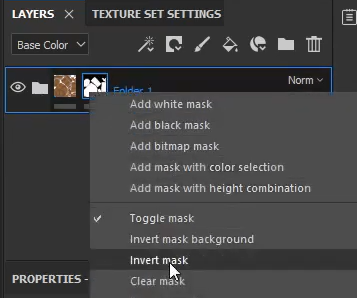
Now that the pieces are masked, you can rotate the material to 90 degrees or to whichever direction you want it to be.

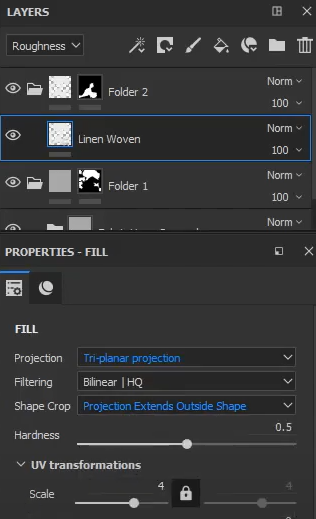
Another issue, however, is that the wood grains might look uniform even when they’re supposed to be separate pieces.
An easy fix for that is to just offset the material.
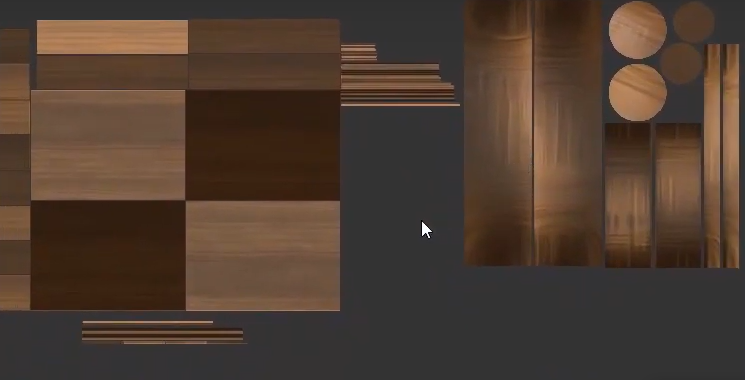
For the drawers, it’s the same process we just did as well. The handles were also masked out to their own folder with a different material.
Now we have a fully textured bedside table!
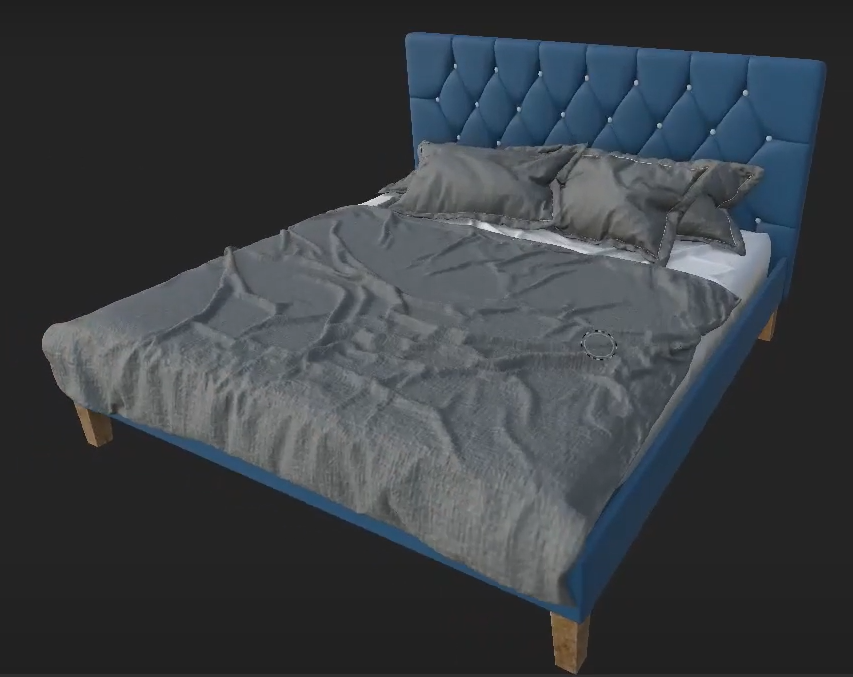
Level 3
Finally, for level 3, we’ll try playing around with smart materials.
Here, I’ll be dragging in some random fabric material and changing the relevant layers to triplanar.

For the legs, I masked them out and dragged in a wood smart material. I also rotated some of the wood grains to make them vertical.
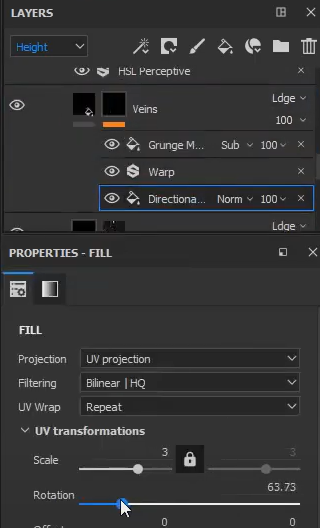
For the bedding, I did the exact same thing but I also added a fill layer on top with only the roughness channel on. I set that to multiply so I could control the roughness.

Finally, I dragged in a fabric material on the mattress, set it to triplanar projection, scaled it up quite a bit, and changed it to white.
And just like that, we managed to texture a bed using mostly smart materials!
Conclusion
Now going back to the topic, can we finally skip UV unwrapping?
The short answer is: NO.
There are still some really good reasons to spend some extra time to unwrap your models properly.
But when the deadlines start piling up and you just need to texture something really quickly, Substance 3d’s Auto UVs is a pretty nifty feature to have.
And who knows? Maybe one day, the answer to this article’s title will be a resounding yes.
Register Now and Get $50 FREE Credits!