


The stencil buffer might not be the flashiest tool in a 3D artist’s toolkit, but it’s certainly one of the most powerful when it comes to controlling what gets rendered and where. Whether you're compositing elements, generating silhouettes, or carving out portals into alternate dimensions (virtually, at least), understanding how to use the stencil buffer opens the door to a variety of advanced rendering techniques that go well beyond the basics of the depth buffer or alpha masking. In this article, we’ll explore what the stencil buffer is, how the stencil test works, and where it shines in real-time 3D graphics pipelines.
What is the Stencil Buffer?
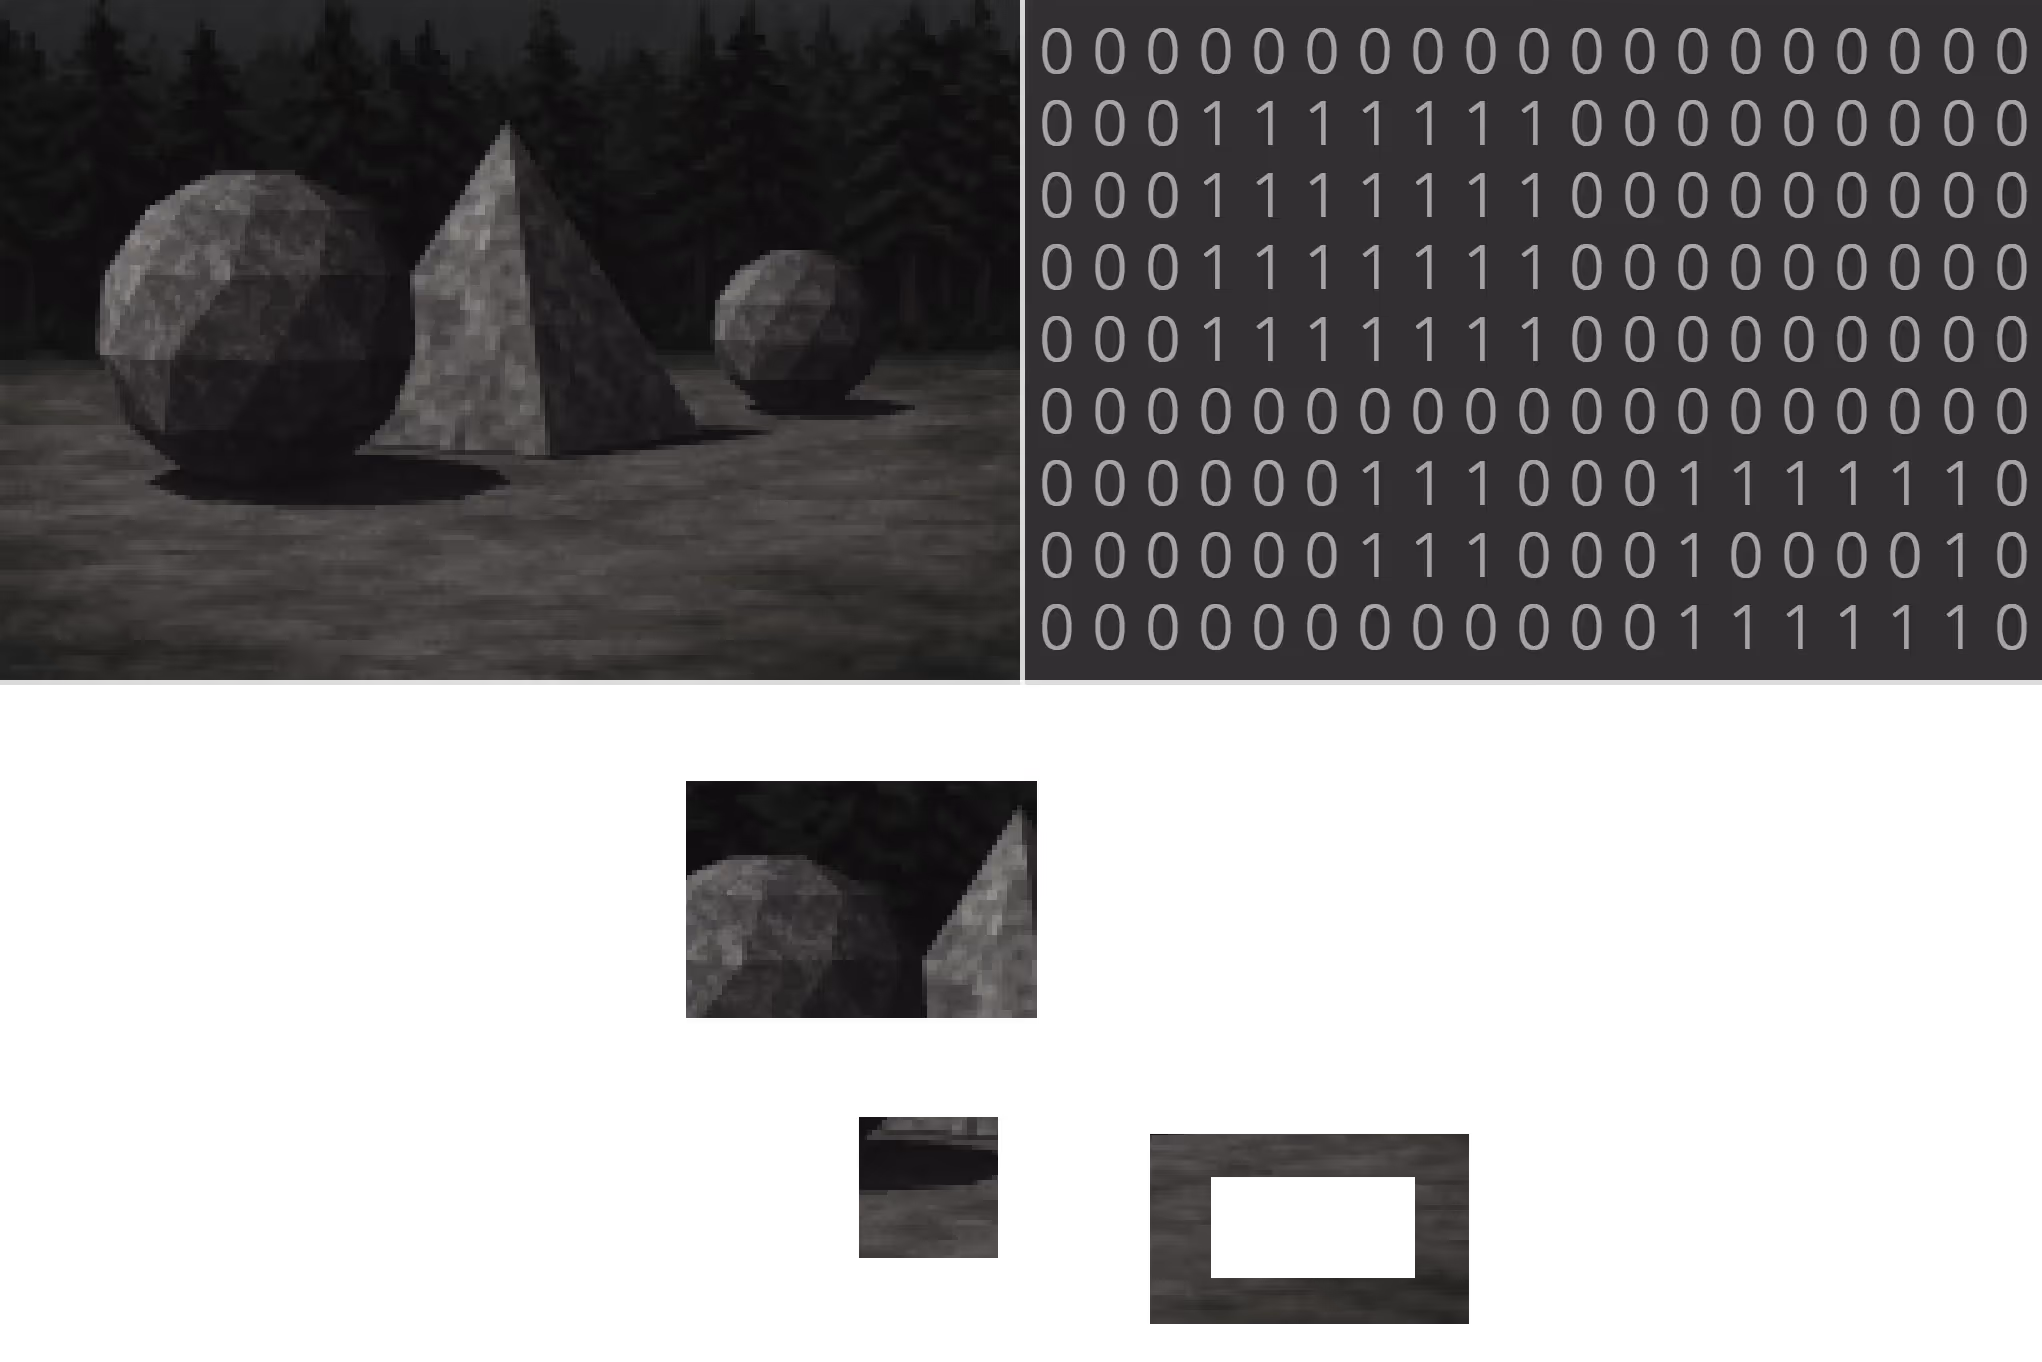
The stencil buffer is a type of data buffer that exists alongside the color and depth buffers in a framebuffer. Unlike the color buffer, which stores RGB or RGBA values, or the depth buffer (used in Z-buffering) which stores depth information for Z-tests, the stencil buffer holds simple integer values (8 bits per stencil value) per pixel. This value in the stencil buffer is used to enforce conditional rendering logic for each pixel. These stencil values act like little flags that tell the rendering engine whether a given pixel should be affected by a draw call based on specific rules. In this way, the stencil buffer functions like a pixel-level gatekeeper.
The Stencil Test: How it Shapes Your Render
After marking certain areas of the screen during an initial pass (for example, by rendering geometry that writes values into the stencil buffer) we move into the test phase (or stencil test), where the real control happens. In this phase, we stop updating the stencil buffer and instead use it as a reference to decide what should or shouldn’t be drawn. The stencil buffer can be used in tandem with the depth buffer to implement sophisticated effects that require both spatial and logical conditions to be met. As we render new objects, each pixel is checked against the stencil buffer’s contents. If a pixel falls within a region marked by a specific stencil value, it might be allowed to render. If not, it’s discarded. This gives us the ability to “gate” rendering based on previous draws, rendering only inside or outside predefined areas.
Each stencil test compares a pixel’s stencil value to a reference value using a specified function, adding a layer of programmable flexibility to your render. The flexibility here is immense: you can stencil only the inside of a shape, or everything outside it, or even build complex multi-pass effects like shadows or outlines by updating the stencil values dynamically.
Use Cases: When to Reach for the Stencil Buffer
Let’s dig deeper into specific scenarios where the stencil buffer isn’t just useful, it’s the ideal tool for the job.
Complex Masking in Arbitrary Shapes
Suppose you're working on a render that requires selective visibility, such as revealing only parts of a character through a magical window or masking off a complex environment behind an animated opening. Texture-based alpha masks can be limiting here, especially when the mask must follow intricate or dynamic shapes. This is where the stencil buffer shines. You can render a shape into the stencil buffer using precise polygonal geometry, effectively creating a pixel-accurate mask. Any subsequent draw calls can be configured to only affect pixels where the stencil test passes. It’s dynamic, geometry-aware, and especially powerful in layered compositions or special effects work.
Depth-Based Culling: Best Left to the Depth Buffer
While the stencil buffer offers fine-grained control over what gets rendered, it's not designed for managing pixel visibility based on distance from the camera. That job belongs to the depth buffer, or Z-buffer. Depth testing ensures correct object occlusion in 3D scenes by comparing the distance of new fragments to what’s already rendered. You can disable the stencil buffer while still relying on the depth buffer to maintain correct occlusion handling. The stencil buffer may be used alongside the depth buffer to refine certain visual effects, but when it comes to depth-based visibility, the Z-buffer remains the right tool for the task.
Custom Compositing for Render Passes and Overlays
In post-production or layered render workflows, the stencil buffer acts as a precise controller for isolating render passes. This becomes critical when creating effects like glows, UI overlays, or targeted lighting where only specific scene elements should be affected. Stencil-based compositing lets you mark regions during one pass and restrict later passes to those same pixels. This requires careful management of the stencil buffer value for each pixel across passes to avoid unintended overwrites. It’s like tagging parts of your render and telling the engine, "only modify these areas later." This level of control is especially useful in deferred rendering or when working with layered real-time effects.
Texture Masking: Better with Alpha or Shaders
If your goal is simply to mask or fade parts of a texture based on transparency or procedural effects, shaders and alpha channels are generally more appropriate than stencil operations. These tools offer smoother gradients, variable opacity, and easier integration with texture-based workflows. That said, stencil masking can complement these techniques. For example, use the stencil buffer to limit where the shader operates while still controlling how it behaves through texture maps. This hybrid approach lets you combine the speed of shader-based rendering with the logical masking control that only the stencil buffer can provide. The result is an efficient division of labor that benefits both visual quality and performance.
Creating Mirrors, Portals, and Alternate Views
One of the most compelling applications of the stencil buffer is in rendering portals and mirrors. These effects involve rendering alternate views into very specific areas of the screen. By using stencil values to define the boundaries of a portal or reflective surface, you can ensure that only those pixels are updated during the rendering of a secondary view. You would typically clear the depth and stencil buffer before rendering each portal pass to prevent artifacts. This makes it possible to convincingly simulate mirror reflections, security camera feeds, or interdimensional rifts with clarity and consistency.
Generating Stylized Outlines and Silhouettes
Stylized rendering techniques often require clean outlines to reinforce the shapes of characters and objects. One popular method is to use the stencil buffer to separate the model’s silhouette from the background. The result is a precise outline that hugs the model’s shape, unaffected by texture seams or lighting inconsistencies. By comparing stencil values in subsequent passes, you can render an object’s outline as a halo or stroke around its silhouette. It’s clean, customizable, and highly performant.
Practical Integration in the 3D Workflow
In many 3D applications, the stencil buffer is abstracted into more accessible tools like masks, object IDs, render layers, or material overrides. As an artist, you might not directly “set” stencil values, but if you’re organizing complex render passes or isolating objects for visual effects, you’re likely benefiting from stencil-like behavior under the hood. When programming directly in OpenGL, managing depth and stencil operations together allows for advanced per-pixel control and optimization. By recognizing how these features map to stencil logic, you can make more informed decisions when compositing, shading, or setting up layered scenes.
Stencil Buffer Management in Render Strategy
Stencil values persist throughout a render unless reset, which can cause artifacts if not managed properly. If previous stencil states are left active, effects may unintentionally overlap or bleed across frames. To avoid confusion and ensure consistency, it’s best to isolate your stencil-based effects and treat them as part of a broader render strategy that is planned, purposeful, and cleanly compartmentalized. Use stencil features sparingly and strategically, especially in real-time projects where performance and clarity are essential.
Conclusion
The stencil buffer is one of those quiet but crucial tools in the world of 3D rendering. It may not always be visible, but its impact can be dramatic when used correctly. From stylized shading to compositing, mirrors to magical portals, the stencil buffer offers a level of control that few other tools can match. Understanding how and when to use it will help you go beyond basic rendering setups, giving your scenes precision, polish, and an extra layer of creative potential. Whether you're working in OpenGL or a game engine that abstracts these operations, the principles of depth and stencil logic remain relevant across platforms. As with lighting, texture mapping, or camera work, mastery of stencil logic takes time but it’s a journey worth taking.
Register Now and Get $50 FREE Credits!