


Ever wish you had a more streamlined experience working on Architectural Visualizations in 3ds Max? Well you’re in luck, because in this article, CG BBQ maestro, Andrew will be sharing how he sets up his workspace for optimal archviz production!
Hi! I’m Andrew.

In this tutorial I will show you how to customize 3ds Max for modeling architecture. You will learn how to get rid of useless panels taking away precious workspace. Hotkeys and quick buttons will speed up your workflow. Other settings will help you manage your scene and work with the precision required in archviz.Let’s get started!
I’m going to create an architectural visualization to work with design drawings measured in real units like centimeters or inches. So I need to set these units in 3ds Max too.
I go to Customize>Units setup>System Units Setup, and here I have the system units scale.
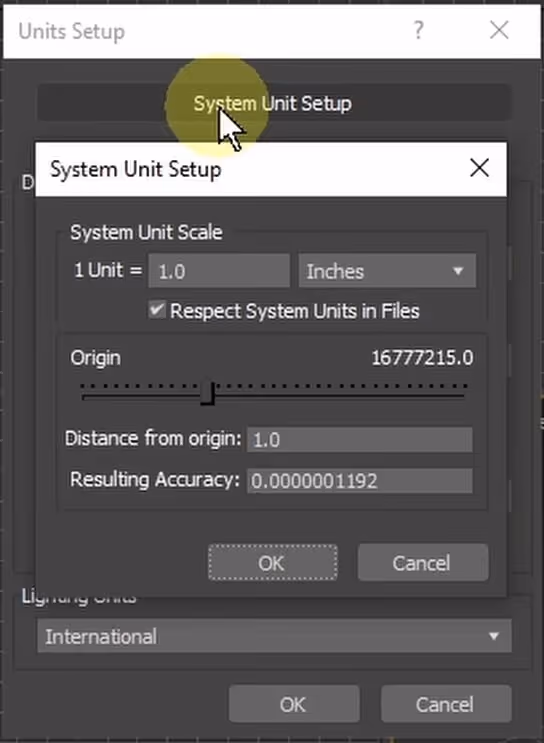
3ds Max will use these units for internal geometry calculations and distances in my scene. For example, these units will also be a reference for rescaling models imported from other 3ds Max scenes or software like Archicad.
It’s essential to set these units according to the scale of objects I'm working with.
So, for example, I shouldn’t set them as millimeters if I’m modeling an object 10 kilometers wide.
This is because computers have problems calculating huge numbers and very small decimals, so I can experience issues working in the viewport and rendering when they get very long.
I can check the accuracy of the units in System Unit Setup, but I’m not going deep into the settings of the calculator available there. You can check how it works in 3ds Max help.
For modeling architecture centimeters or inches are acceptable. I will set my units to centimeters.
Another important thing is that system units shouldn’t be changed after I create or import any object. It can cause problems with accuracy of models and distances in my scene.
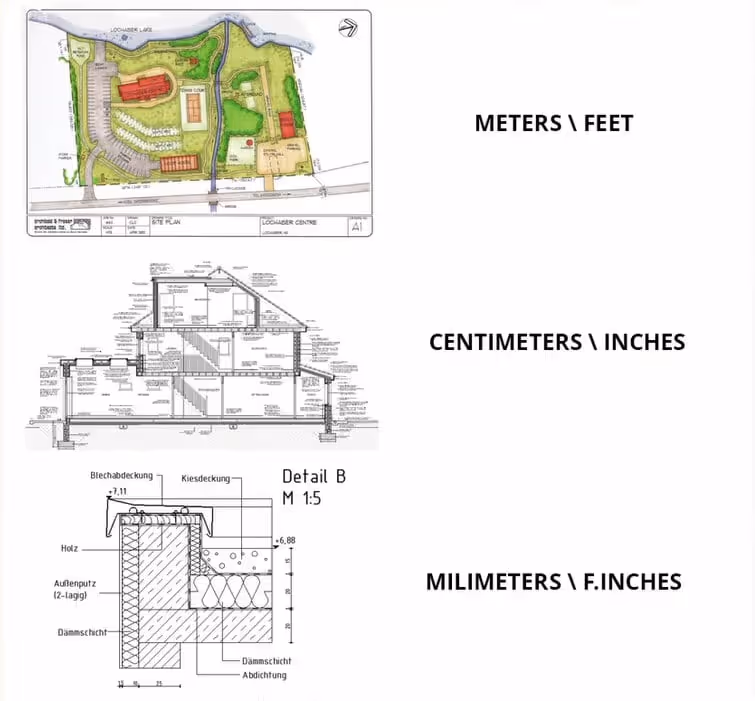
At some point I may move from modeling the main architecture features to modeling little construction details or modeling the site plan. In this case I will probably work with drawings measured in different units, like meters or millimeters.
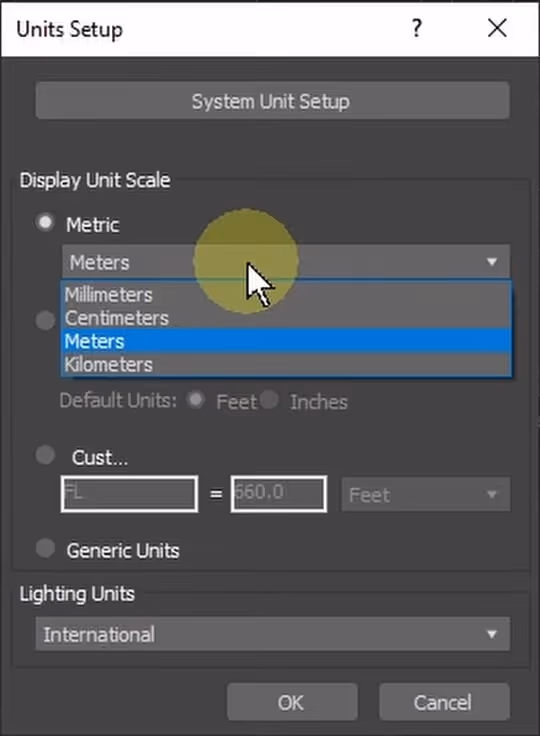
I can just change the display units scale to make my work easier.
Right now, it’s set to meters, but I can change it to centimeters, inches or any other unit. I can change display units scale back and forth as I like with no consequences because these settings won’t affect the System Unit Scale.
I will model a building using architectural drawings as references, so I will need to constantly switch between different views. I don’t want to click on the viewcube all the time or choose views from the viewport list, so I will use hotkeys.
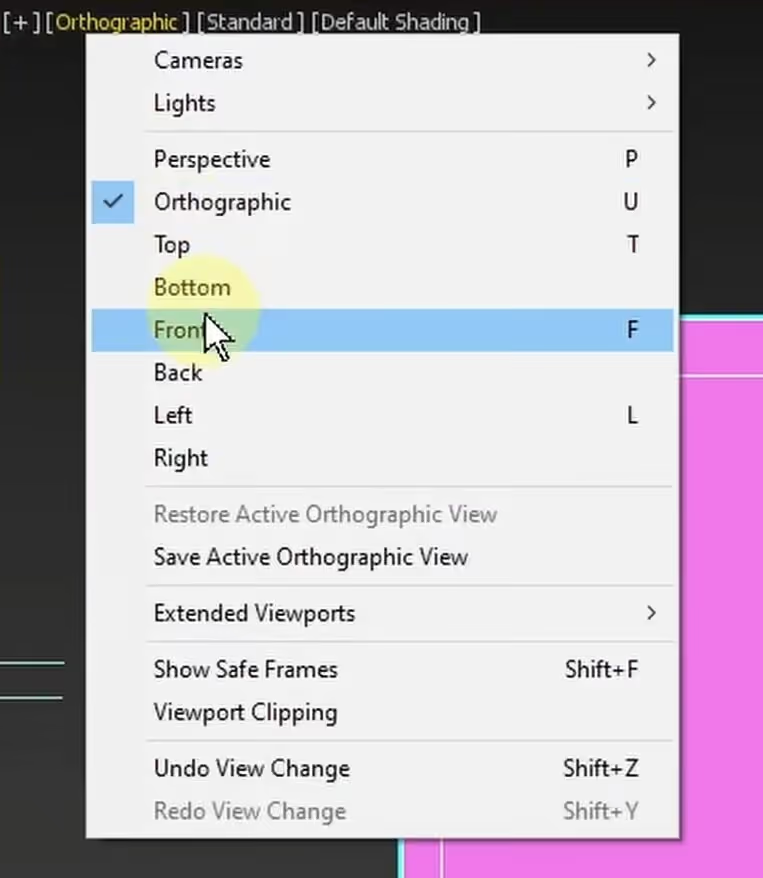
As you can see above the hotkeys for different views are listed here, but they are missing for the Bottom, Back and Right view. I will add the missing hotkeys in Customize>Hotkey Editor. In older versions of 3ds Max, you can set them in Customize>Customize User Interface>Keyboard.
I need to choose some letters, and almost all of them are taken right now, so I may need to steal a letter from other hotkeys, which I’m not going to use.
Here I can choose between searching for hotkeys and actions. I can check what other actions are using a given hotkey if I click Hotkeys and type the hotkey in this field.
For example, ‘O’ is linked to the Adaptive Degradation option in the Main user interface.
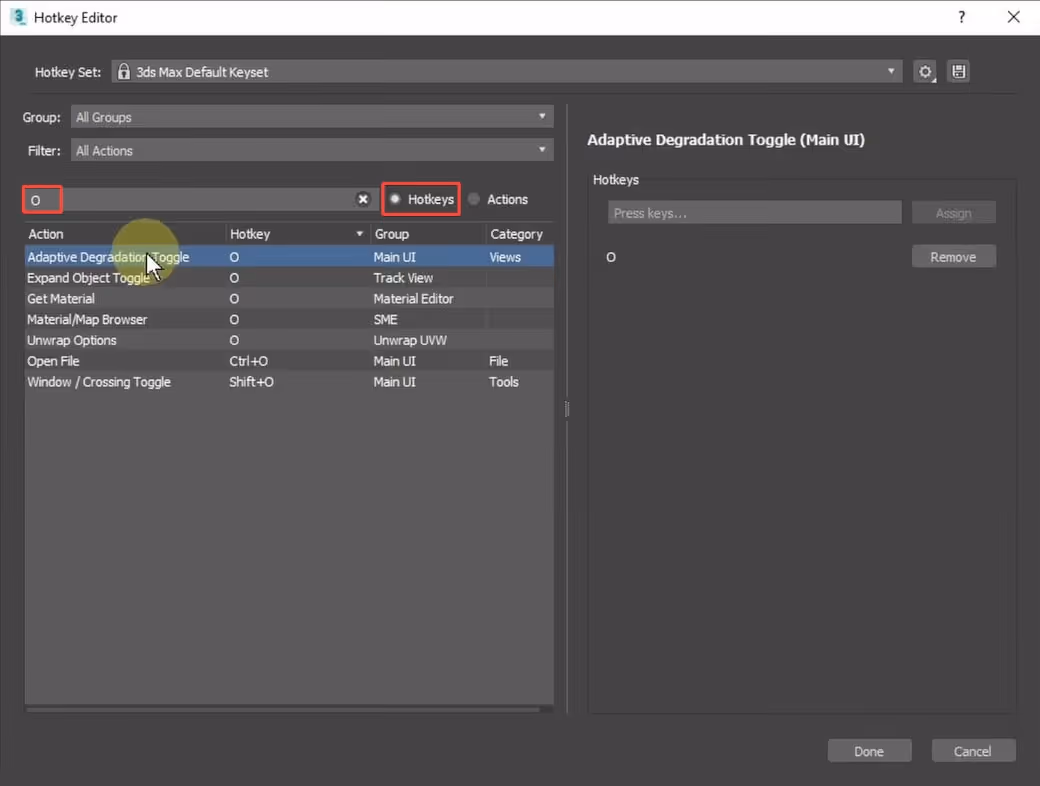
So I will click on Actions again, look for these three missing views and assign hotkeys to them.
I input “O” as a hotkey for the bottom view and click remove the Adaptive Degradation Toggle since I won’t need it for this project,and then click assign.
For the right view, I will use a semicolon. I couldn’t find any good letter for it, but because it’s just next to the Left View hotkey (L), I think it will be easy to remember. I will use the single quote for the back view since any action in the main UI does not use it. In the end my hotkeys for views will look like this:
Bottom View: o
Right View: ;
Back View: ‘
One thing which is essential to remember is that some hotkeys are used both in Main User Interface and in different tools.
For example, if I would like to use the B for Back View, there is no Main UI action using this letter, which means I could use it, in theory. But it wouldn’t work when I edit the Editable Poly because the letter is used for other actions.
I can switch between local and Main UI hotkeys with the button below, but it’s counterproductive to use it every time I want to switch a view.

Since I’m going to model architecture 3ds Max measure tool may come in handy. Let’s add a hotkey to it.
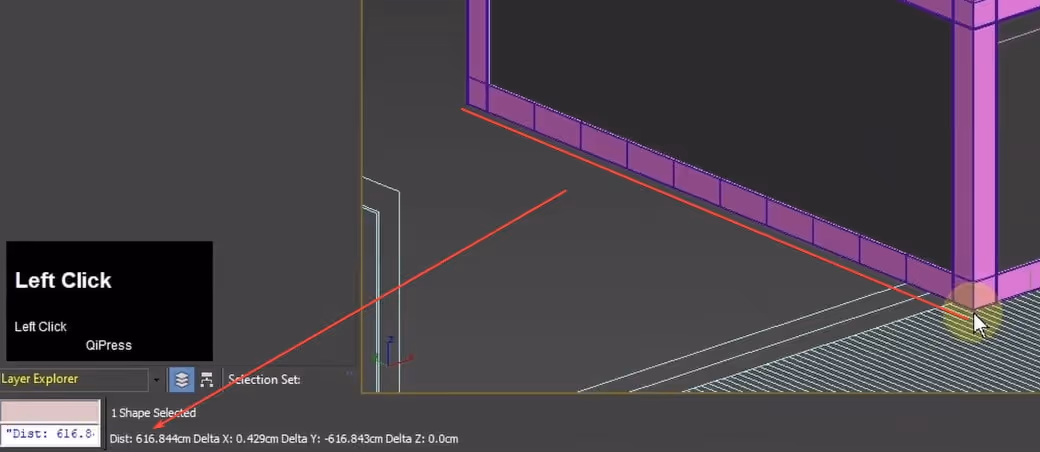
It’s located in Tools>Measure Distance.
So when I use it I can choose two points and I will get distance in display units. It shows in the left bottom corner of the Max interface.
I will set “Shift+` (backquote)” as a hotkey for it.
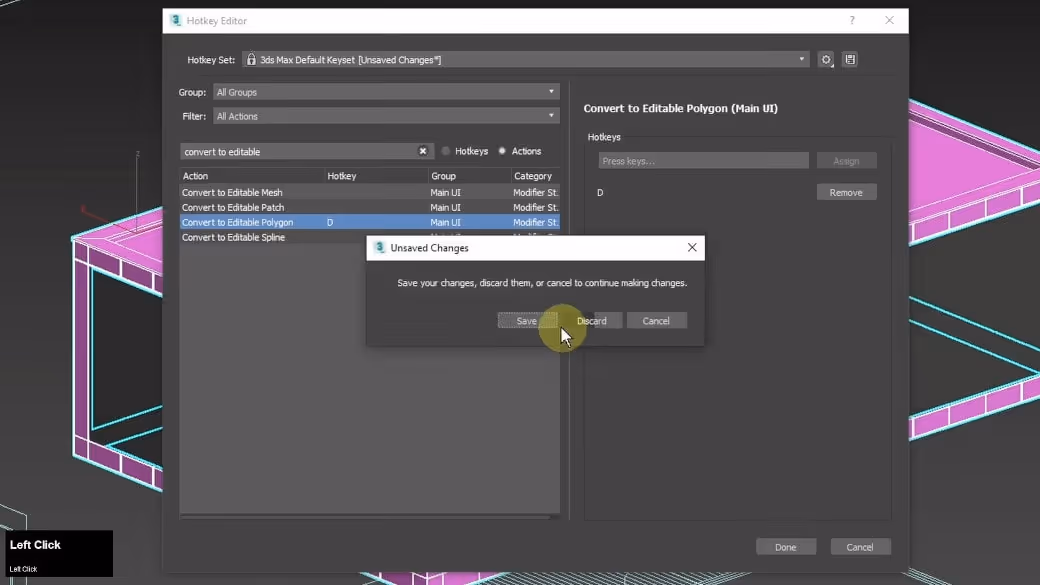
I’m going to create models using different tools and very often I will convert them to editable poly. I'm going to use it a lot, and without a hotkey I would need to click a lot in the viewport or on the modifiers stack.There is no default hotkey for it, so let’s fix it.
Let’s type the command name on the Action list in the Hotkey Editor and assign a D letter. It's not used by any action in the Main User interface. It will speed up my work a lot.
And when I’m done with setting up the hotkeys, I can save them to a file so I can use them later in a similar project.
I will need precision in my modeling, so I will use snaps all the time. Now let’s configure them.
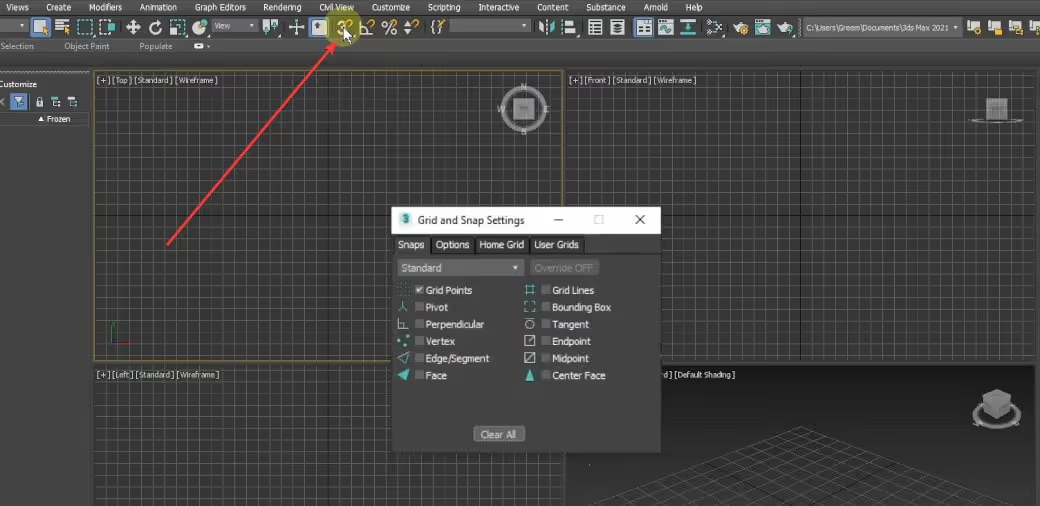
I right-click on the Snaps icon and here I tick off the Grid Points because I’m not going to snap to the grid. But instead I turn on Vertex, then in Options I turn on Snap to frozen objects and Enable Axis Constraints.
The frozen objects will be my reference images, so I don’t want to move them by mistake.
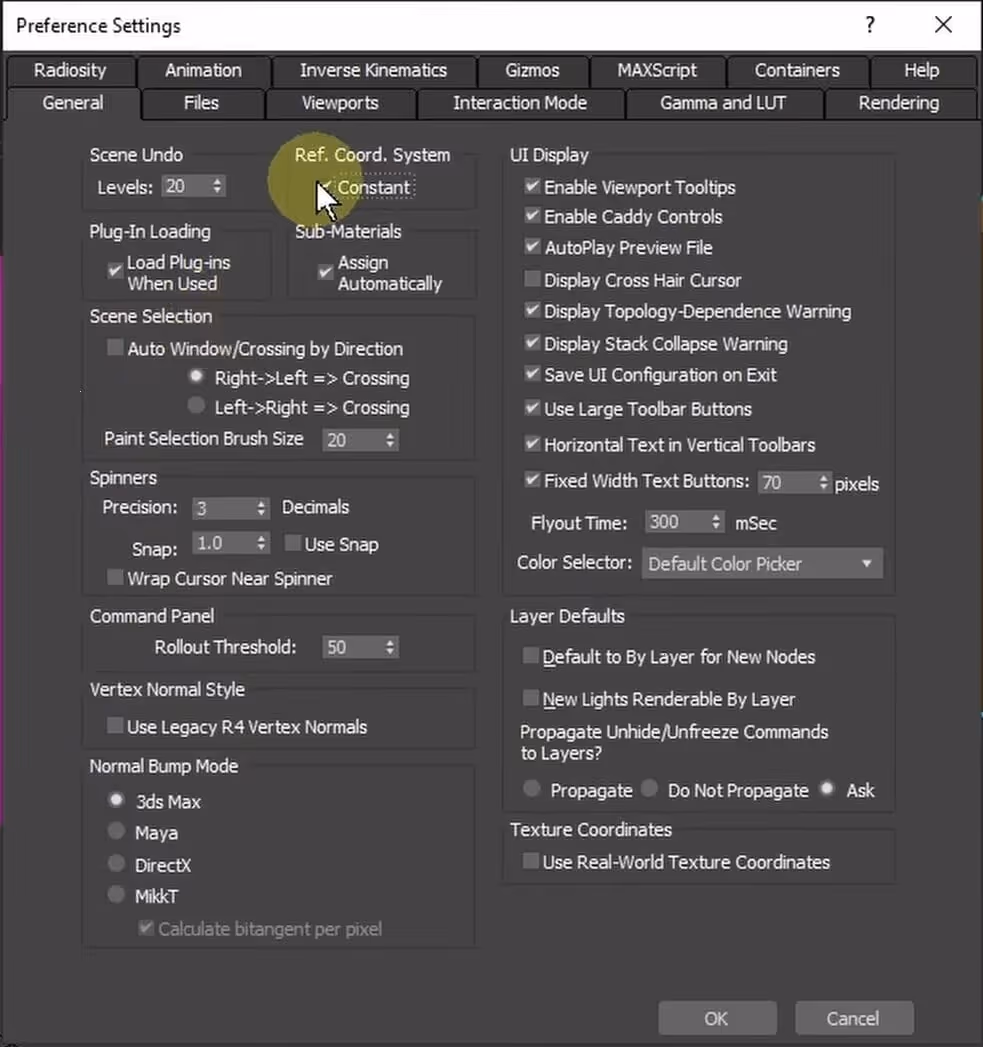
I don’t like the default Reference Coordinate System setting which reverts every time we switch transformation types like move or rotate. To get around this, I will set a constant Reference Coordinate system in Customize/Preferences, so it will stay the same when, for instance, I change the action from move to scale.
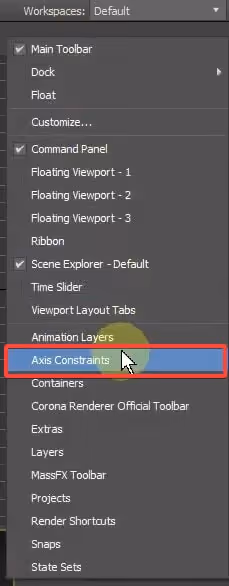
I will customize my general graphic user interface. There is a lot of stuff there that I don’t use, and it takes precious space.
I start from the default Max template then turn off everything from the Main User Interface except the Main Toolbar, Command Panel, and Scene Explorer. Still, I add the Axis Constraints bar because it sometimes comes in handy when constraints don’t work automatically when I use snaps.
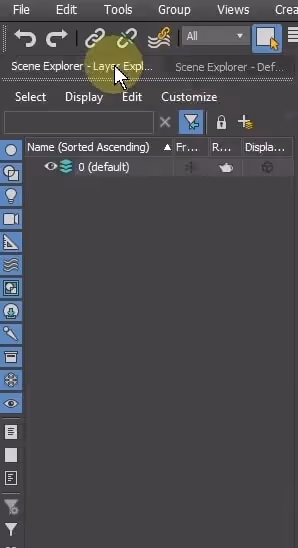
I also turn off the ViewCube under Views/ViewCube, I hardly use it, and add a Layer Explorer under Tools/Layer Explorer. I can then group it with the scene explorer and easily click through them.
I will use some modifiers very often, so I will set them as quick buttons.
I click Show Buttons and click on Configure Modifiers Sets to set up my buttons.
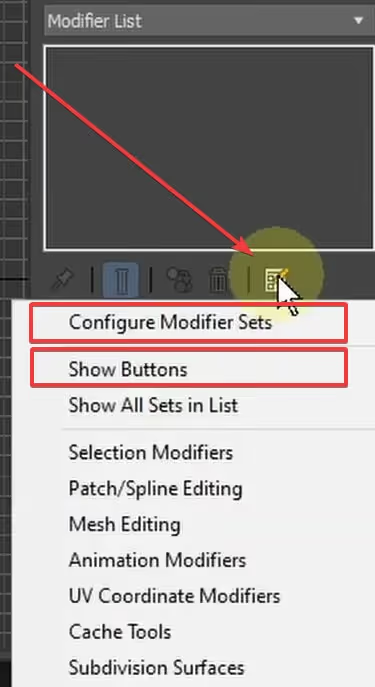
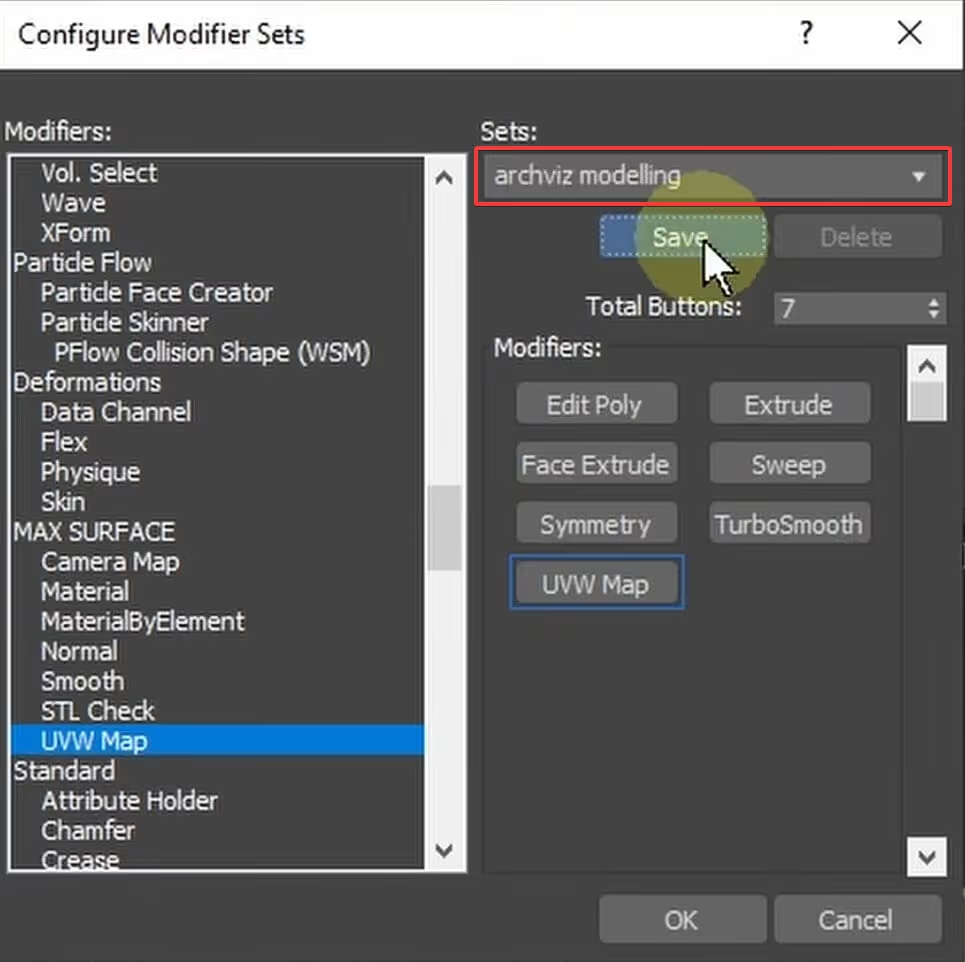
There are many sets of modifiers here. I will take one and overwrite it with my buttons, then I save them as a new list.
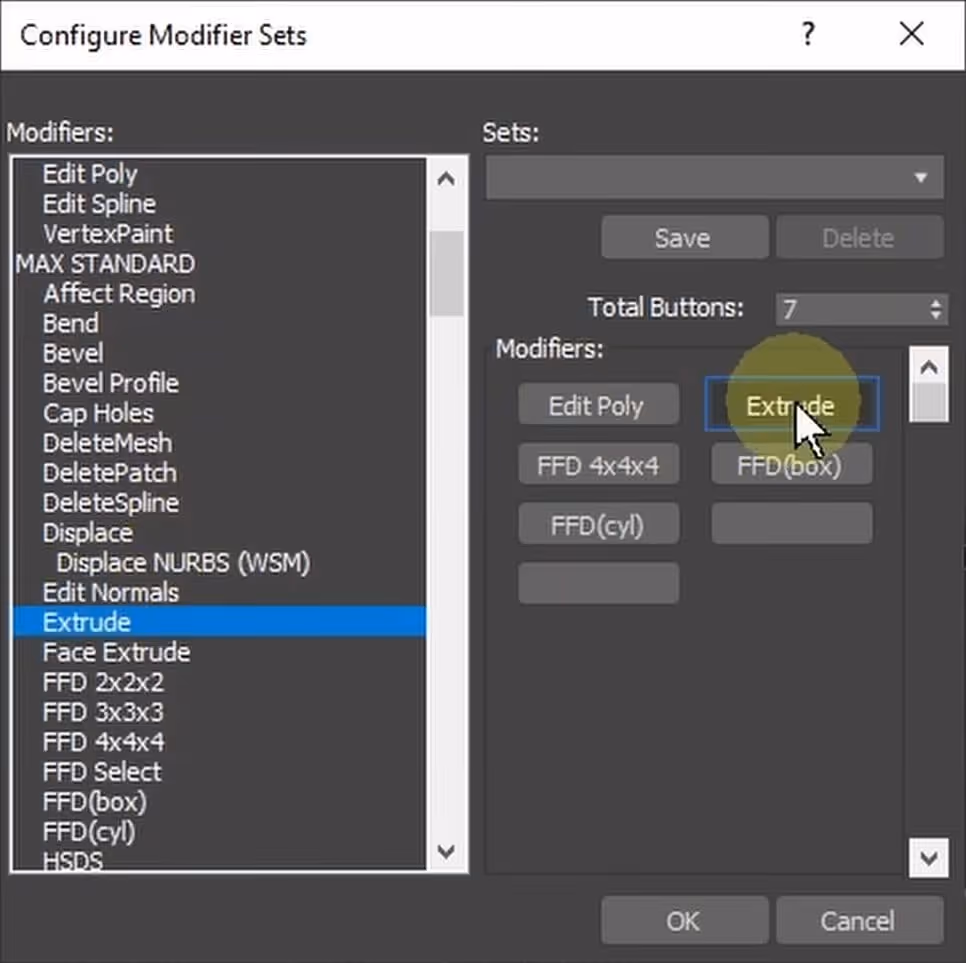
My buttons are now visible on the modifier list. The grayed out ones are the ones I can’t use with the currently selected object.
- TurboSmooth
- Sweep
- UVW
- Extrude
- Face Extrude
- Edit Poly
- Symmetry

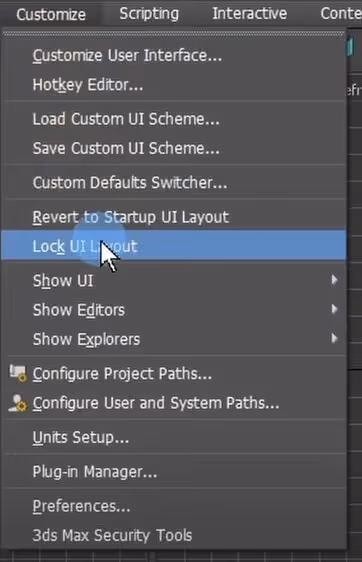
Do you sometimes find that you undocked a toolbar in the zeal of work and had to dock it again carefully? Let’s prevent that!
I will go to Customize and activate Lock UI Layout so I won’t undock any element by mistake.
These 8 steps are enough to save you loads of time and frustration, but if you want even more, check out the full version of this tutorial over at CG BBQ’s Youtube Channel! I hope these tips help you work faster and more effectively. Happy rendering!
Register Now and Get $50 FREE Credits!