by Sabrina Fachetti
Embarking on the journey of 3D creation and design, artists often seek tools that not only elevate their work but also streamline their creative workflows. Among the plethora of tools available, ZBrush has long stood out for its unparalleled sculpting capabilities, offering a virtual canvas for artists to sculpt with digital clay. However, the real magic begins when ZBrush's intricate detailing meets the robust rendering and animation prowess of Cinema 4D, especially when powered by a Cinema 4D Render Farm.
This synergy is further enhanced by Maxon's strategic acquisition of Pixologic, promising an even more seamless integration between the two powerhouse applications. This article dives into the heart of this integration, exploring the combined strengths of ZBrush and Cinema 4D.
ZBrush is a powerful and innovative digital sculpting software that has revolutionized the field of 3D modeling and design. Developed by Pixologic, ZBrush provides artists and designers with a dynamic platform for creating highly detailed and intricate three-dimensional models. What sets ZBrush apart is its unique approach to sculpting, allowing users to work with a virtual clay-like material in a way that closely mimics traditional sculpting techniques.
The software's advanced features, such as its dynamic subdivision system and intuitive brushes, empower artists to unleash their creativity and produce stunningly realistic and imaginative digital sculptures. Widely embraced in various industries, including film, video games, and digital art, ZBrush has become an indispensable tool for artists seeking to push the boundaries of digital sculpting and design.
In January 2022 Maxon, developer of professional 3D software solutions, completed the acquisition of all the assets from Pixologic including the developing team, bringing decades of 3D industry expertise onboard and paving the way for an amazing integration between ZBrush and Cinema 4D.

Maxon's strategic move to enhance the synergy between Cinema 4D and ZBrush has significantly streamlined the creative workflow for 3D artists and designers. While both software applications maintain their distinct focuses, Maxon introduced a bridge tool that facilitates seamless asset transfer between Cinema 4D and ZBrush. This integration not only preserves the unique strengths of each platform but also allows users to harness the power of both in a complementary manner.
Artists can now effortlessly transition their sculpted creations from ZBrush to Cinema 4D, leveraging the strengths of ZBrush's intricate detailing and Cinema 4D's robust rendering and animation capabilities. This bridge tool not only expedites the creative process but also enables a more fluid and efficient collaboration between the two powerful software solutions, enhancing the overall quality and flexibility of 3D design projects.


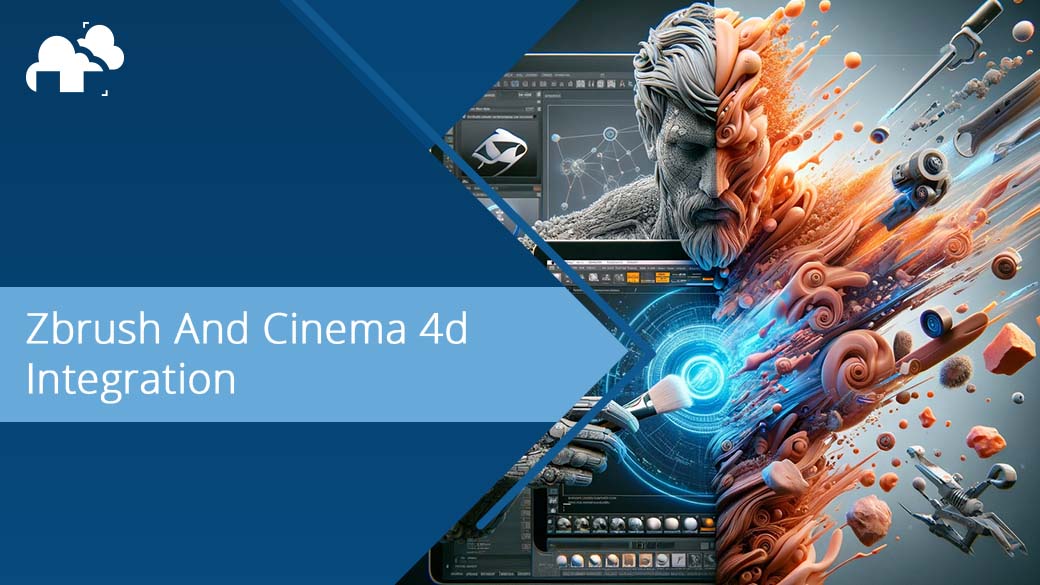
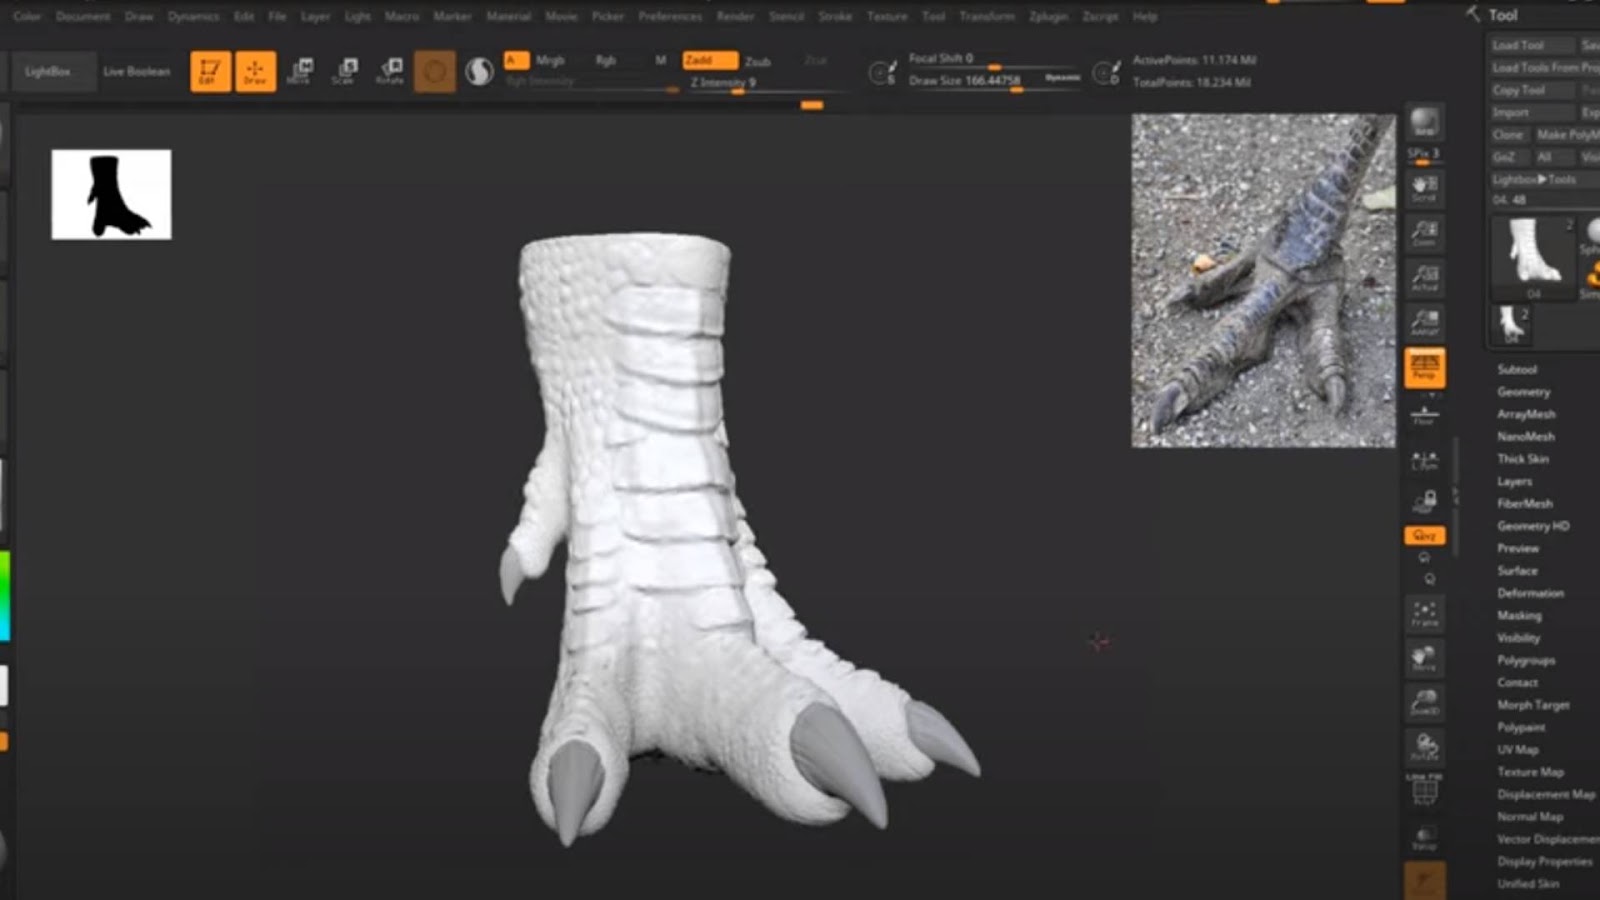
At its core, ZBrush excels in sculpting, particularly in the realm of character design, offering artists an expansive canvas to bring their imaginative visions to life. The software's extensive library of brushes is a testament to its versatility, allowing creators to achieve a staggering level of detail in their work. The ability to customize these brushes enables artists to tailor their tools precisely to their needs, providing an unprecedented level of control over the sculpting process.
This high degree of customization proves invaluable in capturing the intricacies of characters, pushing the boundaries of realism. Moreover, ZBrush's mapping materials feature enhances the overall rendering experience, allowing artists to apply and manipulate textures seamlessly, adding another layer of depth and authenticity to their creations.
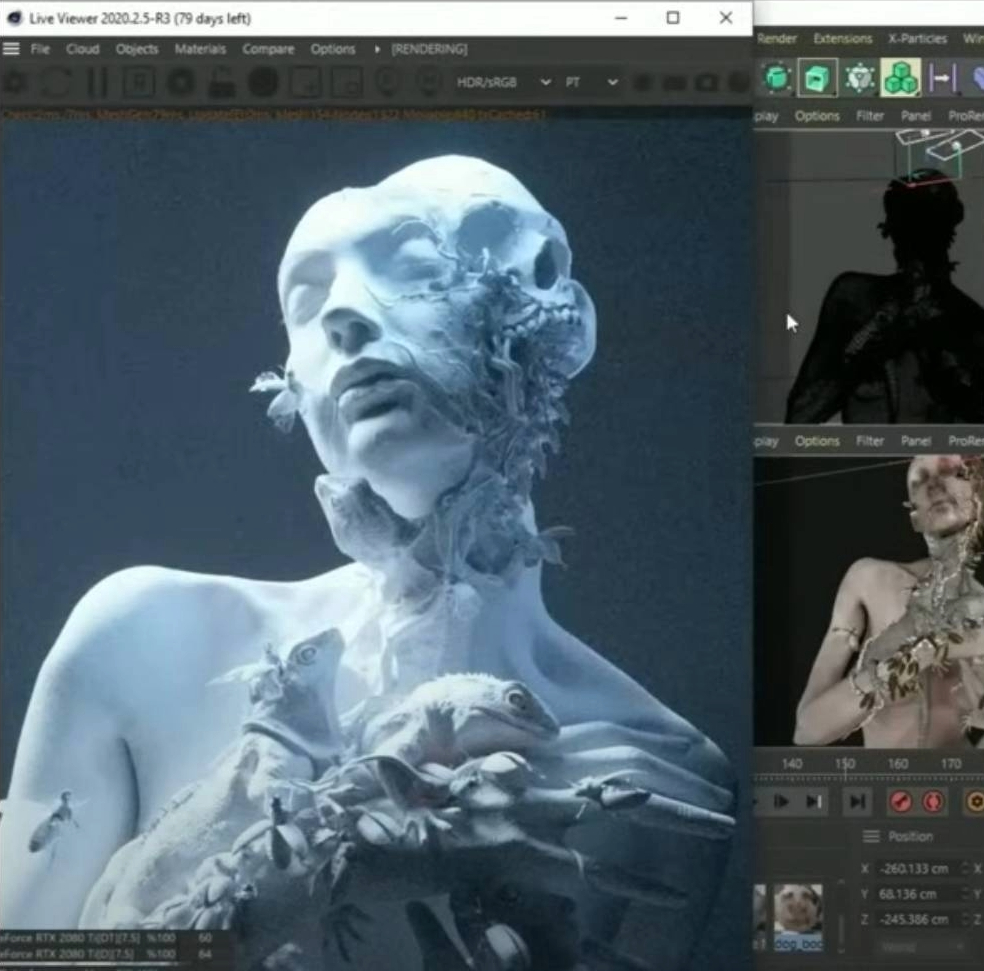
The exceptional integration between ZBrush and Cinema 4D in the end provides artists with an extraordinary level of flexibility and efficiency in their creative workflow. The ability to fluidly transition between these two powerful software platforms enables artists to add, edit, and refine elements with unparalleled ease. This dynamic interchange facilitates a back-and-forth process, allowing for adjustments and enhancements in ZBrush before seamlessly transitioning to Cinema 4D for scene composition.
The workflow between ZBrush and Cinema 4D seamlessly integrates the strengths of both software, providing a robust pipeline for character creation. In Cinema 4D, one can begin with a character either by downloading a pre-existing model or by constructing it entirely from scratch. The software's user-friendly interface makes it easy and intuitive to rig the character, incorporating bones and joints for animation and posing. Once the main pose of the figure is established, the GoZ feature facilitates a smooth transition to ZBrush.
Through GoZ, the Cinema 4D file is sent directly to ZBrush, where artists can refine the pose, add intricate details, and apply textures with precision.
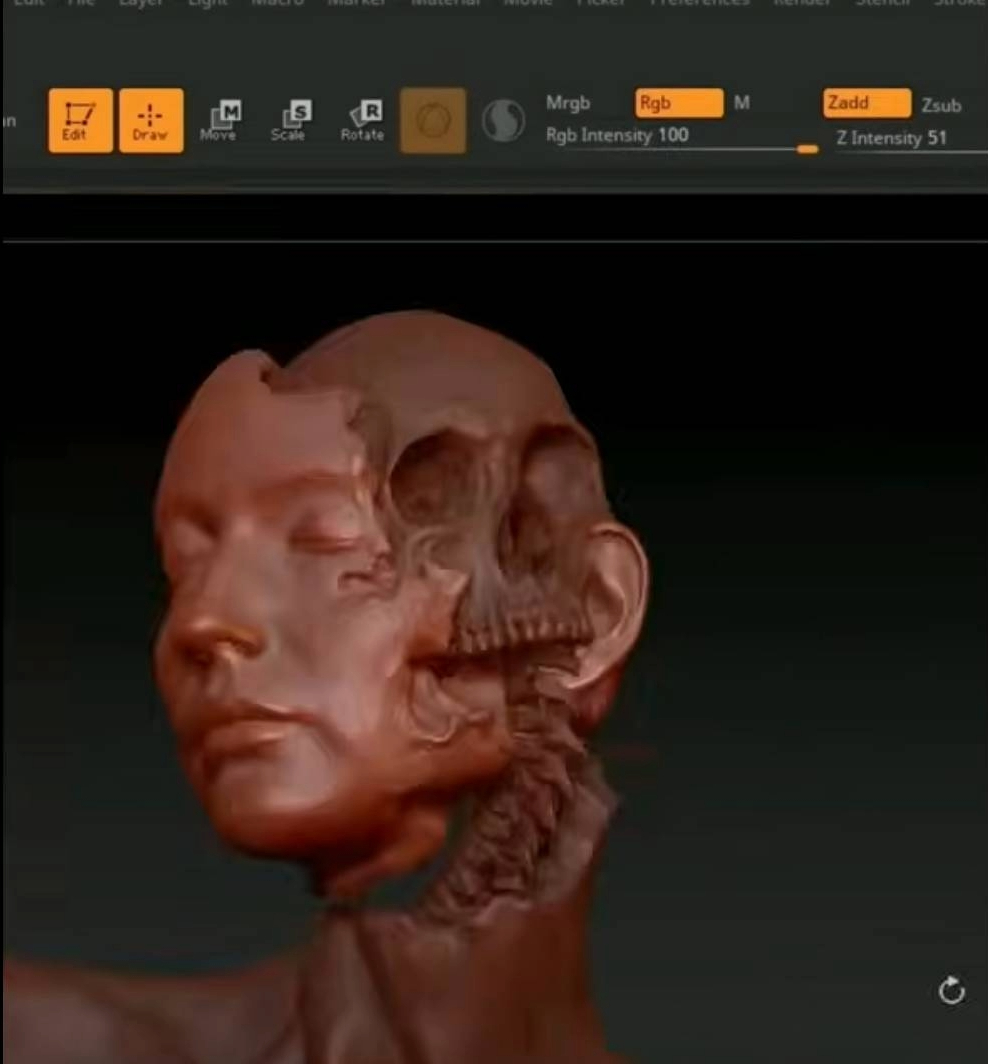
Following the sculpting and refining process in ZBrush, the workflow seamlessly extends back to Cinema 4D for composition and the incorporation of additional elements into the project. Once satisfied with the intricate details and sculpting finesse achieved in ZBrush, artists can effortlessly send the file back to Cinema 4D. This interoperability ensures a smooth back-and-forth process between the two software, allowing for the addition of new elements, environments, or effects within the familiar Cinema 4D environment.
The dynamic interplay between the softwares elevates the potential of digital artists allowing a deeper and more sophisticated integration of the different elements.
While in Cinema 4D, elements are composed and arranged to establish the foundational structure of the scene, it is in ZBrush that these elements truly come to life. ZBrush allows for the deformation, sculpting, and meticulous detailing of each component, breaking away from the regularity that often characterizes independently created elements, introducing a higher level of realism and coherence and ensuring that elements not only fit within the overall composition but also interact with each other organically.


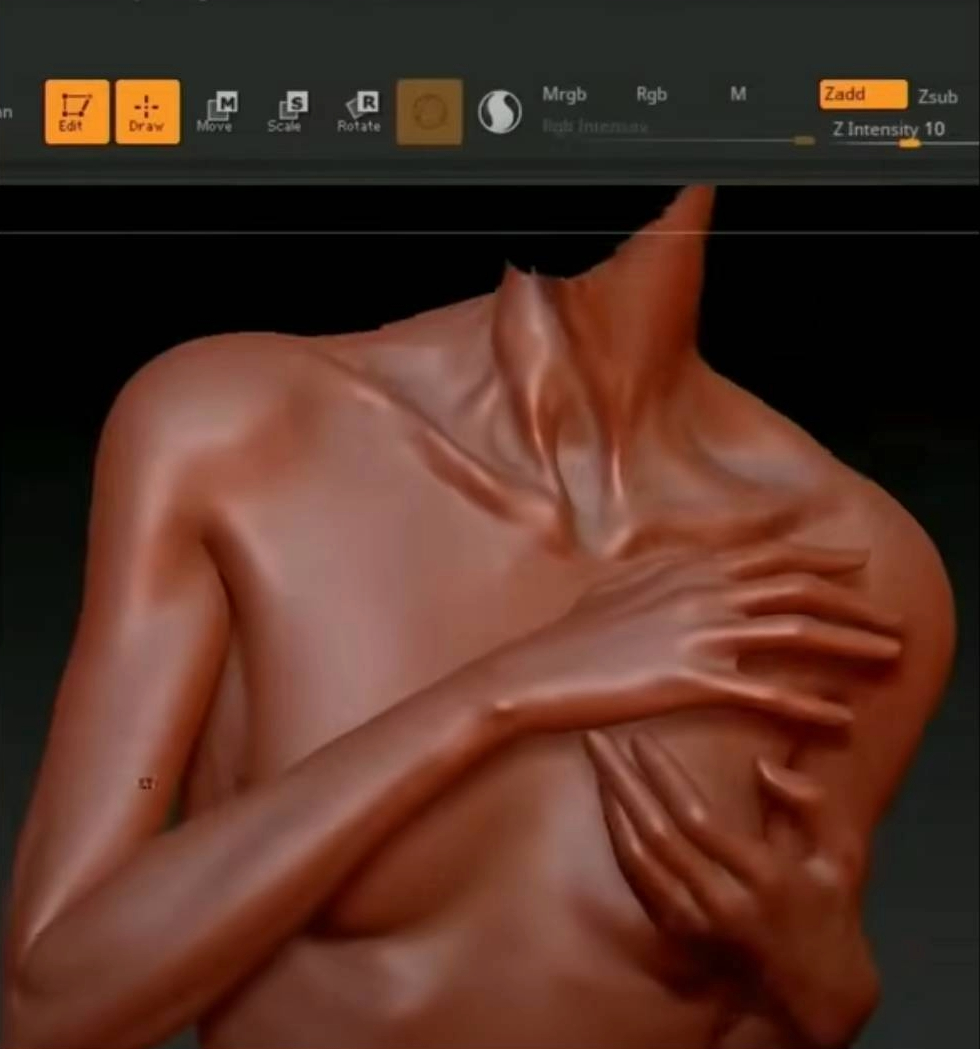

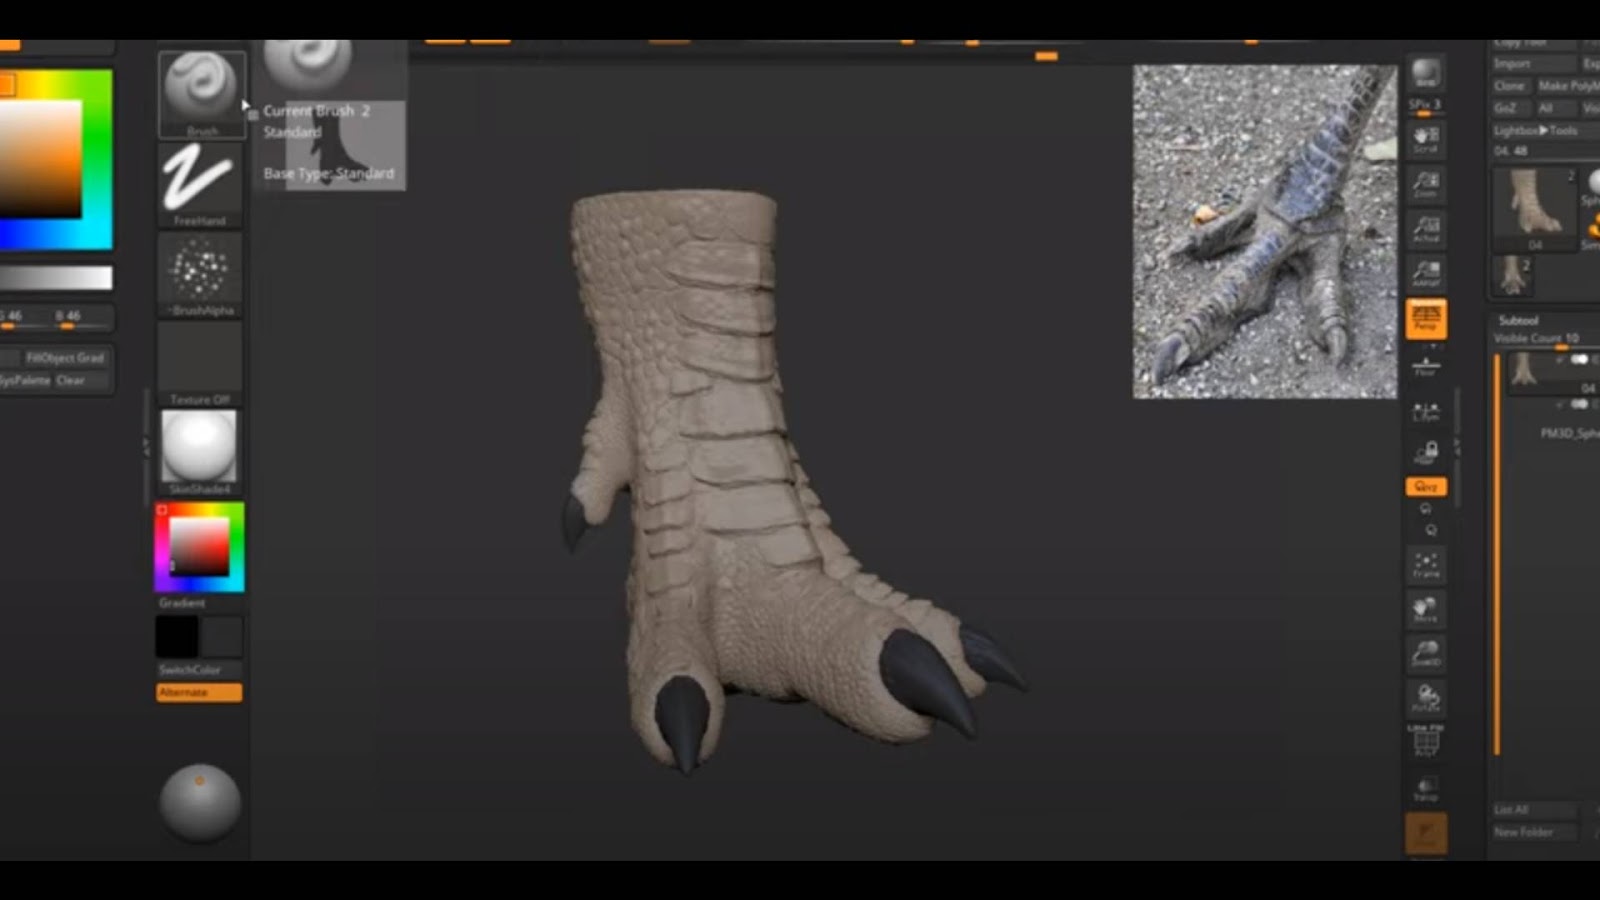
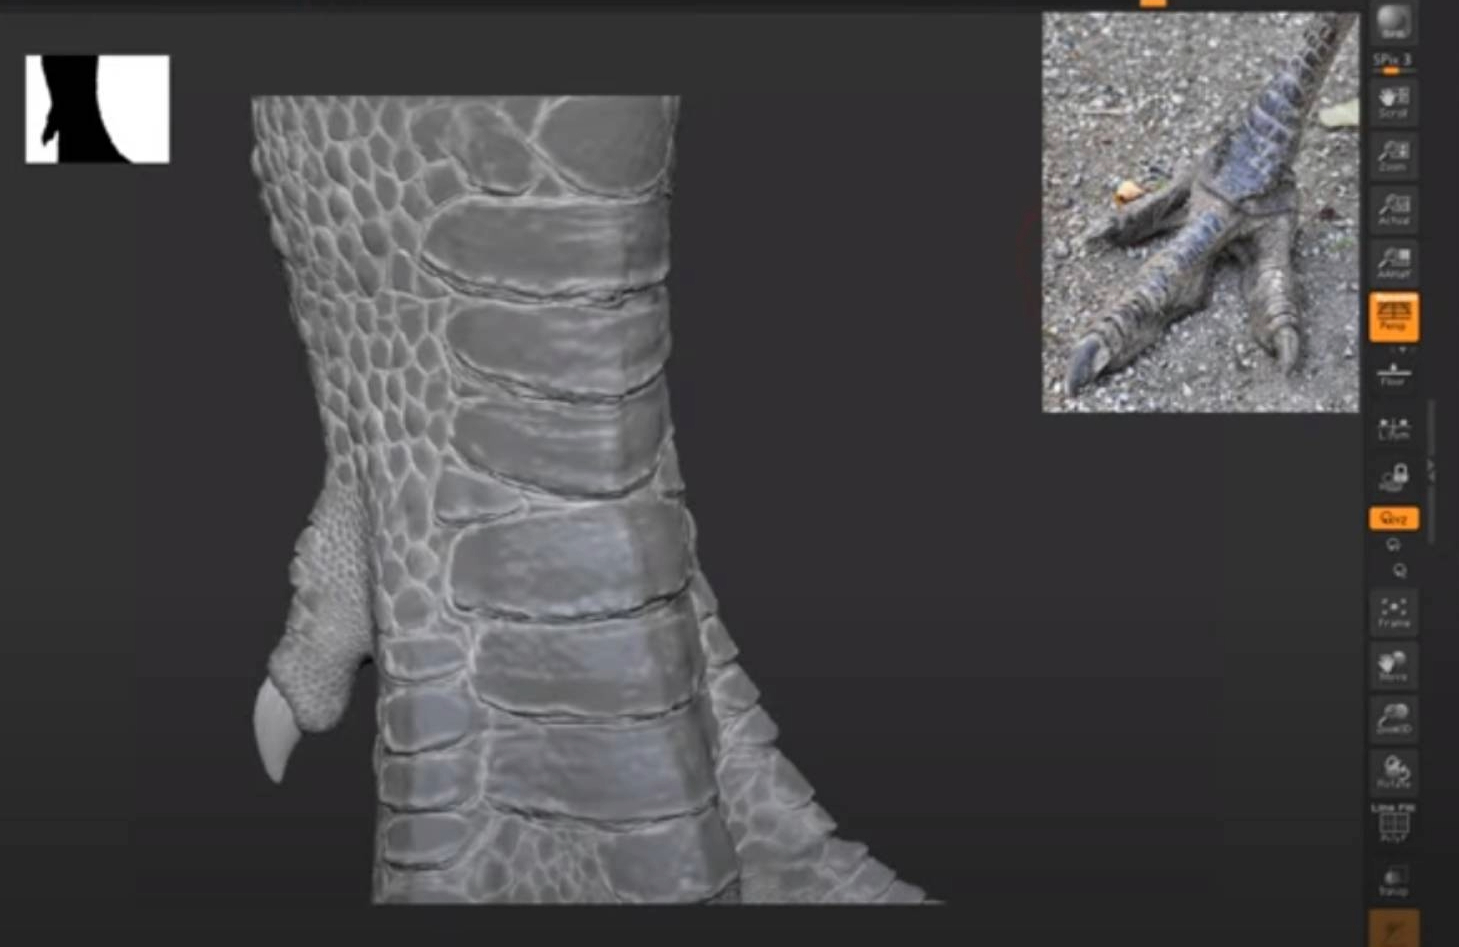
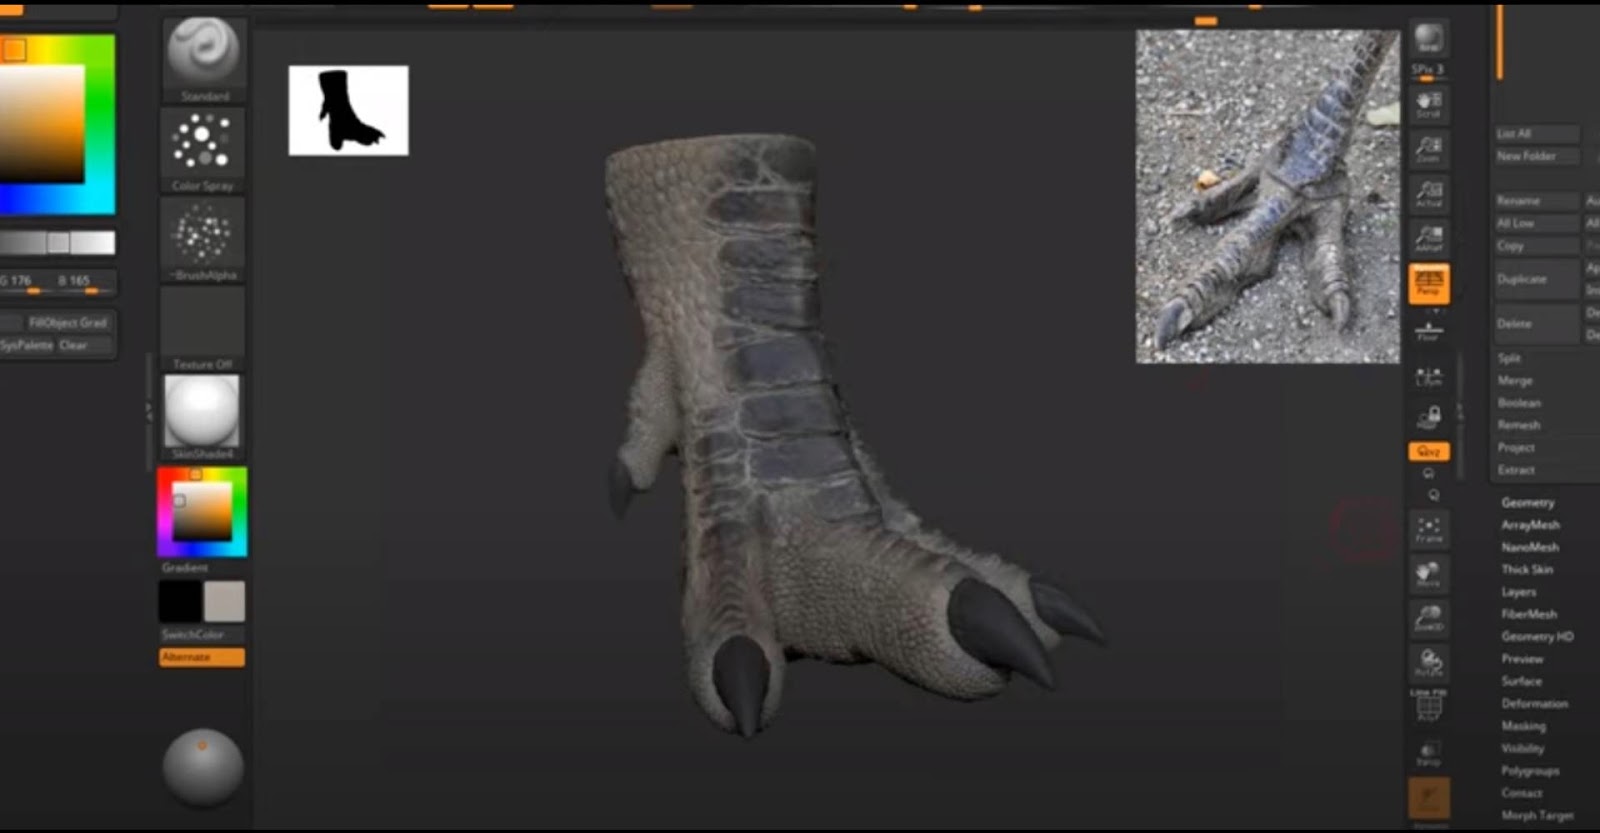
In the texturing process of ZBrush, once the sculpting and detailing stages are complete, artists embark on transforming their 3D models into visually captivating masterpieces. The journey begins by applying a base material and color to ensure an even surface, providing a foundation for subsequent colors and details.
To achieve the desired effect, a meticulous approach involves the strategic use of various brushes and colors, gradually building up details. It's crucial to maintain a reference for the intended material throughout this process, ensuring focus and accuracy. ZBrush's masking tools, including both regular and inverse masks, become indispensable at this stage.
These masks allow artists to selectively apply or exclude details, contributing to a higher level of realism. By leveraging masks, artists can add fine details with precision, creating intricate patterns and textures that enrich the overall visual appeal of the 3D model in a back and forth process that can be iterated as many times as necessary.

ZBrush boasts remarkable capabilities in simplifying the workflow for texture mapping through its efficient unwrapping tools. After meticulously sculpting and detailing a 3D model, ZBrush allows users to unwrap the model's UV maps into flat image files. These files can be seamlessly imported into external editing software, such as Photoshop, enabling artists to conduct further editing, detailing, and customization with precision. This integration between ZBrush and Photoshop facilitates a comprehensive texturing process, empowering artists to refine and enhance their textures in a familiar and powerful environment.
Once the edited textures are finalized, they can be effortlessly brought back into ZBrush for application to the 3D model. Furthermore, the unwrapped and edited textures can be seamlessly transferred to Cinema 4D, where they play a crucial role in rendering the entire scene. This streamlined and interoperable process ensures a cohesive and efficient pipeline, allowing artists to bring their imaginative creations to life with intricate details and visual richness in the rendering phase within Cinema 4D.


Another way to add extra details or graphics to the characters is by using ZBrush's Morph UV tool. After unwrapping and flattening the UV map, the Morph UV tool allows users to directly paint and sculpt onto the 2D representation of their 3D model. This enables the addition of extra details with precision and control. Once the painting and sculpting are complete, the Morph UV can be "unmorphed," seamlessly updating the original 3D file with the additional details from the 2D map.


In conclusion, the synergy between ZBrush, Cinema 4D, and also Photoshop presents a powerhouse of creative tools that significantly streamlines the digital artist's workflow. ZBrush's sculpting prowess, coupled with its efficient UV unwrapping and Morph UV capabilities, allows for meticulous detailing and texturing.
The seamless transition from ZBrush to Cinema 4D facilitates the integration of 3D elements into a cohesive scene, while the option to export UV maps to Photoshop ensures a versatile platform for fine-tuning textures. This fluid interchangeability not only simplifies file preparation but also liberates artists to focus more on their creative vision. The ability to effortlessly move between these software platforms opens up new realms of possibility, enabling artists to experiment, refine, and perfect their creations with unparalleled flexibility, ultimately enhancing the overall artistic process.


