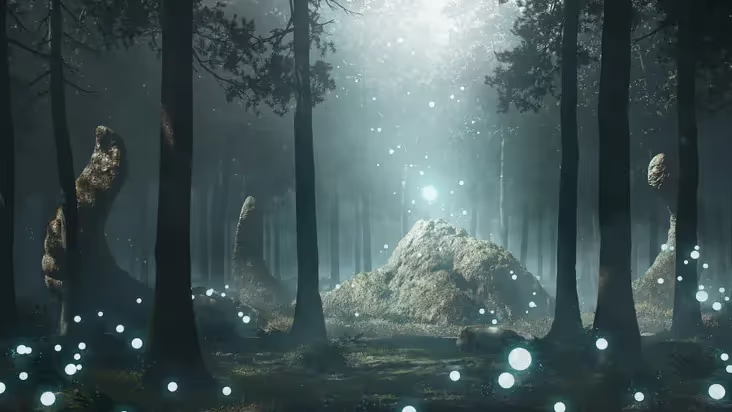
Some time ago, we had the pleasure of having Arnaud Imobersteg render his Forest Creature scene with us for a collaboration we had involving Julius Harling’s Graswald. He has since published this article on his Art Station profile, and we thought it would be nice to revisit his work and publish it on our blog for you. Arnaud is a skilled and imaginative Blender artist, and in the spirit of celebrating Blender’s game-changing 2.80 release, as well as all the amazing new features coming in 2.81, we bring you this throwback! Here’s Arnaud’s walkthrough of how he created the amazing “Forest Creature” scene!

In this making-of, I will be showing some techniques using the Graswald add-on with some assets to create a forest in Blender. Graswald is a brand new product designed especially for Blender, but also usable in other software that allows particle distribution of premade instances like realistic grass, moss, dead leaves, flowers…
Graswald makes creating a highly realistic natural terrain, fast and easy with its presets, which provide means to make the grass dry, or wet, with varying density and so on. Although this add-on is not needed to make such a nature scene, it speeds up the creation process and comes, with ready-made shaders too. So, I highly recommend it.
I’ll give further information as I go along, so let’s begin!
First, we need to have a basic idea of what we really want to create, that sounds quite obvious but having a clear idea always helps us focus on the right subject. So using references there could define better the area of the subject and ideas regarding composition, colors, lighting, mood and so on
Here are some examples of the ones I used.
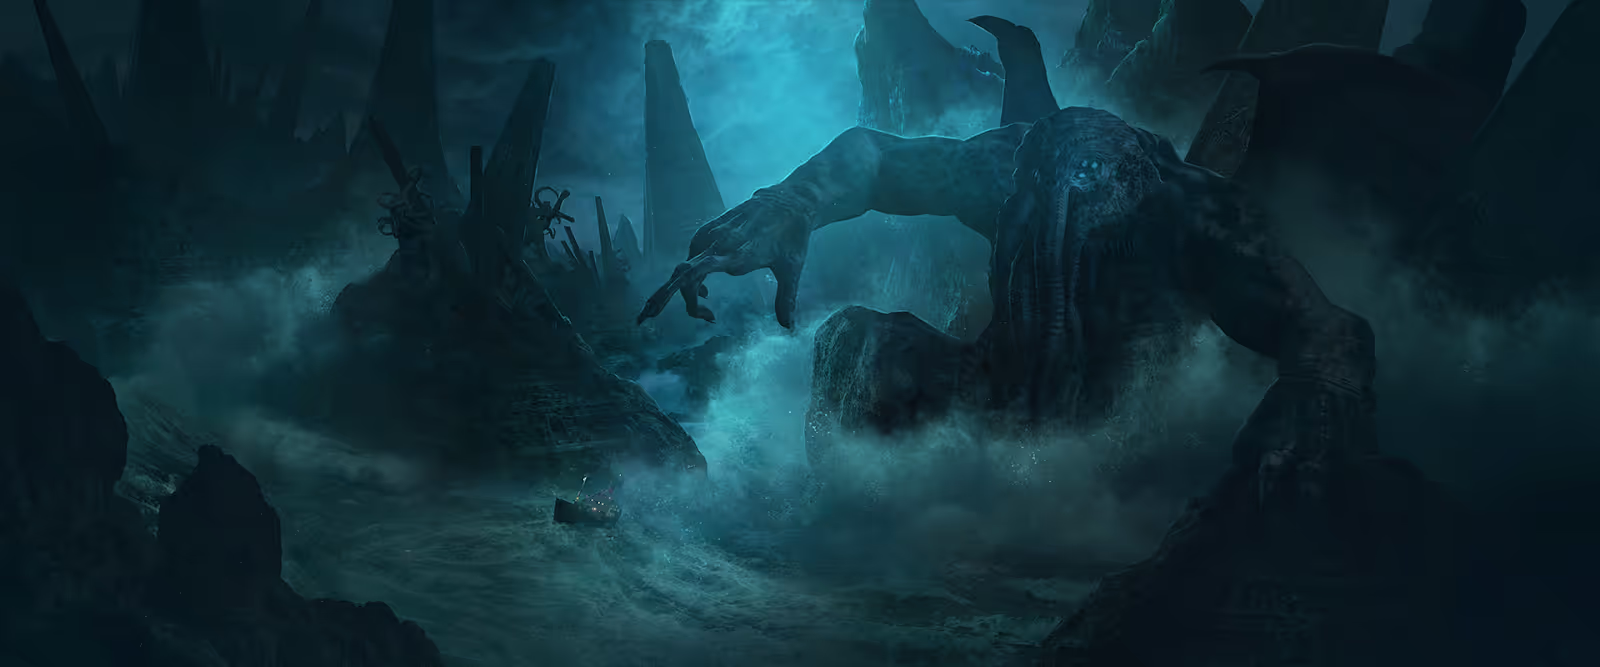
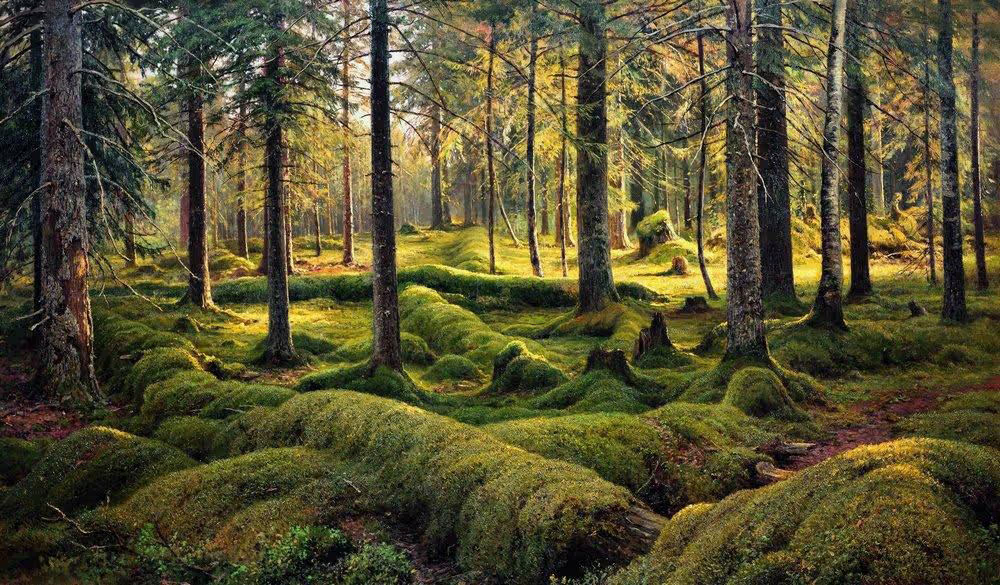
Graswald as said, automates the creation of the terrain to a considerable extent, but composition for a nature scene like the reference also requires trees, maybe bushes, rocks, branches or whatever…
You’ll need to build or use a proper library of assets corresponding to the environment you’re looking for.
So here are the ones used in this project:
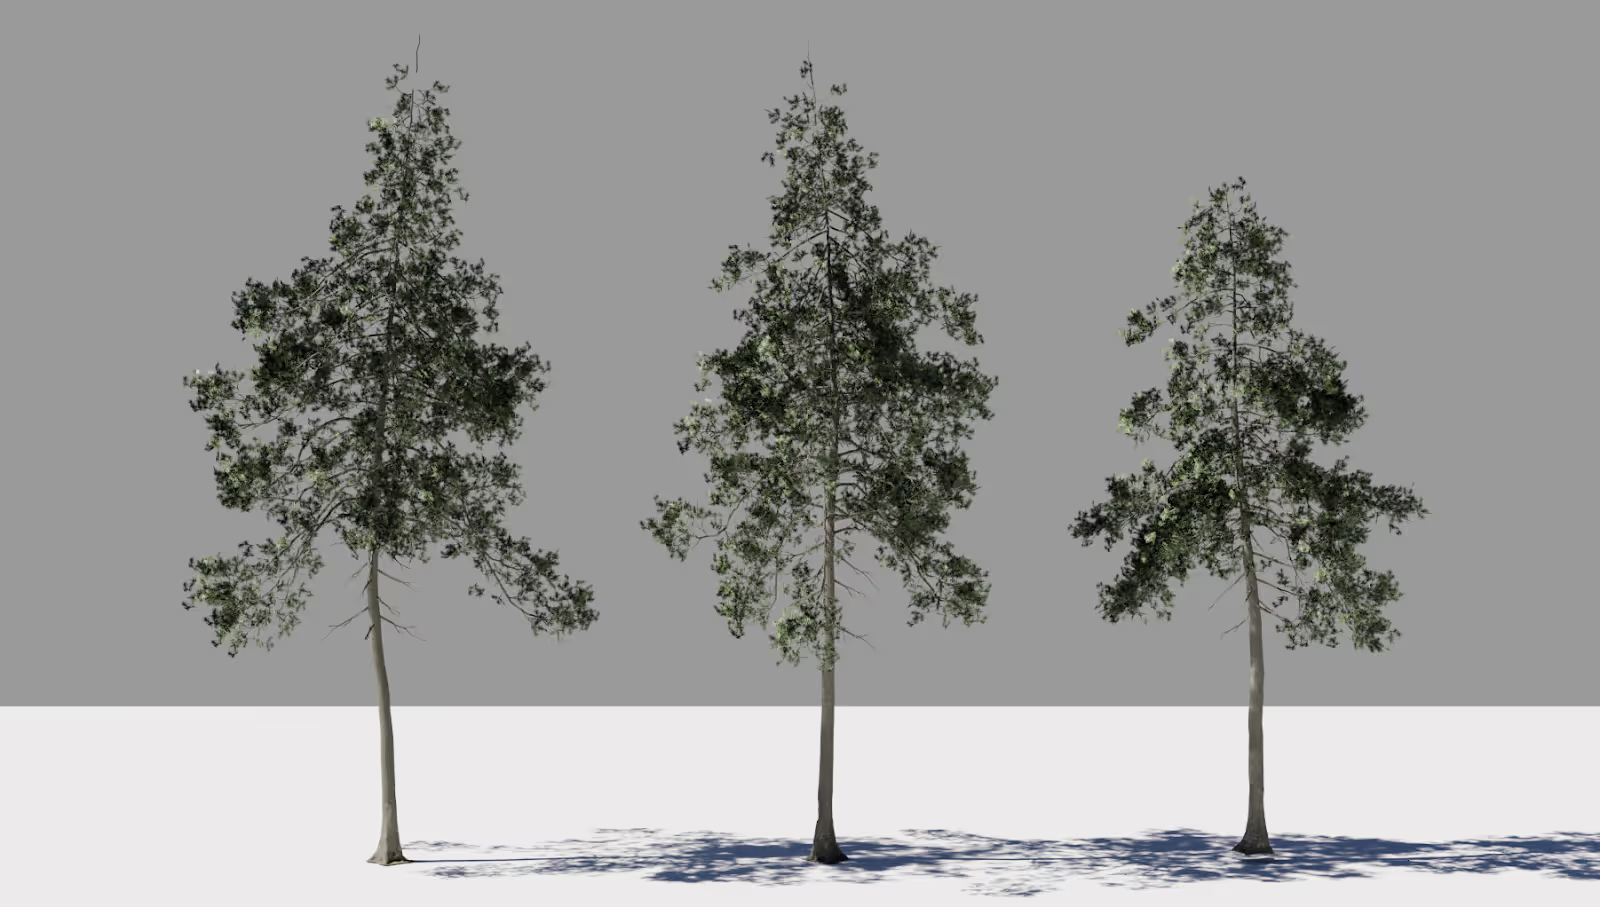
You will need some variations in the trees to not spot the repetition of the same one everywhere.
Then all the trees are either going to be instanced and placed by hand for the one closest to the camera or scattered using particles systems for the farthest ones.
So using only 3 models will simplify the process and even allow us to save some memory.

You can find some free photo scanned 3d assets on Megascan. As the rock and fern here.
This is really helpful in achieving a natural feel as they are literally captured from real life.
And again, using only 4 different assets here will be enough as they will rotate and change their scale being scattered everywhere, and this could lighten the processing load on your machine.
As this is a single image project, Establishing the framing of your shot as soon as possible will prevent any useless work
In this project, I knew that I would like to have a front view with a clear foreground, separating and emphasizing a kind of meadow, with a forest in the background.So I built the project by layers, to better control each one independently and even to completely separate them later on if needed.
The Foreground has been my first step here, building the ground, placing my camera, trying some composition with the trees and bushes. You can see here the different layers that make up the scene.
The geometry is still limited to what is visible to the camera and is memory efficient.
But farther into the scene and towards the background, obviously, more geometry and elements will be needed to cover the visible area.
So placing the camera with the right position and expected focal length (24mm APS-C here), will also help me to focus on what is actually really gonna be seen and what to work on.
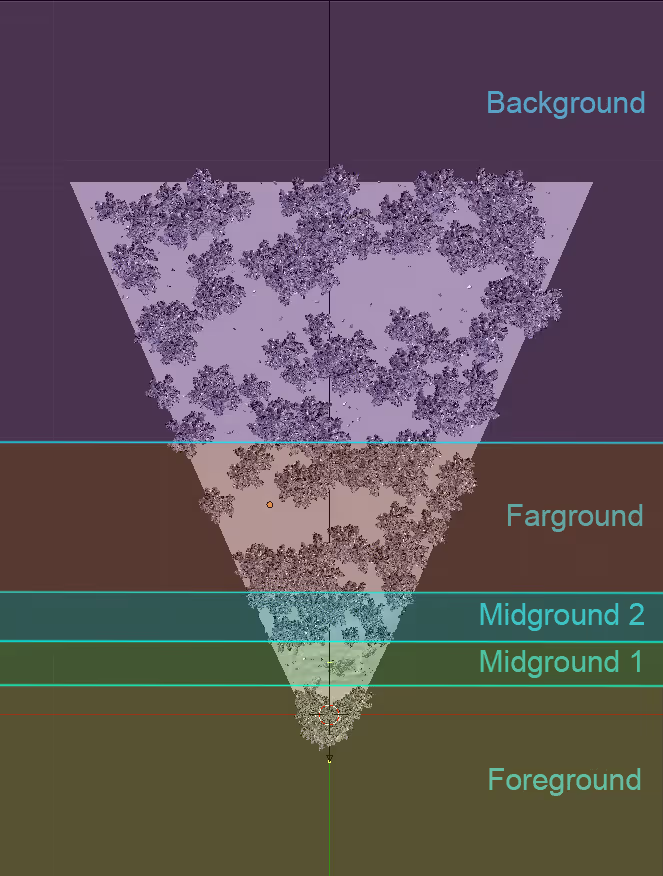
I’ll cover now the foreground creation in more depth. As we go towards the background, we will need more and more big and medium objects (trees and bushes) but less grass. A simple grass texture could then even do the trick because you won’t be able to really see it.
But for the foreground and midground, you will need to display actual geometry using particle distribution.
The Graswald add-on for Blender will do it for us!
Here are the first steps regarding the foreground composition.
Creation of the ground, adding trees (big shapes) and then bushes (medium shapes).
And we’ll cover the grass separately.
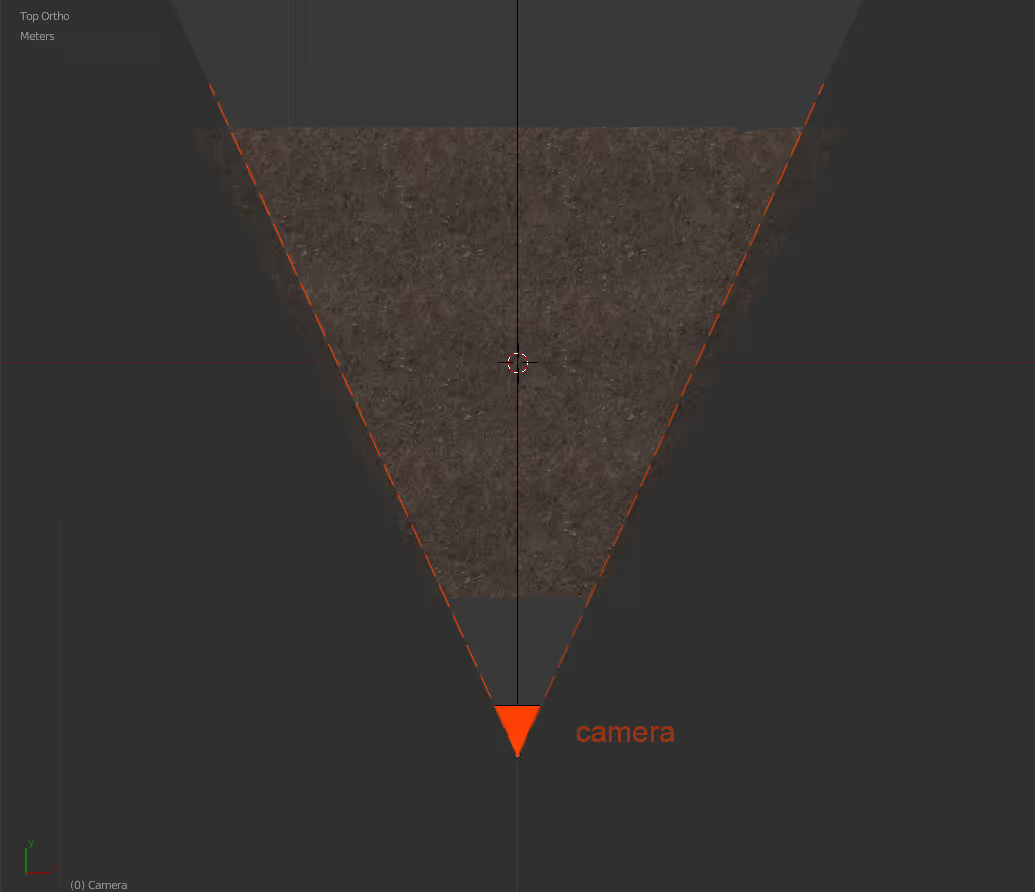
The ground is just a simple plane, that fits the camera view. I just added some geometry and sculpted some littles waves on it to give a more natural look.
Then I applied a photo-scan texture of a forest ground using the micro-displacement feature to create the base.
It allows displaying more geometry based on the camera location.
In order to use micro-displace, you’ll need to set the render into «experimental», use a subsurf modifier in «adaptive» mode and to use «true» instead of «bump» in the material settings and to have both a particle system for grass and micro-displace, you just need to be sure the submodifier remains on the top.
Here are the first examples of the ground rendered, with and without grass.
As the aim was to create a really tiny and mossy grass, the difference between the variants of each species was not so obviously visible in frames, so here are the different Graswald systems used in the foreground.
To control the spreading and distribution of the particles, we can use vertex groups and just paint them.
Here are some examples of the foreground species.

The idea here is to just make some variation and kind of draw where you want grass and where not, here by example I tried to make a very subtle pathway in the middle revealing more of the ground. But to get a natural feel, it’s quite important you use at least 4 or 5 different species.
You can also play with Graswald settings; So far I usually tweak a bit the age, the percentage, maybe the translucency and dead patches if available (this last feature seems to be more grass related).
All the objects from the foreground have been placed by hand by making instances (alt+d) of the same object over and over with some scale or rotation to make some variations. This way it will save a lot of memory.
There are 3 different trees but these are also instancied to have more copies.
I’ve then painted some of the foreground objects like trees and rocks, to make grow some moss on it too.
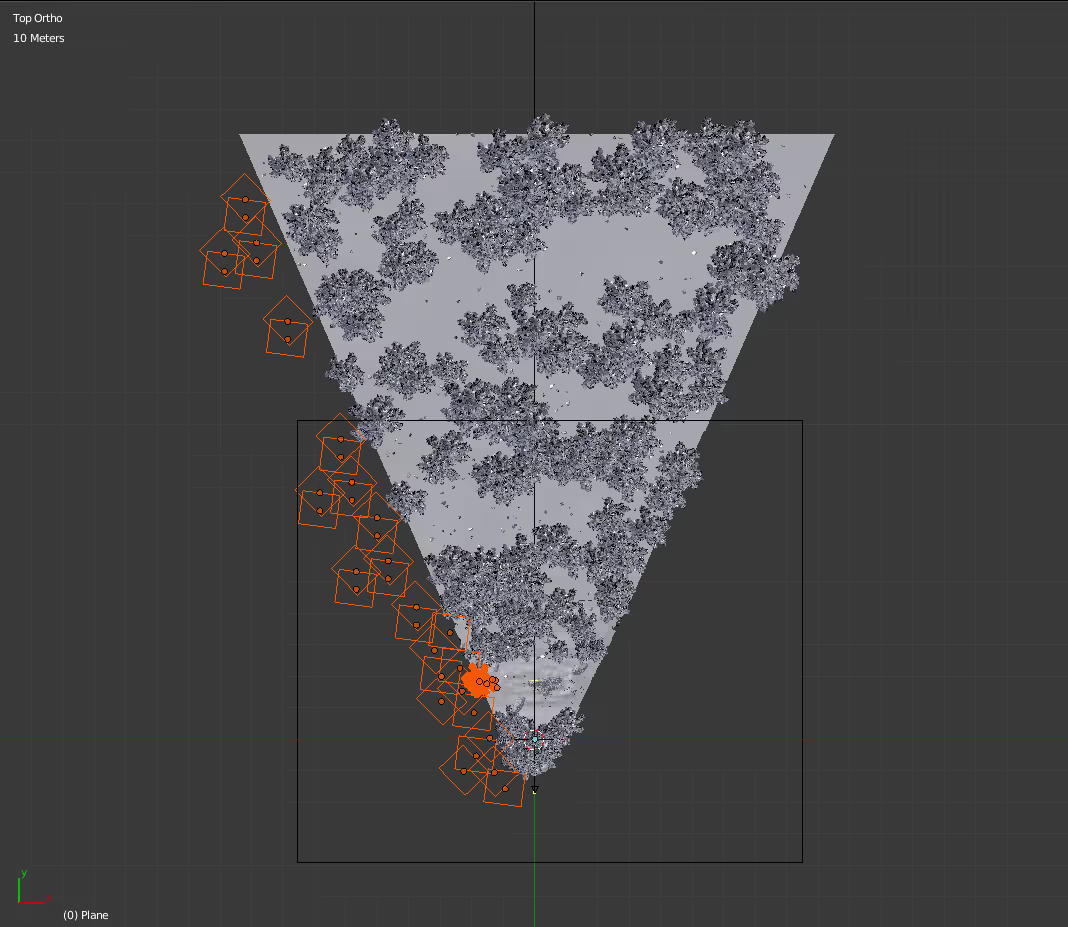
As I wanted to be in a forest, I also needed convincing lighting.
To do so, as the scene is illuminated by an HDRI and the sun is coming from the left, I just added a row of instanced trees to cast shadows.
I could have used just a simple plan with holes to save geometry but as I wanted to add fog and try some godrays I think this way is still a bit closer to reality.
And basically as long as you take into consideration the interaction of light and outdoor elements it will help in getting realistic results.
I’ve also added a cube with a volume scatter shader. This will mimic the forest humidity and give more ambient light and smooth shadows.
The density has to be set very low especially for a big area like this one.
I also advise to not cut it just after the camera but make it bigger, as it is highly light related, you do not want your foreground to be highly lit because of not having enough fog.
Here is the difference in the foreground using fog and shadows makes. The trees in the row are placed to build the shadows from the camera view and to draw the viewer’s eyes by creating a kind of vignette.
Here you can see the full test renders with the foreground only.
I was pretty happy to already get some god rays at this point with the fog and trees’ shadows.
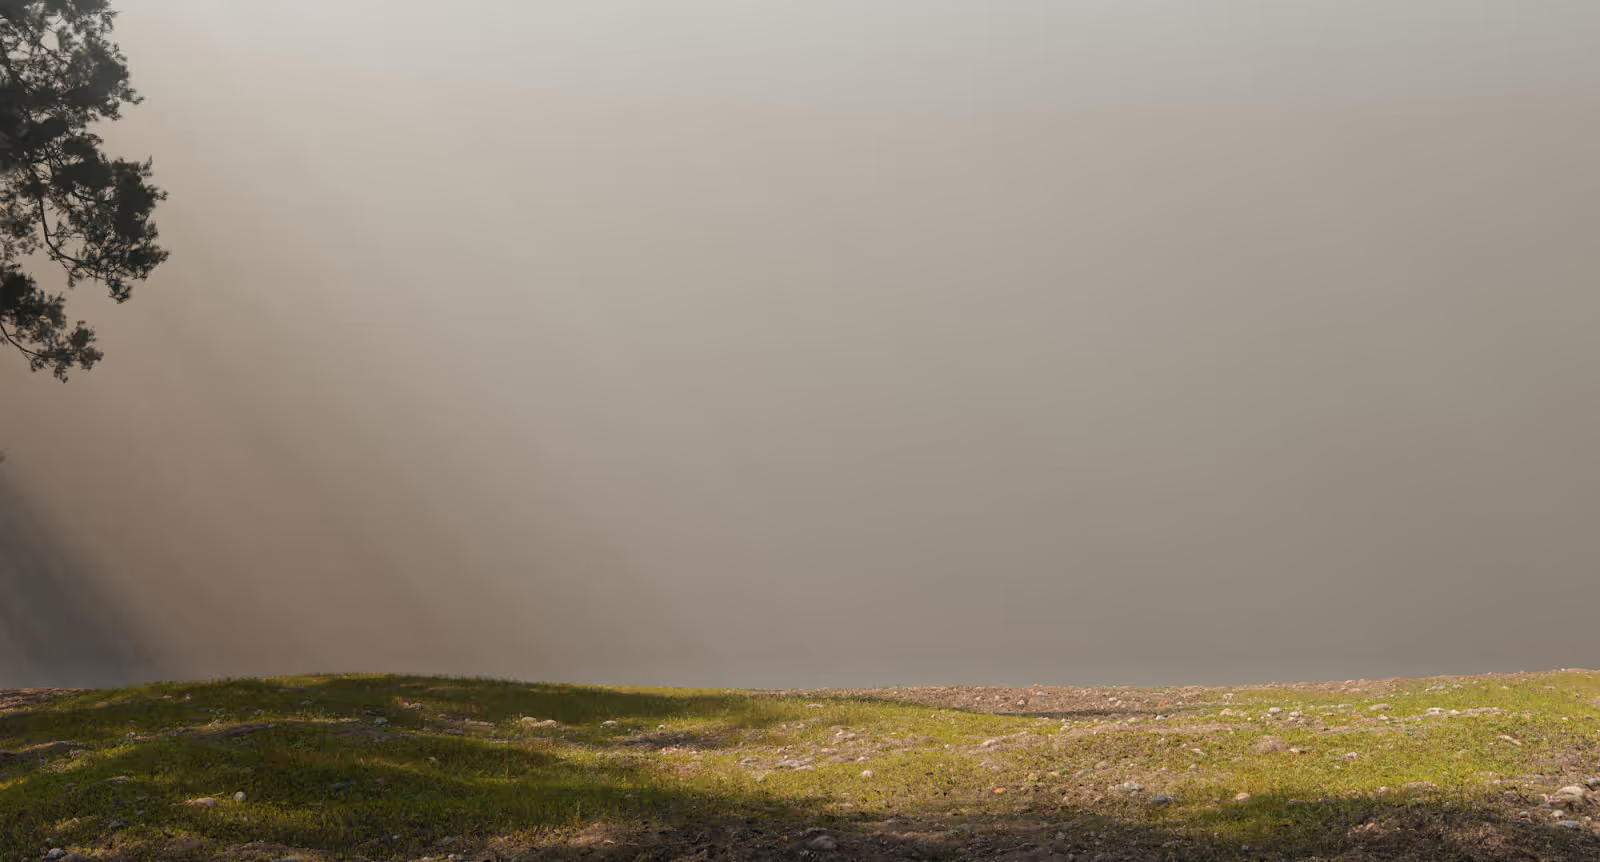
Final ground – You can see better the grass without the other assets.
And here the final foreground with all the assets.
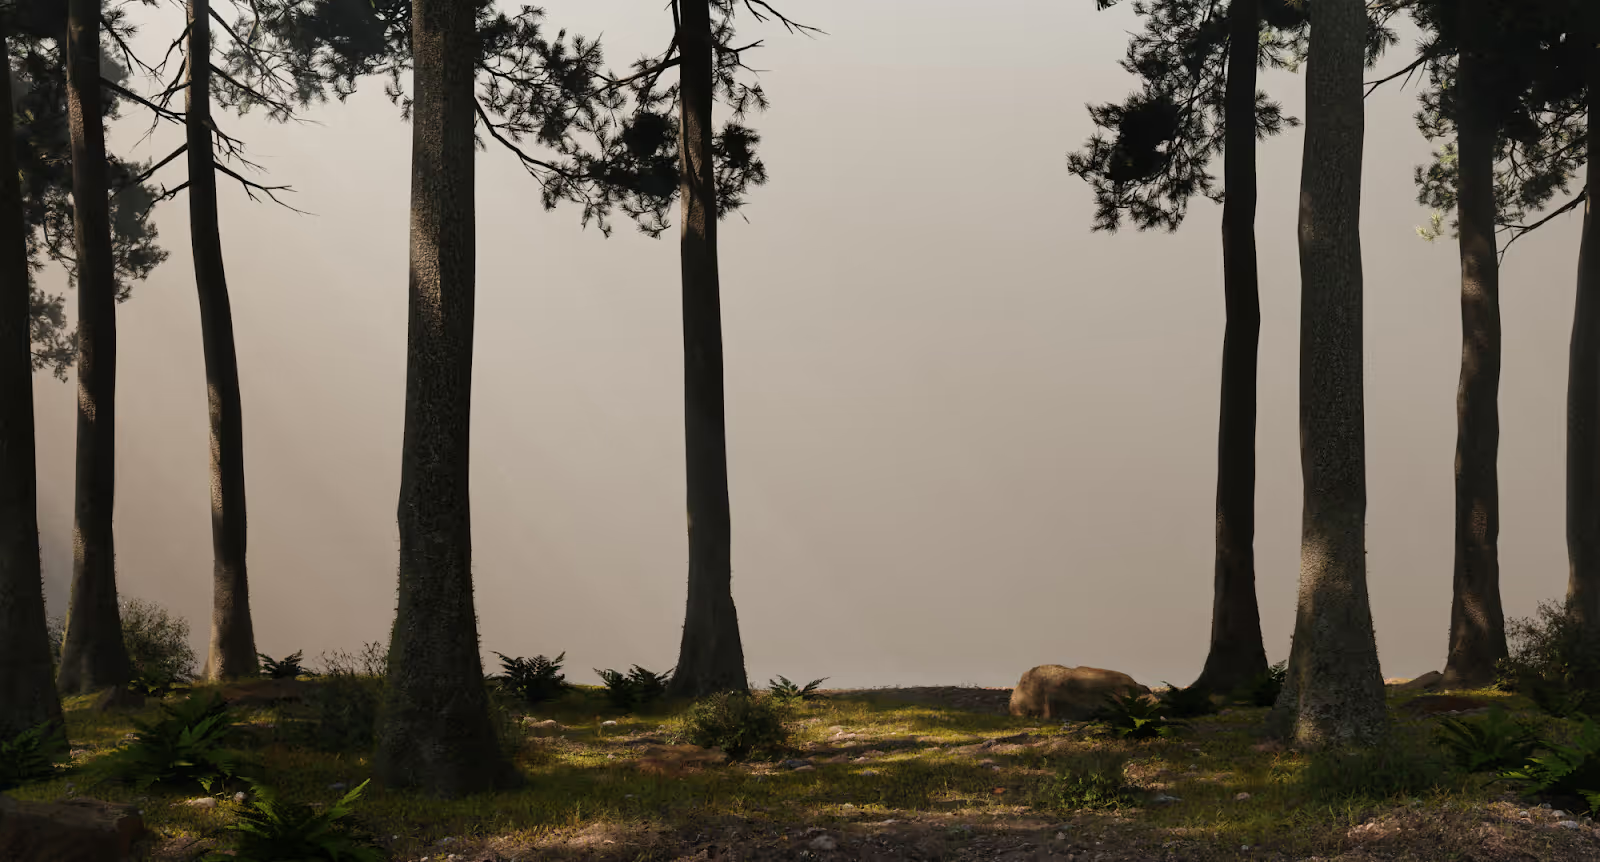
The lighting bulbs are still missing. I will quickly show some of these steps or give an overview of the process but this making-of will mainly stay towards the creation of a forest using the Graswald add-on and some assets more than a complete tutorial to make this image which implies also a lot of post-production.
As we go further in the scene creation, the same principles previously shown are going to be applied.
The midground is still a bit different, as it’s supposed to be more of a meadow area and with no more trees.
The rocky squid has been sculpted in blender using some rocky brushes, I’ll give a link in the end.
Then, I just work with a mix of textures from CMV instead of using more particles.
The moss needs actually a lot of particles to fill an entire area. So from the distance, the textures were detailed enough to me, and there was already a lot of geometry there.
Regarding the ground creation, I’ve also sculpted some waves and used vertex painting to drive the density of the particles for the different plants’ species.
But as it’s already farther from the camera, I skip all the wood debris and moss, to use only grass and flowers.
And there are also some medium size assets instanced by hand as bushes and rocks.
As we go towards the background, we’ll also need less and less density for the grass to appear full.
You can see here only the midground rendered.
For the final render, as I used GarageFarm.NET, and through their service, I was able to render all layers at once. My computer would not have allowed this. So separating the scene into different layers could be useful focusing on the design part as texturing, but it could also allow to network render a big scene like this if needed.
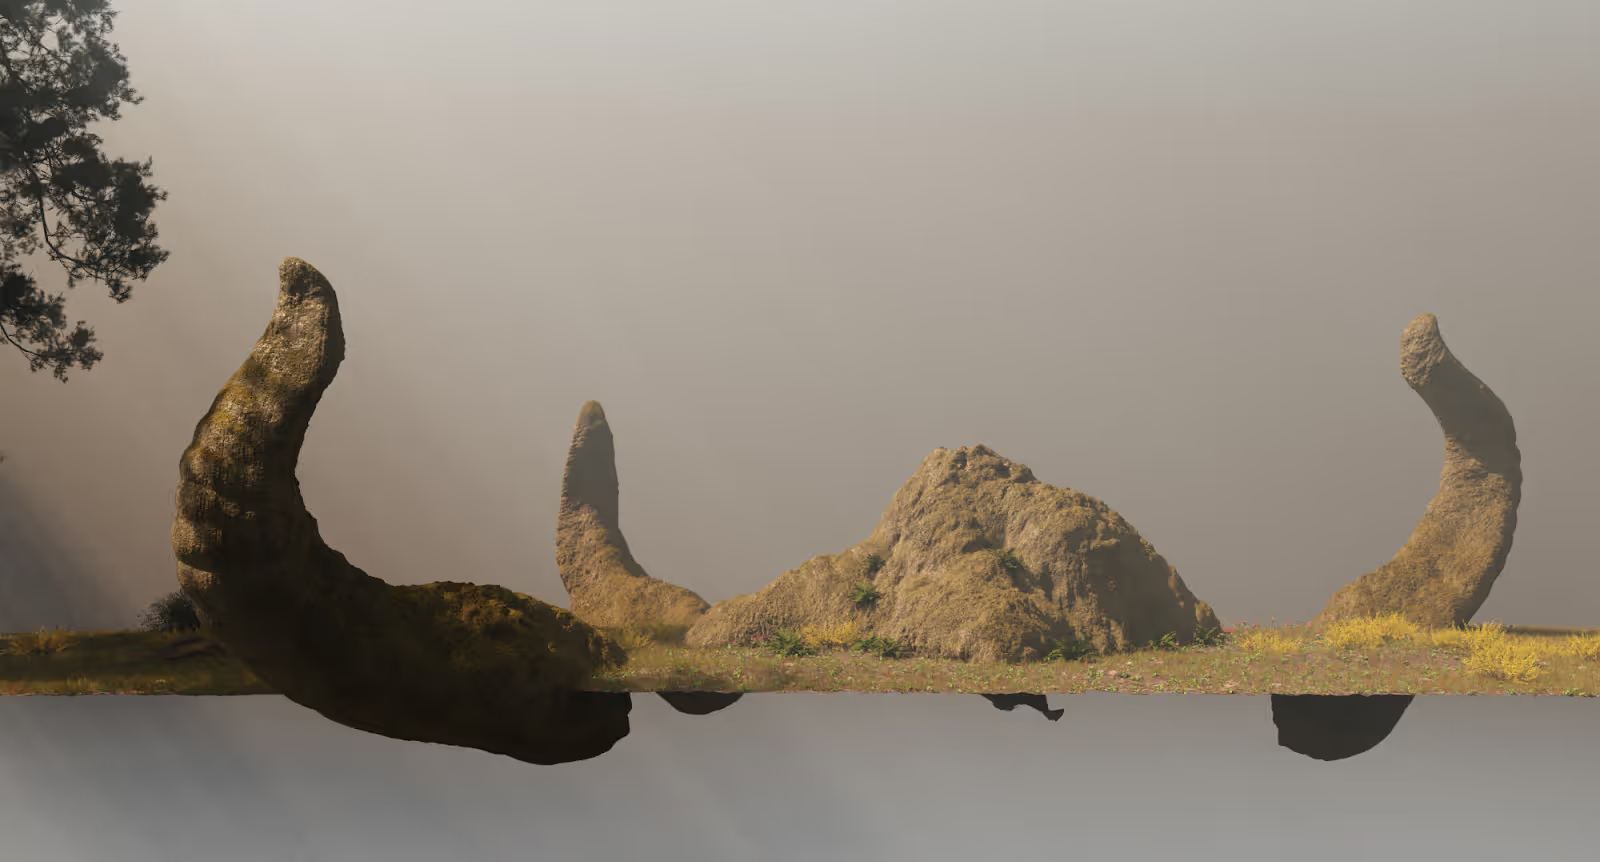
Here are the species used for the meadow. Just stay logical in your use, like how for instance I’ve re-used here the same grass as in the forest but added other specific species.
Here, the trees have still been instanced and placed by hand. The fact is as there were only a few, I could placed them exactly where I want them.
The bushes and rocks were placed in the particle system here. And there are only 2 kinds of Graswald particles left for the grass.
No more moss, or vertex painting to control the density. For the distance, we’ll not be able to tell the difference.
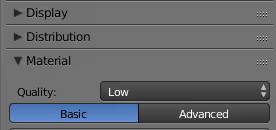
Be also sure when using Graswald, to check the material panel and switch to medium or low quality for the farthest layers.
It will limit the use of transparency and speed up the calculation.
This is the point wherein I stop creating grass by particles. ll the assets, trees, bushes, and rocks are scattered using particles. Almost the same settings were applied throughout.
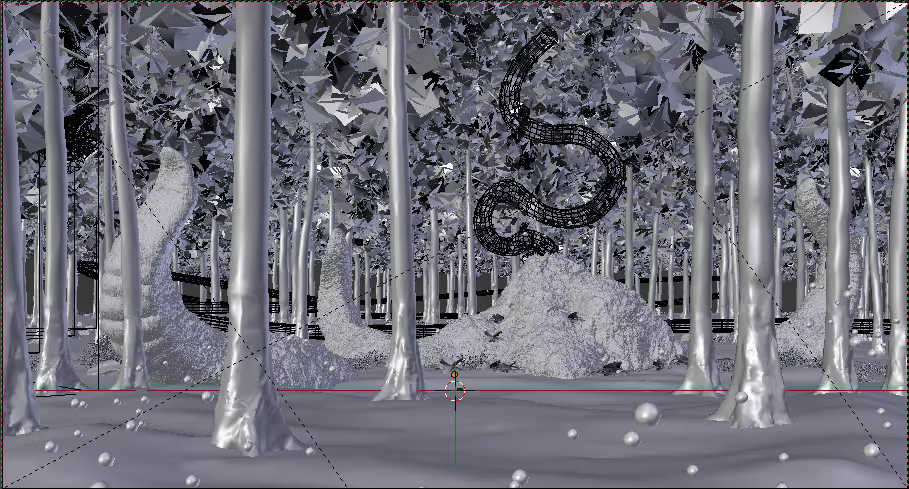
You can see here the scene from the camera view with all the layers on for the forest.
For the image creation, I hide all particles, trees or bushes (turn them into bounding boxes for the viewport)
The grass particles are still hidden, that way I can navigate in the viewport without freezes.
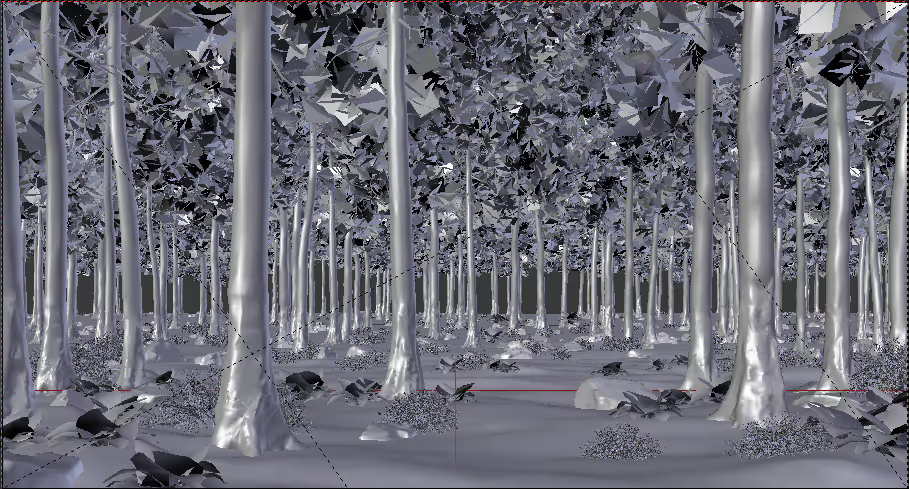
And here’s the final setup, including the rocky squid creature and the bubbles.
The bubbles were actually a small group of different ones, placed using a curve, transformed into a cylinder mesh, and then spread using also a particle system.
Playing with the seed number quickly gives different interesting positions.
I will not cover the whole post-production process. But I can give some hints about some passes or how to use them.
Here you can see the final raw render with all the layers on, except the background. But I rendered also by parts to give me more control.
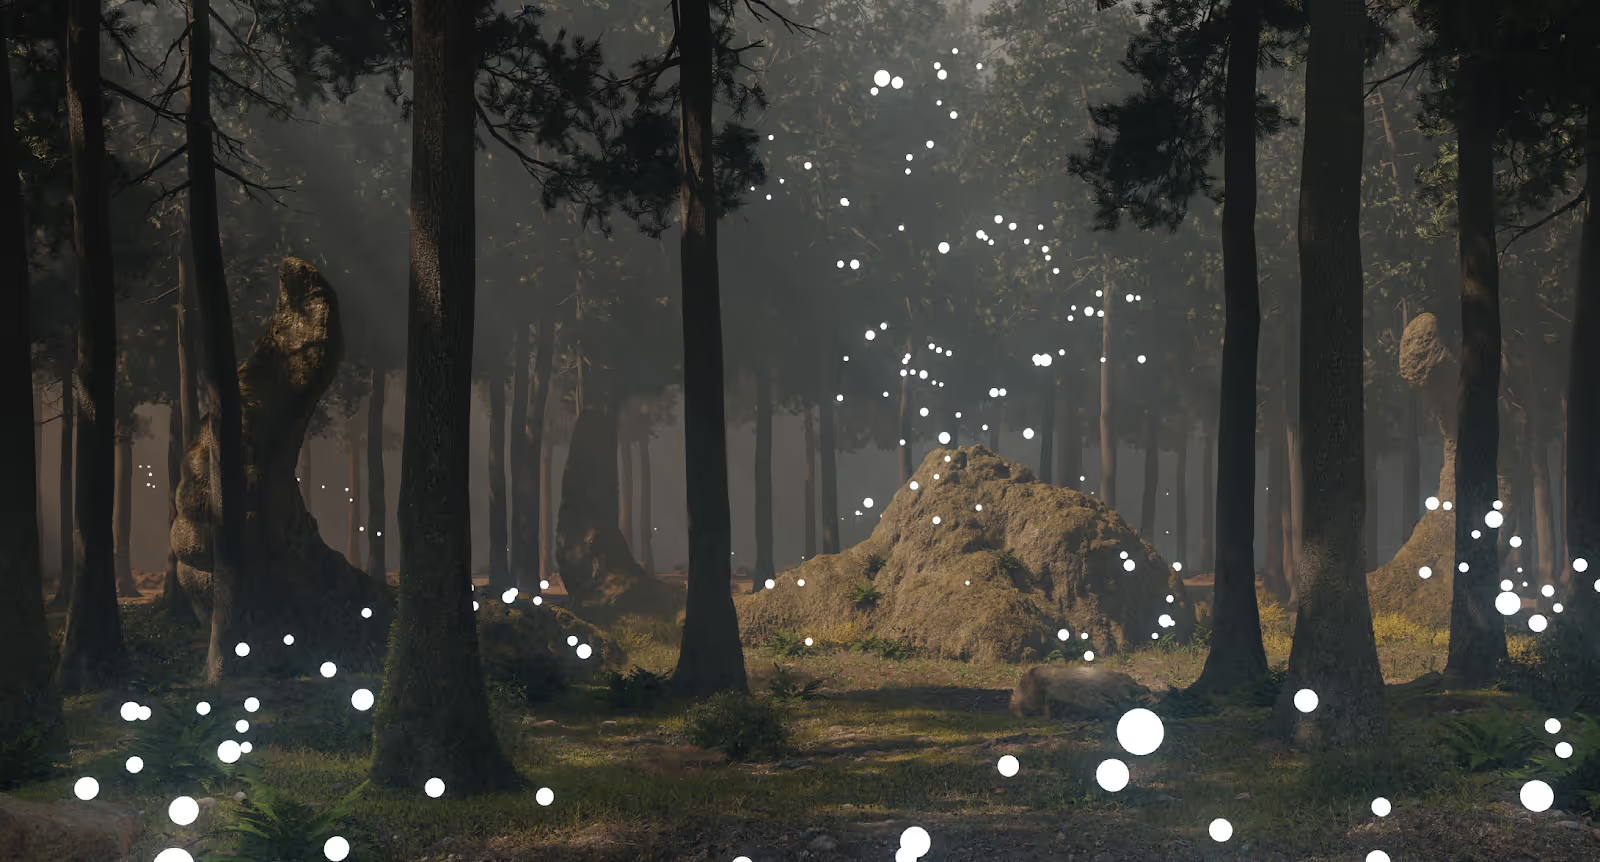
Some passes will give you more reflections or shadows and could boost your rendering to an upper level.
But the Z-pass remains my favorite and the most useful to me. It allows managing the depth in your 3d scene after rendering it into a simple image. This is a way to go for using what we call «atmospheric depth».
In the real world, there are small particles in the air, that are accumulated towards the farthest points that you see. The raw 3d render does not have this effect unless you use a volume scatter shader as we actually did.
So, why use both? Actually they are quite similar but basically, 3d fog reacts to light and colors as the fog driven by the z-pass in post-production doesn’t. So here I used the 3d fog for getting my general fog that quite reacts to light. And then I used the Z-pass to target specific areas where I wanted to add more of a smoke look by painting it using brushes in photoshop.
Just be careful, when you use a volume scatter it will give small artifacts everywhere. So I quickly rendered another clean Z-pass at 1 sample.
This could be an interesting trick for you. For some passes like the Z-depth, the color diffuse, or masks, you’ll get a perfectly clean result using only 1 sample! I prefer the Z-depth over the mist pass, as you have to set up the mist. Just be sure to use a normalize node in the editor to make the Z-pass working.

Here are some examples of the fog around the creature. By using a curve or level, you can narrow the area where you want to have a gradient effect and affect only this part. Then by painting smoke and using them in the mask you can precisely control where in the depth you want them. White being the part affected, as black remains untouched.
You can see here the general development of the image in Photoshop.
These are the previous groups you have seen including also the final color gradings
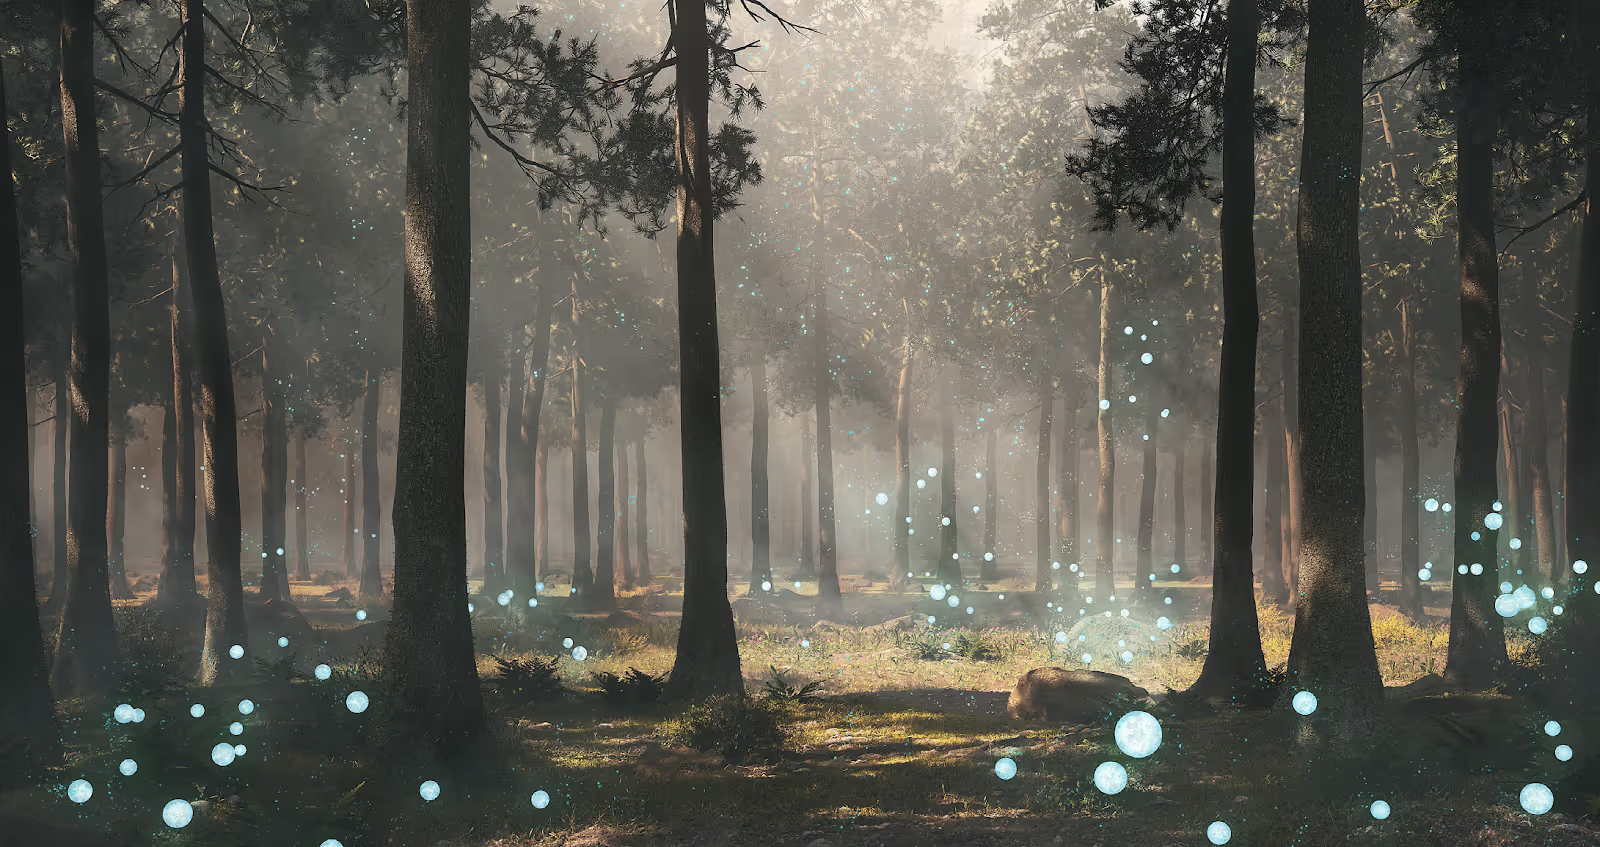
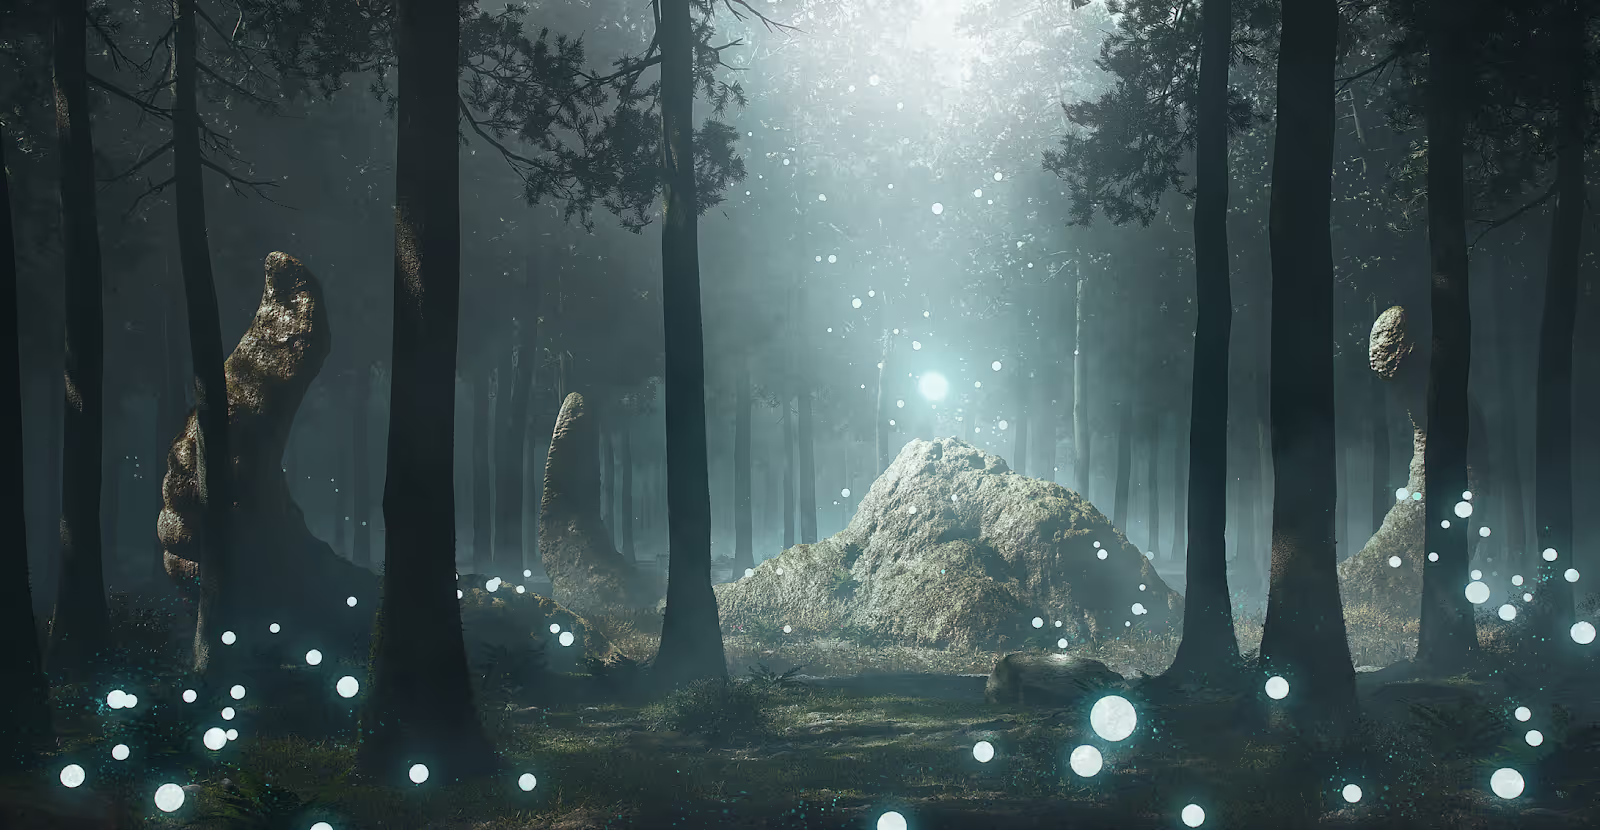
Here are the final renders, the sunny first one focusing more on the forest, and the second, colder featuring the forest creature.
I hope you liked this reading and that it helps you create awesome nature renders with the Graswald add-on. Give GarageFarm.NET a try, they offer $50 worth of starting credits to test their service!
I also wanted to give a general overview of the workflow used here. This image was quite hardly post-produced in Photoshop to get the look I wanted.
I wrote a lot also about memory saving because Blender is still quite limited regarding this point. Past 6 million polygons you can get some issues with the file size and freezes, so I advise you to limit all that you can in the viewport.
In the end, you do not have to push the post-production at this point after the rendering, but remember at least to check your image in black and white, ensuring you have right values!
Thanks to GarageFarm.NET who supported my rendering of this image!!
It’s really big help to network render a big scene like this, especially if you don’t have a super powerful workstation at the house. It’s pretty easy to use and to upload your projects and the costs are really fair. Also a big thanks to all of the GarageFarm.NET team, who were also very proactive in solving eventual issues.
You can check out GarageFarm.NET’s Blender page to learn more about the service and even get $50 credits to test them for free:
https://garagefarm.net/blender-render-farm/
You can follow my work on Artstation if you like;
https://www.artstation.com/arnaud_imobersteg
https://gumroad.com/l/18-rock-brushes
For the rocky brushes used to sculpt the rocky squid, free
http://www.fusroda.com/resources
Resources for photoshop brushes and other elements such as photopacks and so, partially free
https://megascans.se/
Photoscans elements, assets, textures, partially free
https://garagefarm.net/
The render farm used for this project
https://www.poliigon.com/
Texture website, with some freebies
https://www.cyclesmaterialvault.com/
Ready-made shaders for blender and cycles
https://www.blendermarket.com/products/graswald
Graswald add-on for blender and cycles
And there you have it! We hope you enjoyed and learned from Arnaud’s techniques and we hope to see you over at the farm sometime.
Happy rendering from all of us at GarageFarm.NET!