Key takeaways
- Shading uses variations in light, color, and value to communicate form, depth, texture, and mood.
- Flat, smooth, Gouraud, and Phong shading describe different ways of calculating or displaying shading across a 3D surface.
- Physically based shading focuses on how materials interact with light, while stylized shading prioritizes a particular visual language.
- Common 2D shading techniques include hatching, crosshatching, stippling, blending, scumbling, scribbling, and tonal shading.
- Choosing the right approach depends on the medium, desired style, available computing power, and how the final image will be used.
TL;DR
Different shading techniques solve the same fundamental problem: how to represent the effect of light on a surface.
In 3D computer graphics, flat shading gives each polygon a faceted appearance, while smooth shading uses interpolated normals to make connected faces appear continuous. Gouraud shading calculates lighting at vertices, while Phong shading interpolates surface normals and evaluates lighting across individual pixels or fragments.
In 2D art, artists create the same sense of volume manually through techniques such as hatching, crosshatching, stippling, blending, scumbling, and tonal shading. Although the tools are different, successful 2D and 3D shading both depend on an understanding of light direction, value, form, and material.
Introduction to shading in art
Shading is the use of light, dark, color, and value to describe how a surface responds to light. It helps viewers understand an object’s form, position, texture, and relationship to the surrounding environment.
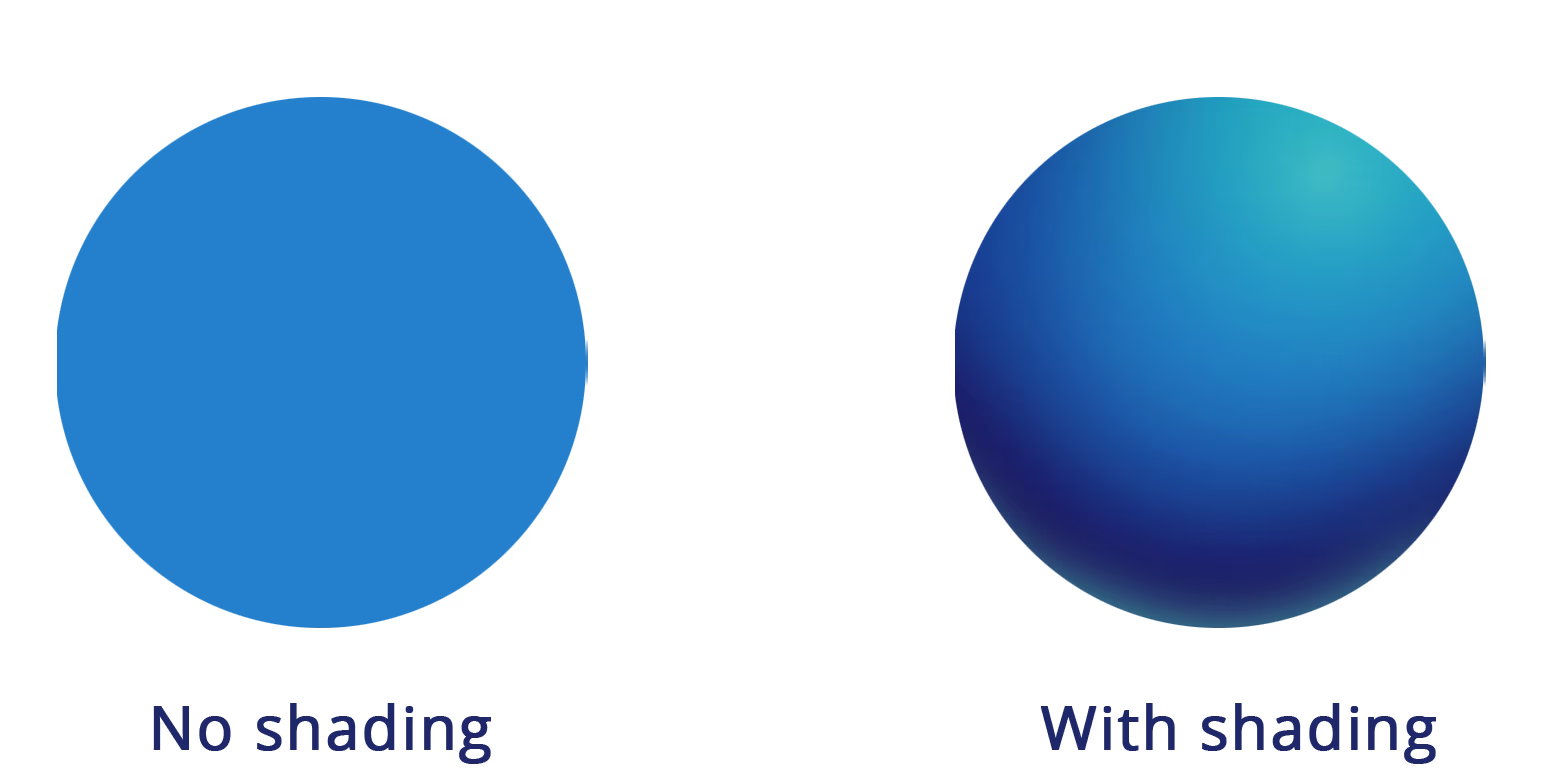
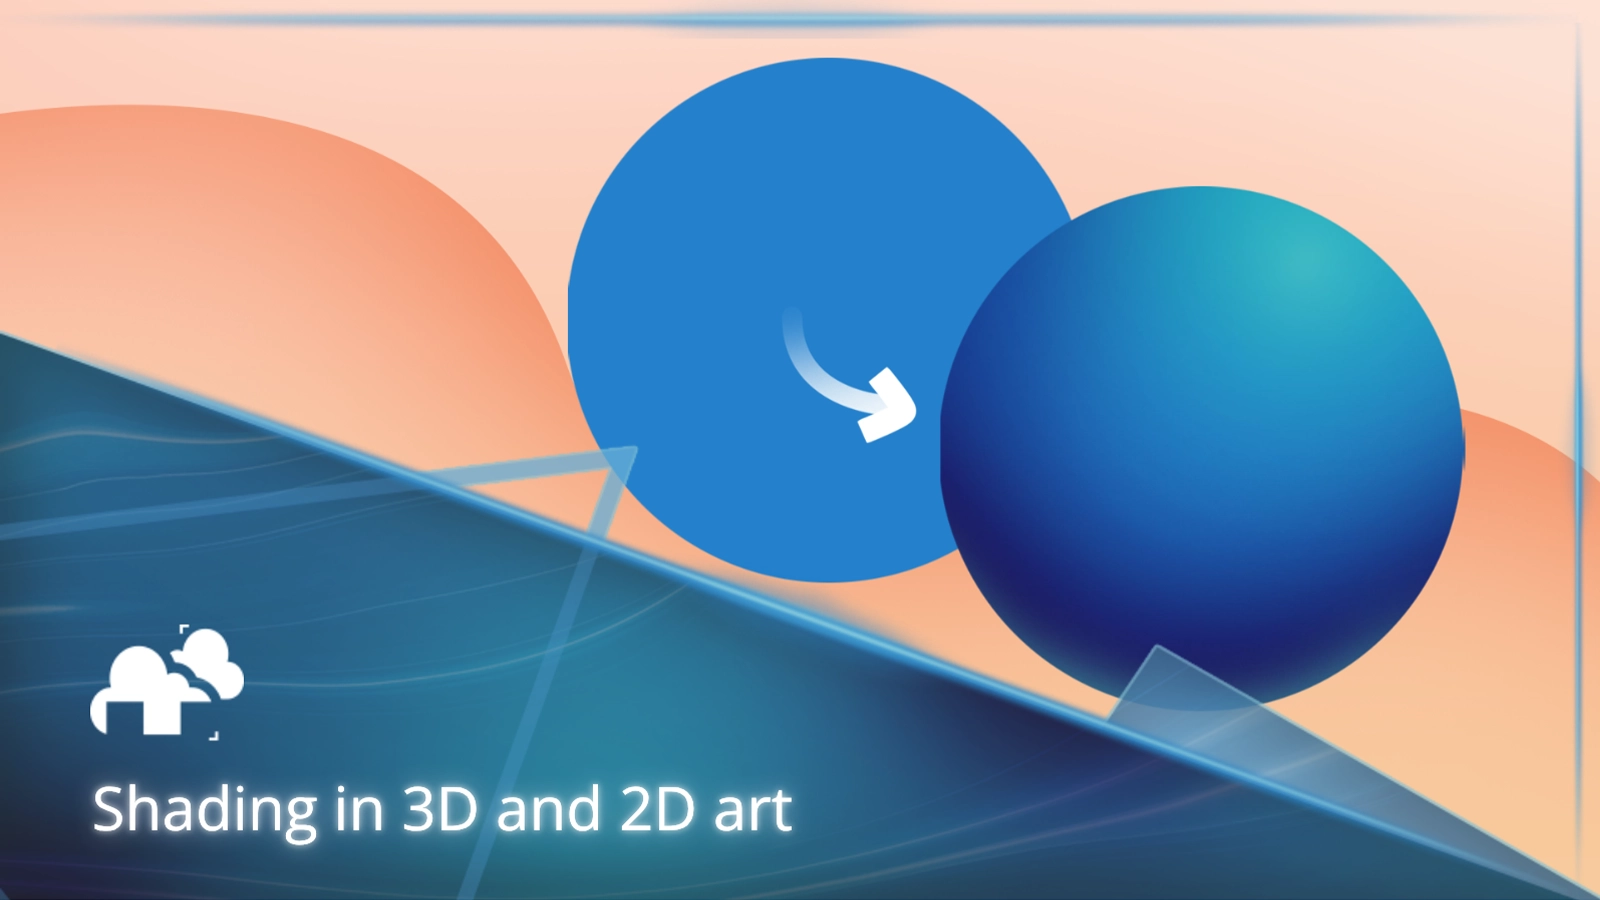
Without shading, a circle usually appears flat. Add a highlight, gradual value transition, core shadow, reflected light, and cast shadow, and the same circle begins to read as a sphere.
The types of shading in art vary according to the medium. A traditional artist may use pencil pressure, lines, dots, or blended pigment. A digital painter can use brushes, layers, masks, and blending modes. A 3D artist works with lights, surface normals, materials, shaders, textures, and rendering algorithms.
These methods look different in practice, but all of them depend on the same visual principles. The artist must understand where the light is coming from, which planes face the light, how quickly the light falls off, and what happens where light is blocked or reflected.
Foundational concepts in shading
Before comparing different shading techniques, it helps to separate shading from several closely related concepts.
Lighting defines the light sources in a scene, including their direction, intensity, color, size, and softness. Materials describe surface properties such as base color, roughness, metalness, transparency, and reflectivity. Textures provide variations and detail across those materials.
Shading is the process that brings this information together to determine the appearance of a surface from a particular viewpoint.
What shading means in 3D
In 3D graphics, shading determines how the surfaces of a model appear when evaluated by the renderer. The result can depend on the surface normal, light direction, viewing angle, material properties, textures, and surrounding environment.
A shader defines how part of that evaluation is performed. In real-time graphics, shaders are programs executed by the GPU. In applications such as Blender, Maya, Cinema 4D, and 3ds Max, artists often build materials through shader nodes or material networks that are evaluated or compiled by the rendering engine.
Several terms used in 3D shading describe different parts of this process:
- Flat and smooth shading describe how surface normals are used to display connected polygons.
- Gouraud and Phong shading describe where lighting calculations are performed and what information is interpolated across a polygon.
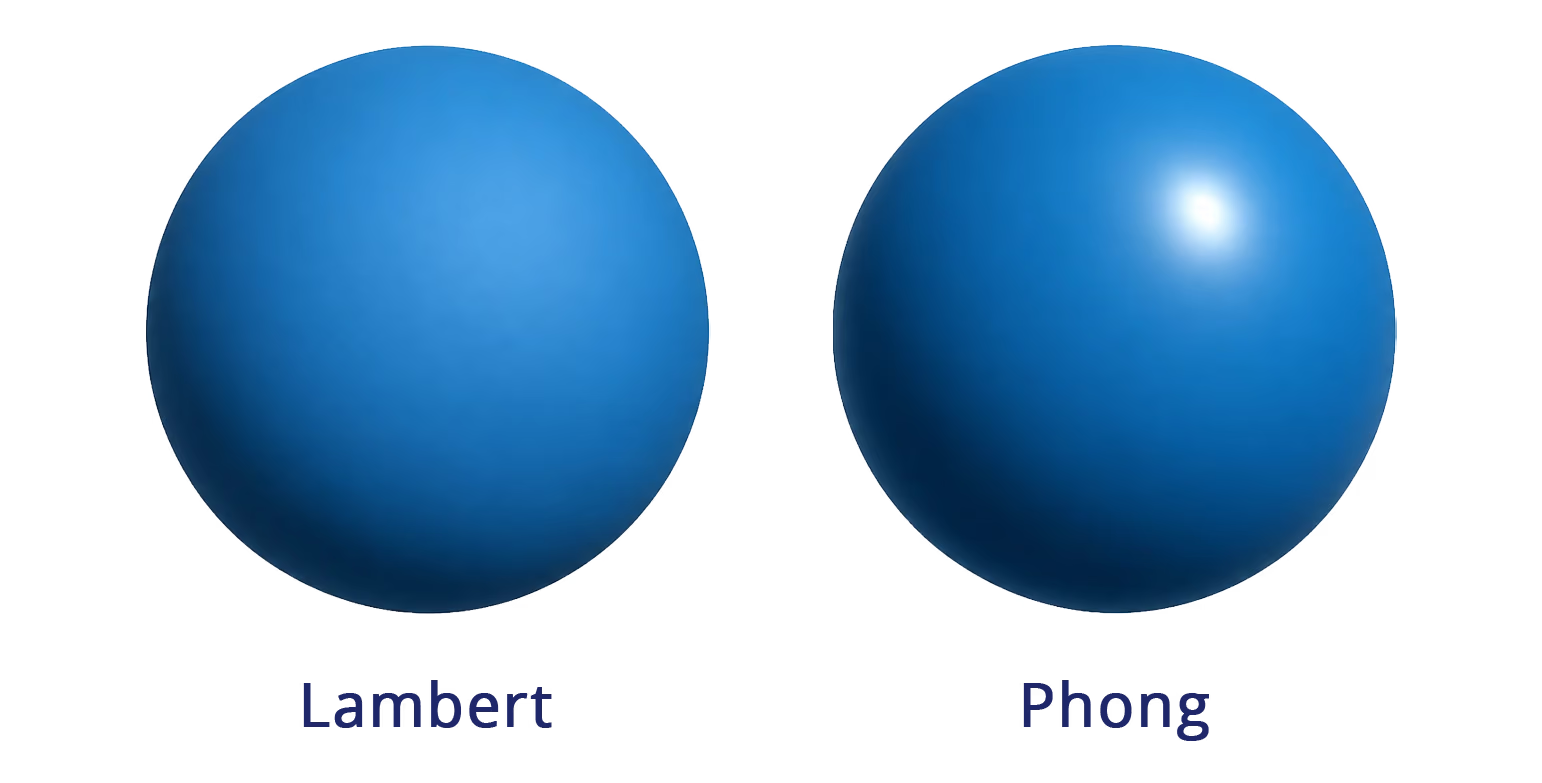
- Lambert and Phong reflection models describe simplified ways of calculating diffuse and specular light.
- Physically based shading uses material and lighting models designed to produce consistent, plausible results.
- Stylized shading deliberately changes or simplifies these calculations to achieve a particular look.
These categories are related, but they are not interchangeable.
What shading means in 2D
In 2D art, shading is created manually or digitally to suggest three-dimensional form on a flat surface. Artists control the placement and density of marks, the transition between values, and the shape of shadows.
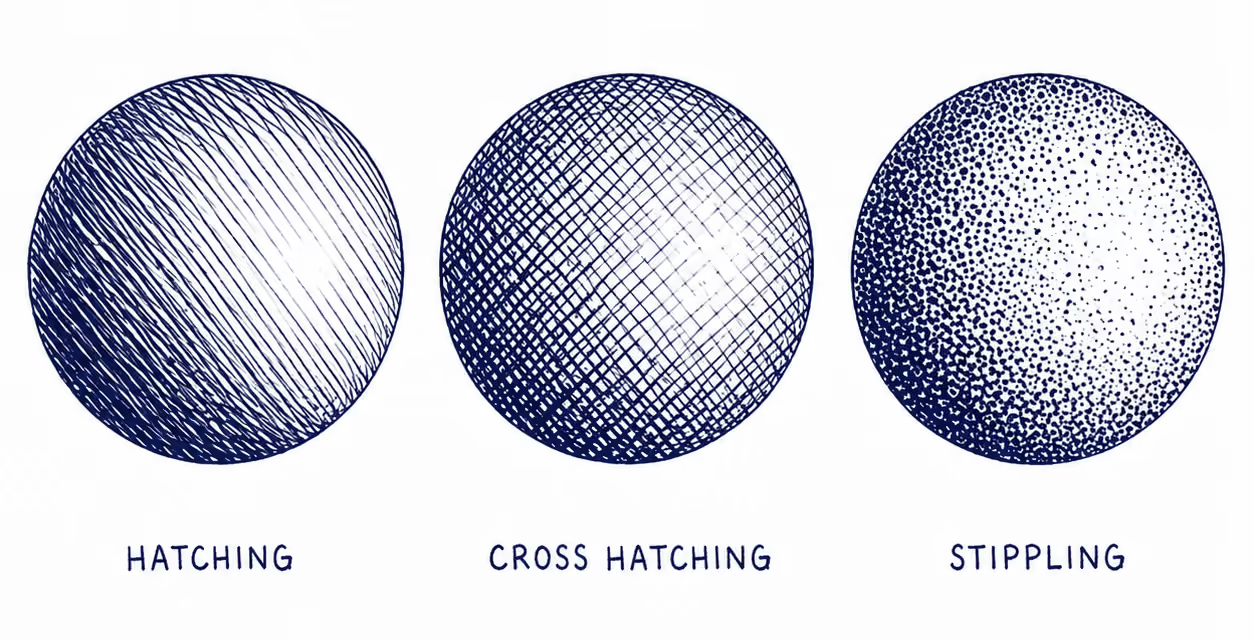
Traditional pencil shading techniques include hatching, crosshatching, stippling, scumbling, scribbling, and blending. Pen and ink shading techniques depend more heavily on the arrangement of lines and dots because the medium offers less opportunity for smooth blending.
Digital art shading techniques use many of the same principles. Brushes, opacity controls, layer masks, selections, and blending modes change the workflow, but they do not replace the need to understand form and light.
Types of 3D shading
The main 3D shading techniques can be compared according to how they treat polygon faces, vertices, surface normals, and lighting calculations.
Flat shading
Flat shading assigns a uniform surface normal or lighting result to each polygon face. Every part of the face is shaded consistently, making the individual polygons clearly visible.
This faceted appearance is often associated with low-poly artwork, technical previews, and deliberately geometric styles. It can also help artists inspect the underlying structure of a mesh.
A simple flat shading example is a low-poly sphere. Instead of appearing perfectly round, the sphere displays a series of distinct angular faces. The geometry has not changed. Only the way the surface normals are interpreted has changed.
Flat shading offers several advantages:
- It clearly displays the polygon structure.
- It works well for intentional low-poly aesthetics.
- It can simplify some shading calculations.
- It can make incorrect or inconsistent face normals easier to identify.
Its main disadvantage is that curved surfaces can appear rough or angular unless the model contains enough geometry.
Smooth shading
Smooth shading makes connected polygon faces appear visually continuous by interpolating vertex normals across the surface. It does not add polygons or physically alter the mesh.
This is especially useful for rounded and organic objects such as characters, cylinders, furniture, vehicles, and product models. The silhouette still depends on the actual geometry, but lighting transitions across the surface appear smoother.
The difference between flat and smooth shading is therefore mainly a difference in how normals are interpreted. Flat shading preserves the visual boundary between faces, while smooth shading hides many of those boundaries by creating a gradual transition.
Smooth shading can introduce artifacts when:
- Vertex normals are inconsistent.
- Sharp edges are smoothed unintentionally.
- The topology contains stretched or poorly shaped polygons.
- Custom split normals are configured incorrectly.
- Large flat areas share smoothing with curved surfaces.
Artists can usually control these problems by marking sharp edges, adjusting smoothing angles, improving topology, or editing custom normals. Blender’s documentation provides a practical explanation of flat and smooth shading.
Gouraud shading
Gouraud shading is a technique in which lighting is calculated at the vertices of a polygon. The resulting colors or intensities are then interpolated across the surface.
Because the lighting calculation happens at the vertices rather than every pixel, Gouraud shading can be more efficient than per-pixel methods. It also produces a smoother result than basic flat shading.
However, the quality depends heavily on the number and placement of vertices. A small specular highlight that falls between vertices may be weakened or missed entirely because the lighting model is not evaluated at that point.
The Gouraud shading algorithm can be summarized in three steps:
- Calculate a normal at each vertex.
- Evaluate the lighting at each vertex.
- Interpolate the resulting color or intensity across the polygon.
Gouraud shading was especially important when graphics hardware had limited processing power. It remains useful for understanding the development of real-time rendering and the tradeoff between speed and visual accuracy.
Phong shading
Phong shading improves the representation of curved surfaces and specular highlights by interpolating surface normals rather than completed lighting values.
The renderer interpolates a normal across the polygon and evaluates the lighting model for each pixel or fragment. This generally produces smoother highlights and more convincing curved surfaces than Gouraud shading, particularly when the underlying mesh has relatively few vertices.
The basic Phong shading algorithm works as follows:
- Calculate or assign normals at the vertices.
- Interpolate the normals across the polygon.
- Normalize the interpolated value.
- Evaluate the lighting model for each pixel or fragment.
Phong shading usually requires more calculations than Gouraud shading because lighting is evaluated more frequently. Modern hardware can handle this efficiently in many situations, but the distinction remains important when understanding shader performance.
Phong shading should not be confused with the Phong reflection model. Phong shading describes how normals and lighting calculations are applied across a surface. The Phong reflection model approximates lighting through ambient, diffuse, and specular components. The two are often used together, which is why the terms are sometimes treated as if they mean the same thing.
Gouraud vs Phong shading
The main difference between Gouraud and Phong shading is what gets interpolated.
When comparing flat vs Gouraud vs Phong shading, flat shading provides the most visibly faceted result. Gouraud shading smooths the lighting by interpolating vertex results. Phong shading performs more detailed calculations across the polygon, producing more accurate highlights and smoother apparent curvature.
This distinction is also demonstrated in LearnOpenGL’s basic lighting guide.
Lambert and Blinn-Phong shading models
Lambertian shading represents diffuse reflection from a matte surface. It assumes that light is scattered evenly in all viewing directions, so the apparent brightness depends mainly on the angle between the surface normal and incoming light.
The Phong reflection model adds specular highlights to a combination of ambient and diffuse lighting. Blinn-Phong modifies the specular calculation by using a halfway vector between the light direction and viewing direction.
These models are useful for learning how shading works, but they are approximations. Modern film and game pipelines increasingly rely on physically based models for more consistent material behavior.
Physically based shading
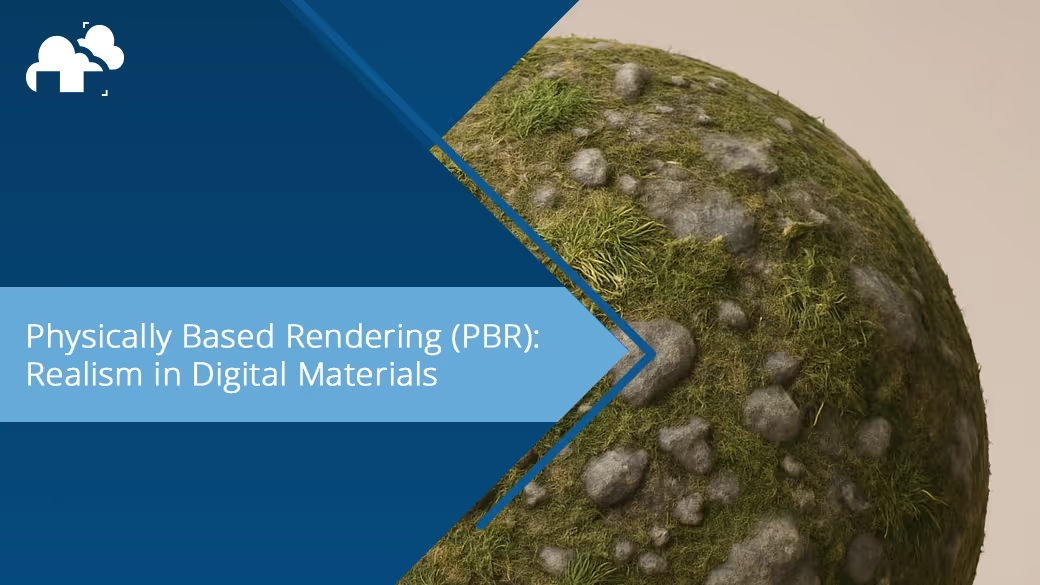
Physically based shading aims to reproduce plausible interactions between light and materials. Rather than adjusting every material separately for each lighting setup, artists define properties that have consistent meanings across the scene.
In a metallic-roughness workflow, the most common properties include:
- Base color
- Metalness
- Roughness
- Surface normals
- Emission
- Opacity
Additional maps may control height, displacement, ambient occlusion, transmission, subsurface scattering, or other material characteristics.
Roughness affects the spread and clarity of reflections. Metalness determines whether a surface behaves more like a metal or a non-metal. Normal and displacement maps introduce smaller surface variations, while base color defines the material’s underlying color information.
Physically based shading does not guarantee realism on its own. The textures, lighting, scale, geometry, camera, and color management still need to work together. However, a consistent PBR workflow makes materials more predictable when they are moved between lighting environments or compatible rendering applications.
For a deeper explanation of material maps and workflows, see our guide to physically based rendering.
Ambient occlusion and self-shadowing
Ambient occlusion estimates how exposed a point is to indirect ambient light. Creases, corners, contact areas, and narrow gaps receive more occlusion and therefore appear darker.
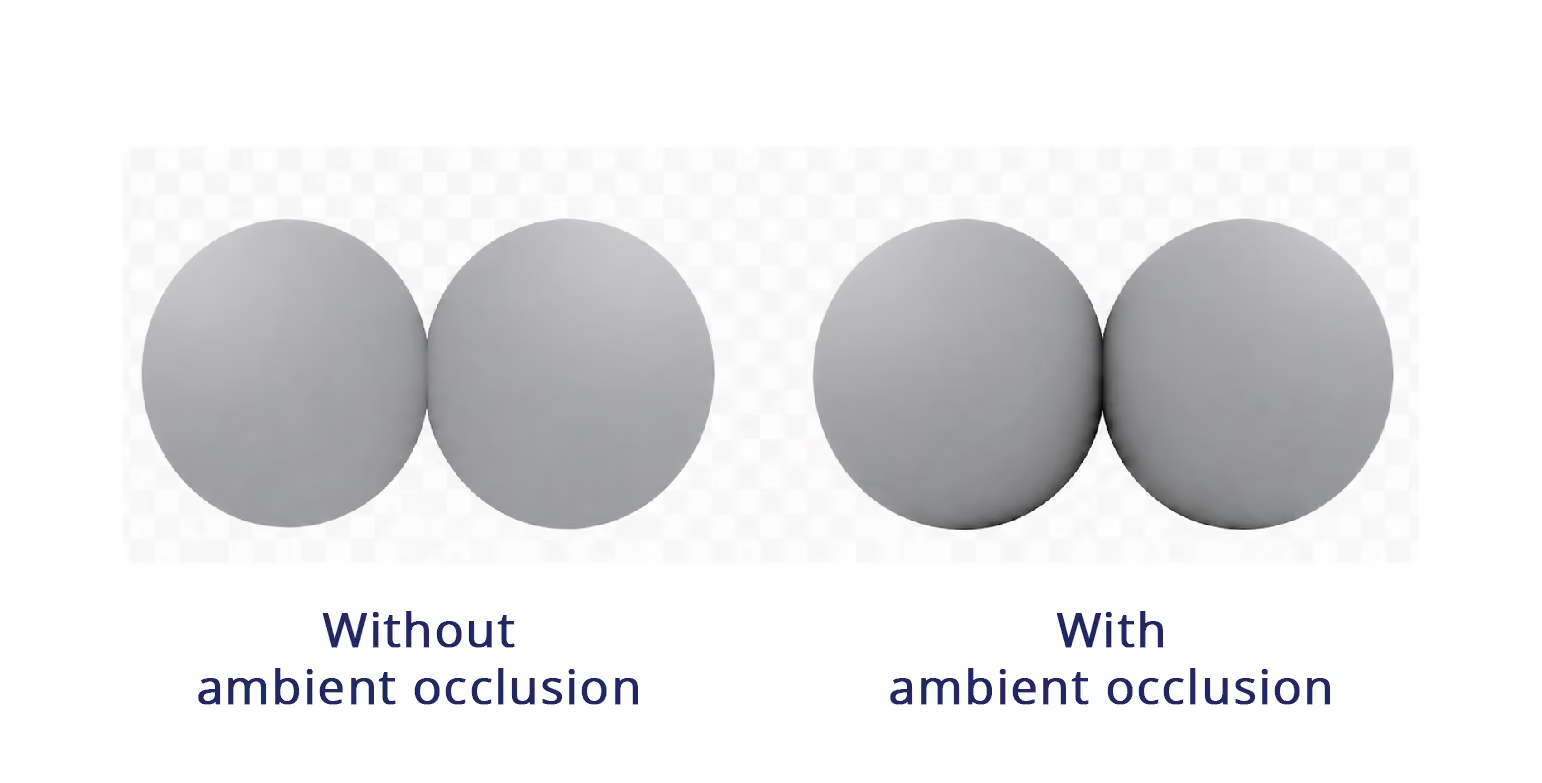
It is best treated as a supporting lighting effect rather than one of the main shading models in computer graphics. Excessive ambient occlusion can make a render appear dirty or create dark outlines that do not respond naturally to the lighting.
Self-shadowing occurs when one part of an object blocks light from reaching another part of the same object. A character’s nose casting a shadow across the face is a simple example. Unlike ambient occlusion, self-shadowing is connected to a specific light source and the geometry between that light and the shaded area.
You can learn more about the technique in our detailed guide to ambient occlusion.
Stylized shading
Stylized shading prioritizes visual direction over strict physical accuracy. Artists may simplify gradients, alter shadow colors, exaggerate highlights, add texture to lighting, or change how a material reacts to the environment.
The goal is not necessarily to make the image less sophisticated. Stylized shading often requires careful control because every decision must support the shape language, mood, and readability of the scene.
Cel or toon shading
Cel shading, also called toon shading, separates light and shadow into distinct color bands instead of continuous gradients. It is commonly used to give 3D models an appearance inspired by comics and traditional animation. Outlines may be added, but they are not required.
Because this is a specialized subject with its own history, tools, and workflows, we cover it separately in our complete guide to cel shading.
Painterly and impressionistic shading
Painterly shading uses color variation, visible brush textures, simplified detail, and deliberately shaped light to make a 3D image feel painted rather than mechanically rendered.
Artists may combine hand-painted textures, custom material nodes, post-processing, normal distortion, color grading, and simplified reflections. Some workflows apply the effect at the material level, while others use a screen-space or compositing treatment across the entire image.
Lighting remains essential. A painterly shader cannot compensate for lighting that fails to describe the forms or support the composition. As principal lighting artist Maria Yue explained in an 80 Level interview, good lighting design should make 3D assets feel alive within the scene.
Types of 2D shading
The main types of 2D shading use marks, tones, or color transitions to communicate the direction and intensity of light.
Some techniques create smooth, realistic surfaces. Others leave visible lines, dots, or brushwork as part of the final style. Artists often combine several methods in one drawing.
Hatching and Crosshatching
The hatching shading technique uses a series of lines to create value. Closely spaced or heavier lines produce darker areas, while wider spacing creates lighter areas.
The lines do not need to be perfectly straight. They can follow the direction of a surface, reinforce the shape of an object, or create a specific texture.
Crosshatching adds another set of lines over the first, usually at a different angle. Additional layers can build progressively darker values.
The main difference between hatching and crosshatching is therefore the number and direction of the line sets:
- Hatching uses one primary group of lines.
- Crosshatching uses overlapping groups of lines.
- Contour hatching curves the lines around the form of the subject.
Hatching and crosshatching are among the most common pen and ink shading techniques because they create value without relying on smudging or diluted pigment. They can also be recreated in 3D through procedural textures, shader nodes, or post-processing.
Stippling
The stippling shading technique uses dots to create value and texture. Dense concentrations of dots produce darker areas, while wider spacing produces lighter areas.
The size of the dots can vary, but controlling their spacing is usually more important for creating a gradual tonal transition. Random variation can produce an organic result, while evenly distributed dots create a more mechanical or graphic appearance.
Stippling works particularly well with pen and ink, where each mark remains clearly visible. Digital artists can reproduce it with textured brushes, scatter settings, procedural patterns, or custom shaders.
Scribbling and circulism
The scribbling shading technique builds value through loose, overlapping marks. It can be fast and expressive, making it suitable for hair, foliage, fabric, and other irregular surfaces.
Circulism uses overlapping circular marks. The circles can be kept visible for texture or blended together for a smoother result. It is sometimes used in pencil drawing to build skin tones and other softly changing surfaces.
Both methods depend on controlling the density and pressure of the marks. Darker areas use more overlapping strokes, while lighter areas leave more of the underlying surface visible.
Scumbling
The scumbling shading technique uses small, irregular, layered marks to create tone and texture. In drawing, it may resemble controlled scribbling or a collection of loose circular strokes. In painting, scumbling can also refer to dragging a lighter, relatively dry layer of paint across an existing color.
Scumbling produces a textured transition rather than the polished finish associated with smooth blending. It is useful for rough surfaces, clouds, foliage, stone, skin, and other subjects where perfectly uniform shading would appear unnatural.
Paint and ink blending
The blending shading technique creates smooth transitions between light and dark values. With graphite or charcoal, artists may vary pencil pressure and blend marks using a stump, tissue, brush, or other tool. With paint and ink, they control pigment, water, brush pressure, opacity, and drying time.
Blending can produce subtle tonal shading techniques suited to skin, curved objects, atmospheric backgrounds, and polished materials. However, excessive blending may remove useful texture or make forms appear soft and undefined.
Strong blended shading still requires clear value structure. The lightest and darkest areas should be planned before refining the transitions between them.
Digital painting applications recreate blending through soft brushes, pressure sensitivity, opacity controls, smudge tools, masks, and layer blending modes. The process is more adjustable, but the underlying decisions about value and light remain the same.
Core shadow vs cast shadow
Shading techniques describe how marks or values are applied. Terms such as core shadow and cast shadow describe where shadows appear and why they form.
- Form shadow: The darker area that appears as a surface turns away from the light.
- Core shadow: Usually the darkest part of the form shadow, located beyond the point where direct light stops reaching the surface.
- Cast shadow: A shadow projected onto another surface because an object blocks the light.
- Reflected light: Indirect light that bounces from the environment into the shadowed side of an object.
- Highlight: A bright area created where a surface strongly reflects the light toward the viewer.
When comparing a core shadow vs cast shadow, the core shadow belongs to the object’s own turning form. The cast shadow appears on another part of the object or on a nearby surface.
A form shadow vs cast shadow comparison works in much the same way. A form shadow describes the gradual change across the object, while a cast shadow is produced by blocked light and often has a more clearly defined shape.
Understanding these relationships improves every traditional and digital art shading technique. The chosen marks may change, but the underlying light structure remains consistent.
Challenges and best practices
Balancing realism and performance
More complex shading is not automatically better. A physically detailed material may require additional texture lookups, displacement, transparency calculations, subsurface scattering, or layered reflections. These features can increase render time and memory use.
In games and interactive applications, artists must keep shader complexity within a real-time performance budget. Offline rendering allows more expensive calculations, but unnecessary complexity can still slow previews and final output.
A practical workflow is to begin with the simplest material that produces the required result. Additional nodes and effects should solve a visible problem rather than add complexity for its own sake.
For animation, test representative frames before rendering the full sequence. Choose frames that include close-ups, difficult lighting, motion, transparency, and the most complex materials. If a project requires substantial computing power, a render farm can distribute frames across multiple machines after the materials and dependencies have been tested.
Consistency in lighting and shading
Materials should be evaluated under consistent conditions. A surface that looks convincing under one studio light may fail under daylight, low light, or a high-contrast environment.
Studios often use standardized material previews, neutral lighting rigs, reference objects, and color-management settings. This helps artists determine whether a problem comes from the material, the lighting, the geometry, or the display transform.
Consistency also matters across assets. Similar materials should use compatible scales, roughness ranges, texture resolutions, and naming conventions.
Iteration and reference gathering
Real-world references help artists understand how materials behave under different lighting conditions. Instead of relying on a single photograph, collect references showing the material from several angles and under different types of light.
The same principle applies to 2D art. A strong reference can reveal the shape of the core shadow, the softness of cast-shadow edges, the position of reflected light, and the way texture changes across the form.
Iteration should move from large decisions to small ones:
- Establish the light direction.
- Separate the major light and shadow shapes.
- Check whether the form reads clearly.
- Refine material response and local color.
- Add texture, highlights, and smaller variations.
This order prevents surface detail from hiding weaknesses in the underlying value structure.
Learning and adapting workflows
Shading tools continue to change, but the basic principles remain stable. New renderers, GPUs, material systems, and digital brushes can make particular effects easier to achieve, yet artists still need to understand form, value, reflection, and visual hierarchy.
The Science Behind Pixar describes lighting as an essential storytelling tool that directs attention and strengthens emotional impact. Shading supports that goal by controlling how characters, environments, and materials respond to the chosen lighting.
Learning the tools is important, but learning to observe light is what makes those tools useful.
Applications of shading in different industries
Different industries use shading for different purposes. A feature film may prioritize detail and consistency across hundreds of shots, while a game must maintain its appearance at an interactive frame rate.
Film and animation
Film and animation productions commonly divide material creation, texturing, look development, lighting, and compositing into connected stages.
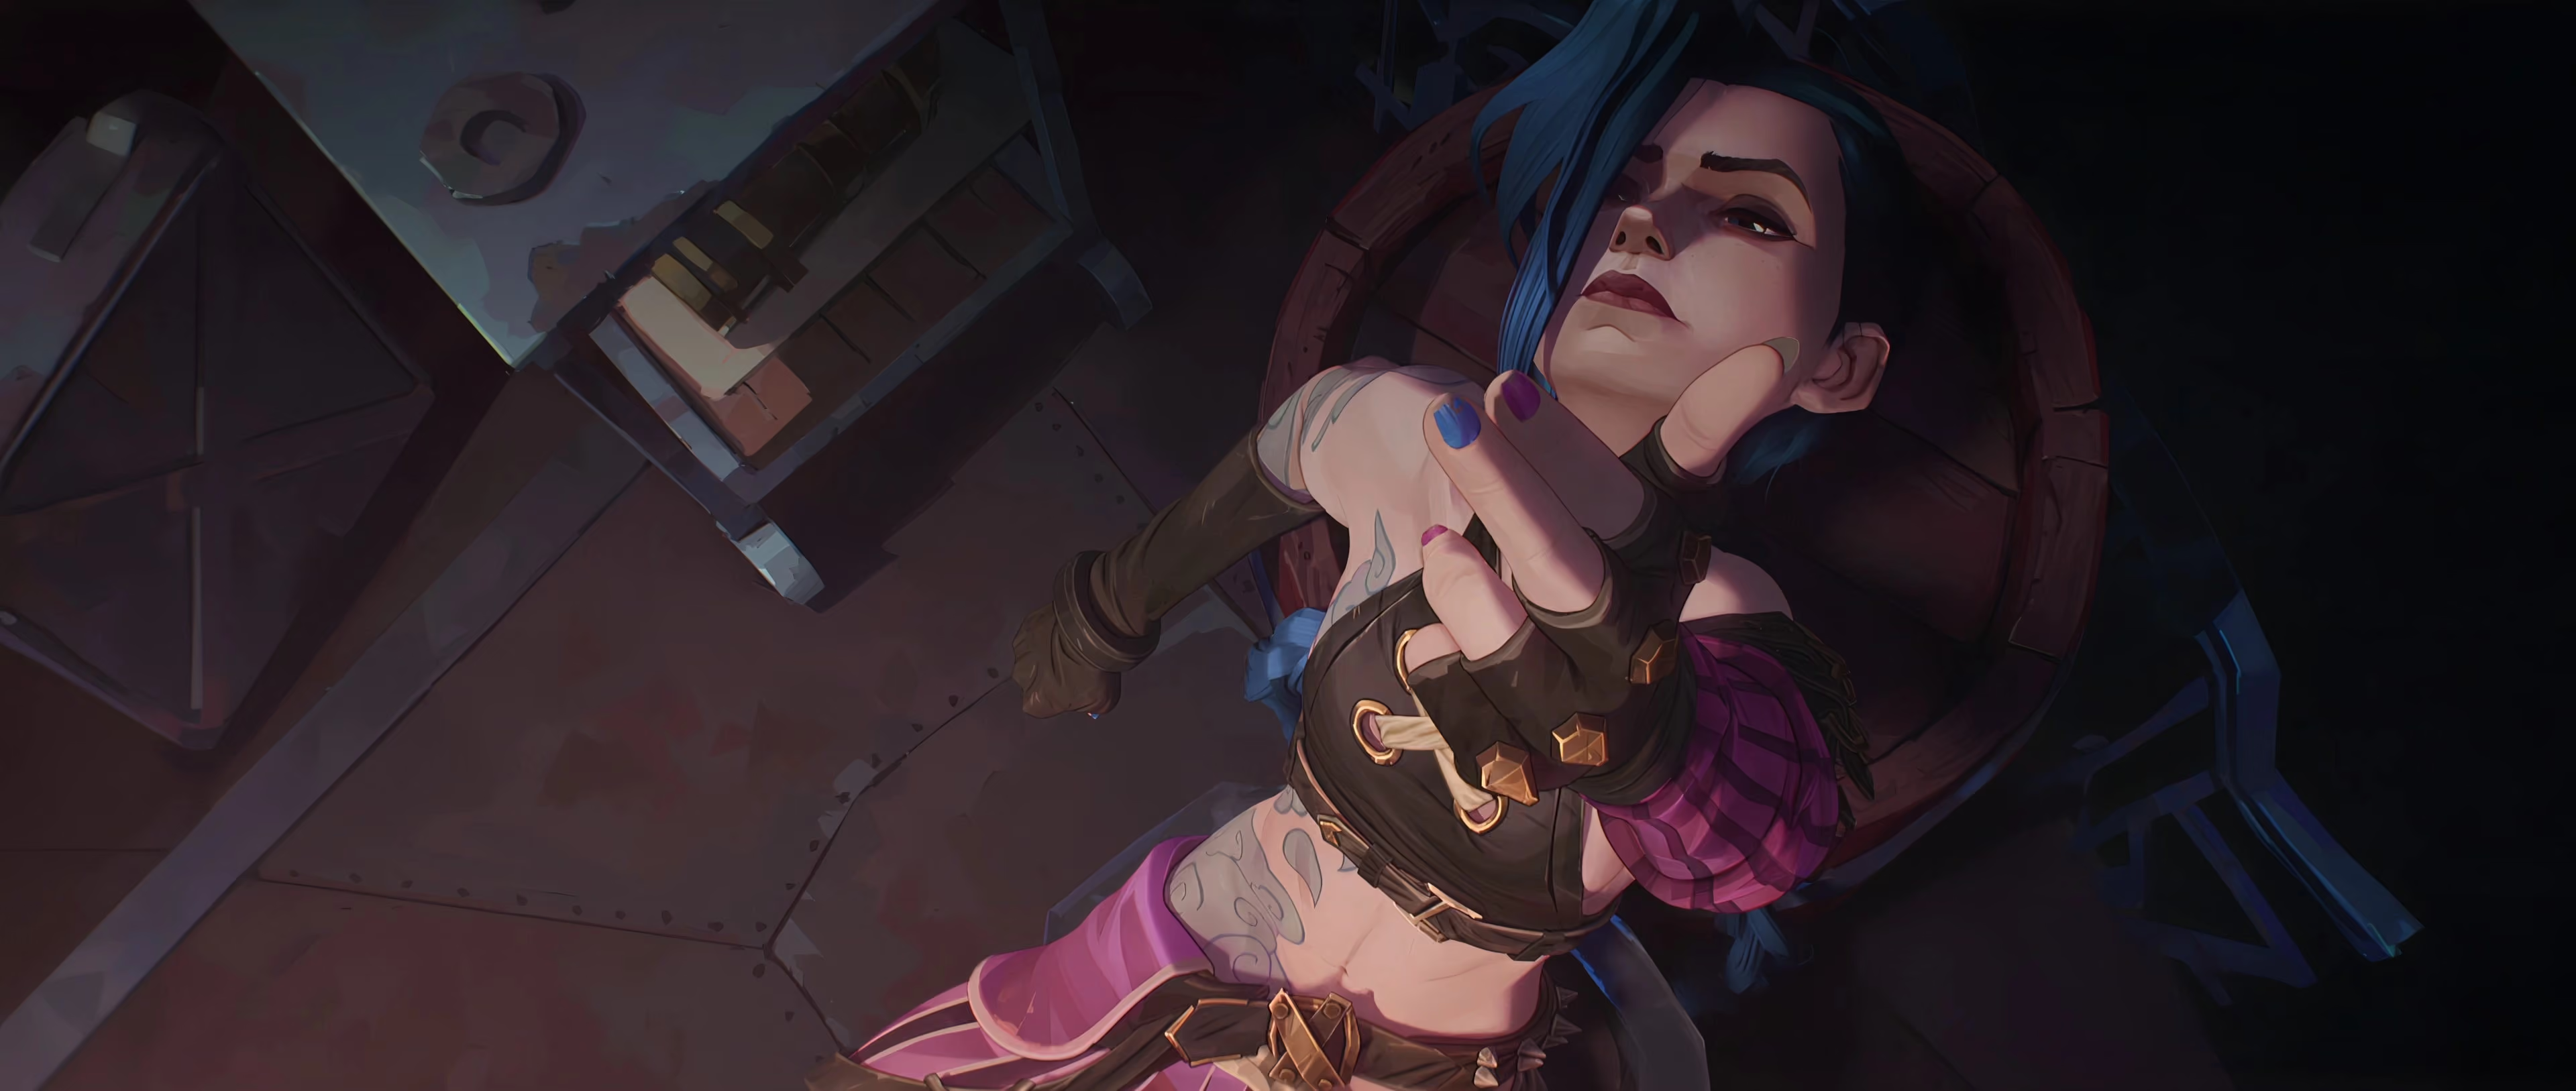
Shading and look-development artists define how surfaces respond to light. Lighting artists then use those materials within each shot, adjusting the placement, intensity, color, and size of lights to support the story.
Productions such as Arcane demonstrate how 3D models, painted textures, stylized lighting, compositing, and 2D effects can work together to create a painterly final image. The result should not be attributed to a single shader. It comes from the interaction of several artistic and technical departments.
Video games
Video-game shading must balance visual quality with real-time performance. Materials need to respond consistently as the player moves through changing environments, while shaders must remain efficient enough for the target hardware.
Developers may use physically based materials for realism, simplified shading for mobile platforms, flat shading for low-poly environments, or custom models for a distinctive visual identity.
Gouraud shading historically provided an efficient way to smooth lighting across polygons. Modern engines more commonly use per-pixel calculations, physically based material systems, baked lighting, and screen-space effects, but the same performance tradeoffs still apply.
Architectural visualization
In architectural visualization, shading communicates the character of materials before a building or interior exists physically.
Wood should respond differently from polished stone. Frosted glass should not behave like clear glass. Rough concrete needs a broader, softer reflection than glazed tile. Accurate scale is also important because texture size, bump detail, and surface roughness influence whether the result appears believable.
Shading is most effective when it is evaluated together with lighting. Even an accurately built material can appear incorrect if the scene lacks suitable highlights, reflections, or indirect illumination.
Industrial design and product visualization
Product visualization relies heavily on controlled shading because small changes in roughness, edge highlights, reflections, and surface curvature can alter how viewers interpret a product.

Smooth shading is especially important for manufactured objects with curved surfaces. Poor topology or incorrect normals can produce visible dents and distorted reflections even when the underlying model dimensions are accurate.
Product artists often use large area lights and controlled studio environments to reveal the shape of the object through reflections. The goal is not simply to illuminate the product, but to describe its form and material clearly.
Virtual reality and simulation
Shading in virtual reality must support immersion without reducing performance or visual comfort. Because each view must be rendered repeatedly at a high frame rate, expensive materials and effects need careful optimization.
Artists may simplify reflections, bake lighting, reduce texture sampling, limit transparency, or use lower-cost approximations for indirect light. The most appropriate technique depends on the hardware, viewing distance, scene complexity, and importance of the material to the experience.
Simulation and technical visualization may prioritize readability over photorealism. Flat shading, simplified lighting, or cool-to-warm shading can make surface orientation and small geometric changes easier to understand.
Evolving role of shading in art
Modern shading increasingly combines traditional artistic judgment with programmable tools.
Real-time engines now support material systems that were once practical only for offline rendering. Film renderers continue to improve their handling of complex materials, volumes, and indirect lighting. Artists can also build custom shading networks without writing every operation directly in code.
At the same time, traditional methods continue to influence digital work. Hatching, stippling, paint texture, ink washes, and simplified tonal shapes can be reproduced through brushes, procedural shaders, geometry, or post-processing.
The boundary between 2D and 3D shading is therefore becoming less rigid. A 3D render may contain hand-painted textures and drawn effects, while a 2D illustration may use 3D models, normal maps, and digital lighting as part of its process.
Regardless of the tools, successful shading depends on making deliberate choices. Flat shading can reveal structure. Smooth shading can suggest continuous curvature. Gouraud and Phong shading demonstrate different approaches to interpolating information across a surface. Hatching, stippling, scumbling, and blending give artists different ways to organize value and texture.
Understanding these different shading techniques makes it easier to choose the right approach for a particular image, animation, game, product, or architectural scene.
Register Now and Get $50 FREE Credits!