.avif)


Introduction to Rendering in Maya
Autodesk Maya is a premier software suite for 3D animation, modeling, simulation, and rendering. It offers an array of sophisticated tools that enable artists and animators to craft detailed and immersive visual experiences. Rendering in Maya translates your meticulously crafted models and animations into stunning visuals that showcase the depth and vibrancy of your creations. Utilizing a Maya render farm can greatly enhance this process, efficiently handling the complex rendering tasks to bring your artistic visions to life more quickly. In this article, you'll learn how to render animation in Maya and discover crucial tips to optimize your rendering process efficiently.
Why Render Animation in Maya?
Rendering is the transformative step in the 3D production pipeline where your digital work is finalized into an image that replicates real-world lighting, textures, and physical attributes. Utilizing Maya's potent rendering capabilities, such as the Arnold Renderer integrated since Maya 2017, artists achieve images and sequences with a lifelike quality unparalleled in CGI (Computer Generated Imagery). This makes Maya a top choice for professionals in animation and visual effects.
Preparing Your Animation for Rendering
Effective preparation can significantly enhance the quality of your rendered animation while optimizing the use of system resources.
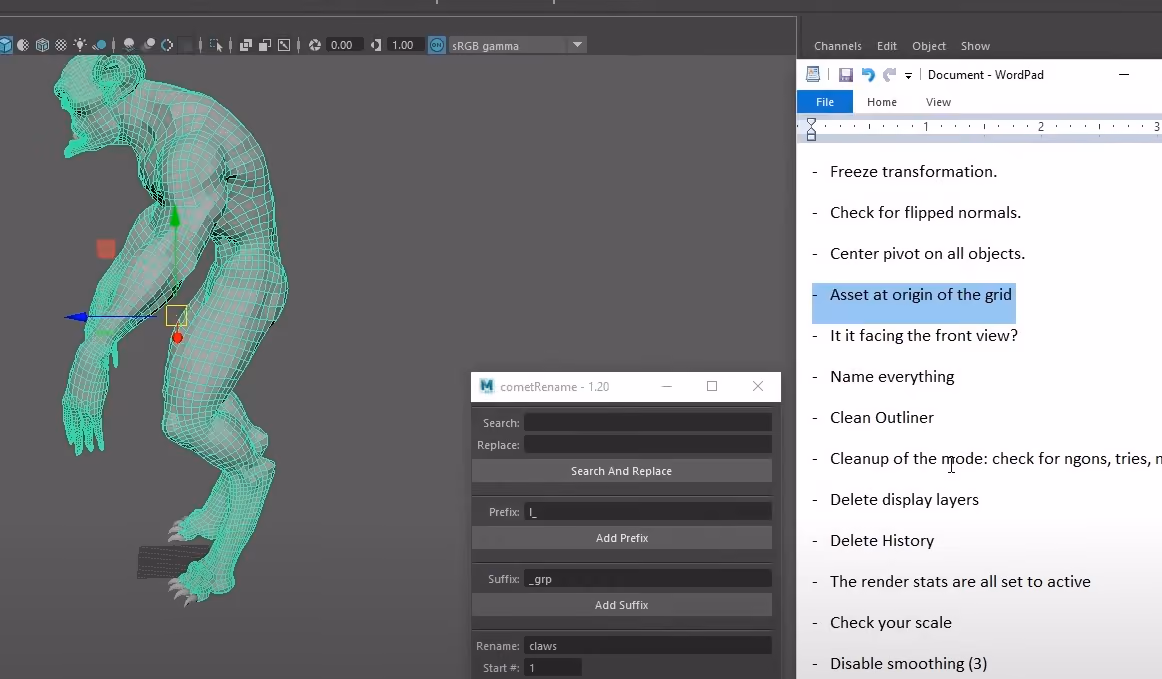
Checking Your Scene Setup
It's crucial to ensure that all elements are correctly positioned and visible in your scene. Autodesk recommends a thorough inspection of your models, animation paths, and visibility settings to prevent any rendering errors or undesired elements in the final product. The scene should be clean of any unused nodes or history that can clutter your scene and cause unnecessary computation during rendering (Autodesk, 2023).
Optimizing Geometry and Textures
Reducing the polygon count in your models and optimizing texture sizes can decrease rendering times and system load. Autodesk suggests using techniques like LOD (Level of Detail), where simpler models replace detailed ones at farther distances, and efficient UV mapping to maintain quality without straining resources (Autodesk, 2023).
Setting Up Cameras and Lighting
Correct camera and lighting setups are pivotal. Maya allows for multiple camera angles and types, each offering unique perspectives and focal depths. Autodesk also emphasizes the importance of lighting in rendering, advising the use of natural light simulation and three-point lighting setups to enhance depth and realism (Autodesk, 2023).
Choosing Render Settings in Maya
Selecting the right render settings is crucial in balancing render quality with resource efficiency.
Selecting Render Engine
Arnold, Maya’s default render engine, is renowned for its ability to manage complex scenes and lighting scenarios efficiently. Its integration supports advanced rendering techniques such as ray tracing and global illumination, which are essential for achieving photo-realistic results (Autodesk, 2023).
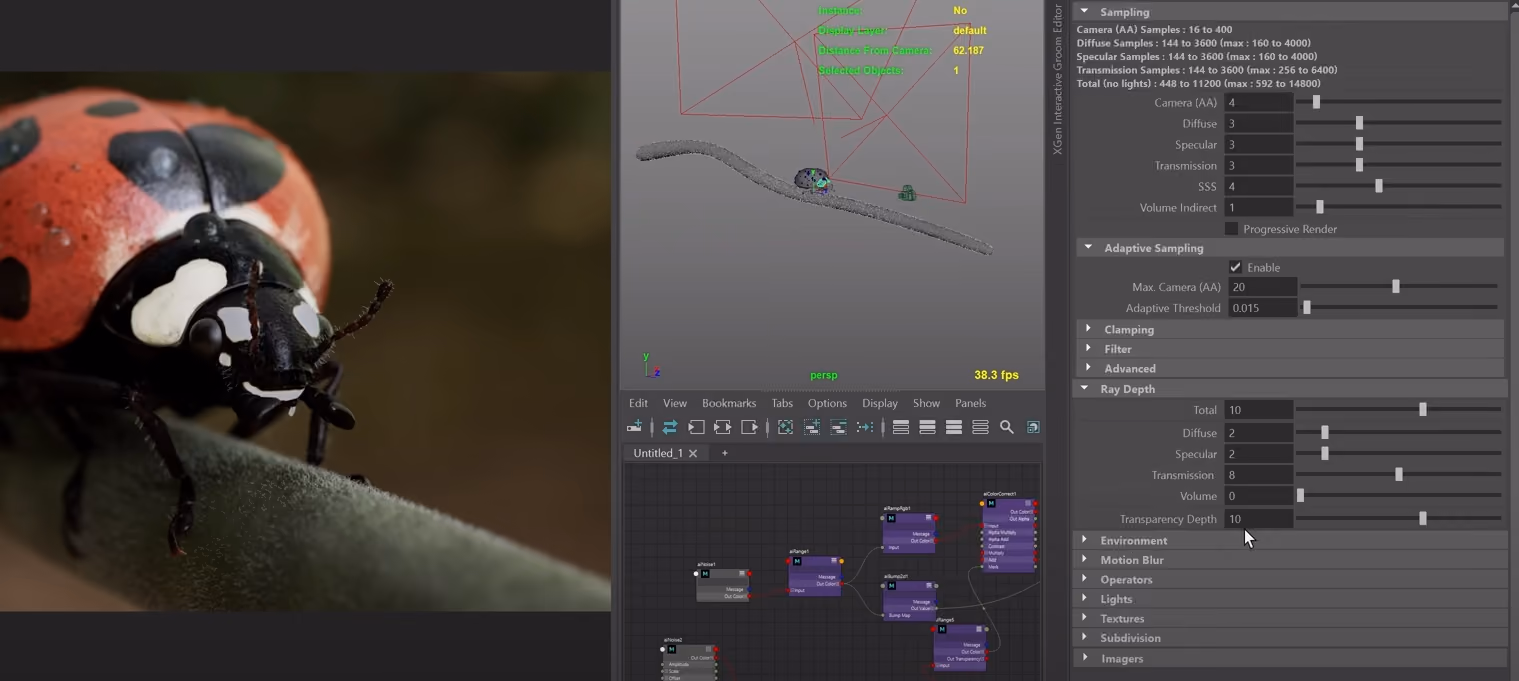
Understanding Render Quality
Adjusting render settings like ray depth, sample rate, and anti-aliasing filters can significantly impact both the quality of your renders and the time it takes to complete them. Autodesk recommends conducting test renders with reduced settings to refine these parameters before executing a final high-quality render (Autodesk, 2023).
Configuring Render Output
Choosing the right output format is essential for your workflow. Maya supports a variety of file formats, including .MOV, .AVI, and image sequences like .PNG or .EXR. The choice depends on your project requirements, such as resolution, compression needs, and downstream processing. Autodesk provides detailed guidelines on configuring these settings optimally (Autodesk, 2023).
Rendering Your Animation
Batch Rendering Basics
Batch rendering allows you to render scenes or sequences in the background, freeing up Maya for other tasks. This method is particularly useful for rendering complex scenes or long animations overnight or on dedicated rendering machines (Autodesk, 2023).
Rendering Individual Frames
For high control over specific frames, especially when troubleshooting or fine-tuning, rendering frames individually is beneficial. This approach allows for adjustments and re-renders without committing to lengthy sequence renders (Autodesk, 2023).
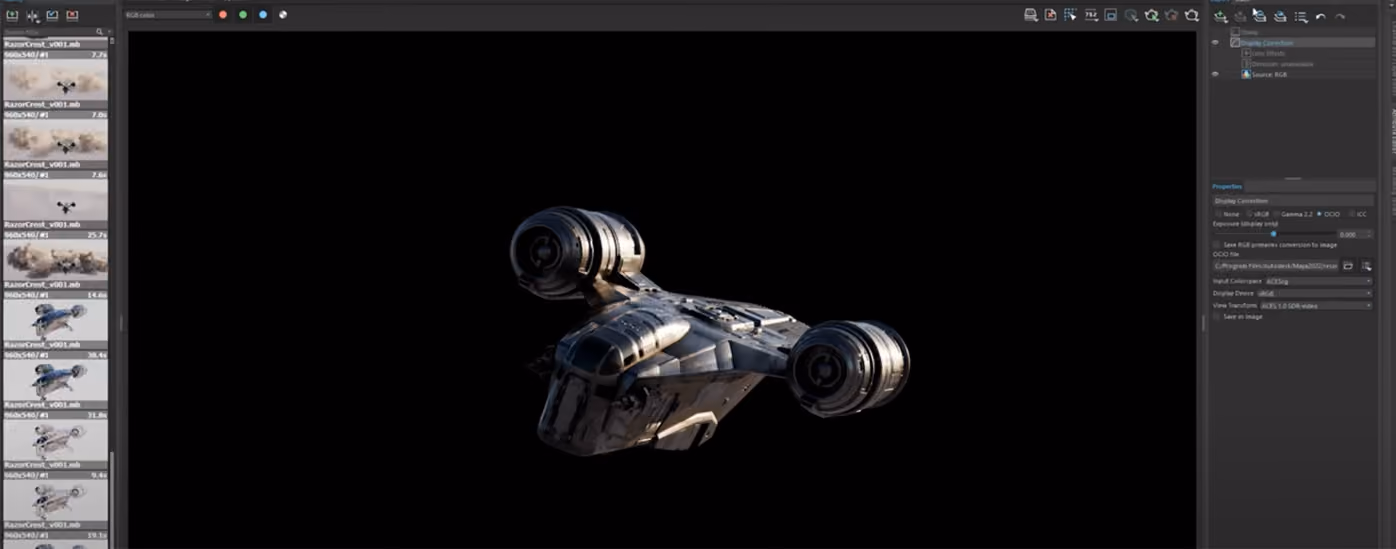
Monitoring Render Progress
Maya provides tools for monitoring render progress and adjusting parameters on-the-fly, allowing for real-time corrections and optimizations. Keeping an eye on the Render View window during rendering offers immediate visual feedback and error identification (Autodesk, 2023).
Exporting and Compositing Rendered Animation
Exporting Animation Files
Once rendering is complete, exporting your frames or sequences is straightforward in Maya. Autodesk advises on best practices for exporting to ensure compatibility and integrity of the final animation files (Autodesk, 2023).
Basic Compositing Techniques
Compositing is a critical post-processing step where rendered elements are combined to form the final visual output. Using software like Adobe After Effects or Nuke, integrate your rendered layers, apply color corrections, and adjust transparency to achieve the desired final composition (Autodesk, 2023).
Combining Frames into a Video
Compiling individual frames into a video sequence is a common practice. Autodesk provides insights into how to use Maya’s built-in tools or external software to seamlessly integrate frames into a cohesive animation, ensuring smooth playback and professional quality (Autodesk, 2023).
Troubleshooting Common Render Issues
Dealing with Render Errors
Rendering errors can be due to numerous factors, including hardware limitations, software bugs, or incorrect settings. Autodesk’s support forums and documentation offer troubleshooting tips for common issues like crashes, incomplete renders, or unexpected visual artifacts (Autodesk, 2023).
Improving Render Performance
Optimizing your scene, upgrading hardware, or utilizing network rendering are all strategies recommended by Autodesk to enhance render performance. Effective management of these elements can lead to faster renders and more efficient workflows (Autodesk, 2023).
Fixing Lighting and Shadow Problems
Correcting issues with lighting and shadows can drastically improve the realism of your render. Autodesk’s tutorials provide step-by-step adjustments for light settings, shadow fidelity, and render options to accurately depict lighting dynamics (Autodesk, 2023).
Conclusion
Final Thoughts on Rendering in Maya
Learning, mastering, and rendering animation in Maya requires patience, skill, and an understanding of both the artistic and technical aspects of 3D visualization. The software's extensive capabilities, supported by a robust set of tools and detailed documentation from Autodesk, equip artists to achieve stunning, realistic animations.
Additional Resources and Tutorials
For further exploration, Autodesk Maya’s manual and online learning resources offer comprehensive tutorials and user guides that are invaluable for both novice and experienced animators aiming to perfect their rendering skills.
Register Now and Get $50 FREE Credits!