Autodesk's 3ds Max stands as an industry standard in the 3D modeling and animation domains, revered for its robust capabilities in creating detailed animations and models. This software is pivotal across various industries including video game design, film visual effects, and architectural visualization, providing tools that cater to a broad spectrum of creative professionals. This guide is designed to delve into the complexities of rendering animations in 3ds Max, offering a broad walkthrough including some advice, tailored techniques, and insights to significantly enhance your final renders.
Rendering transforms a simple 3D model into a stunning visual representation, complete with textures, shadows, and lighting effects that mimic real-world phenomena. For animators and designers, rendering is the final step that showcases their artistic and technical prowess. In 3ds Max, rendering animations allows creators to visualize the final effect of their designs, ensuring that they are both visually appealing and technically accurate. This process is vital for final presentations, client reviews, and visual effect assessments in films and games.
Rendering begins long before you hit the render button. Preparation is key to a smooth rendering process and a high-quality outcome. Here’s how to set up your project for optimal results.
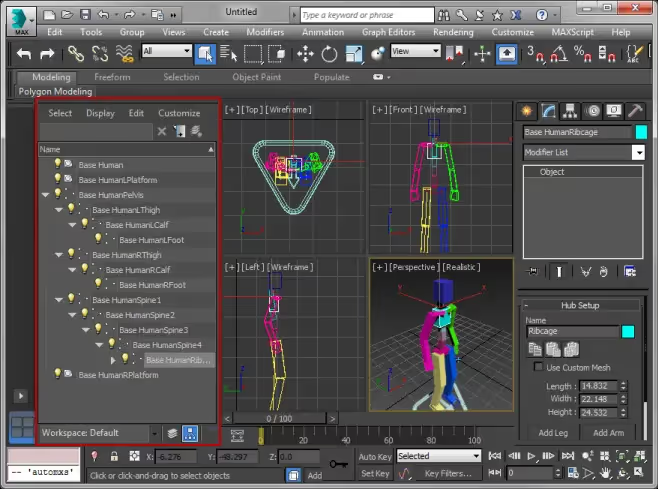
Efficient scene organization is critical for managing complex animations which may contain multiple elements such as characters, environments, and dynamic effects. Utilize 3ds Max's Layer Manager to segregate different assets, making it easier to handle individual elements without affecting the entire scene. This method enhances not only the workflow but also the software’s performance by isolating actions to specific layers during the animation and rendering processes.

Model complexity and material definitions significantly impact rendering times. To optimize the efficiency, focus on minimizing the polygon count in your models while retaining essential details that contribute to the visual quality. In materials, avoid overly complex shaders and high-resolution textures that can exponentially increase render times. Instead, use optimized, yet visually appealing textures and procedural materials where possible.
Cameras define the viewpoint from which your animation is rendered, acting as the audience's eye. Careful positioning and framing can make or break a scene’s impact. Experiment with different types and angles to best capture the action or highlight specific details. Lighting plays an equally important role by influencing mood, depth, and realism. Utilize 3ds Max’s extensive lighting tools, experimenting with global illumination, spotlights, and ambient light to enhance your scene's atmosphere and realism.
The render settings in 3ds Max are powerful and detailed, providing control over every aspect of how your scenes are rendered.
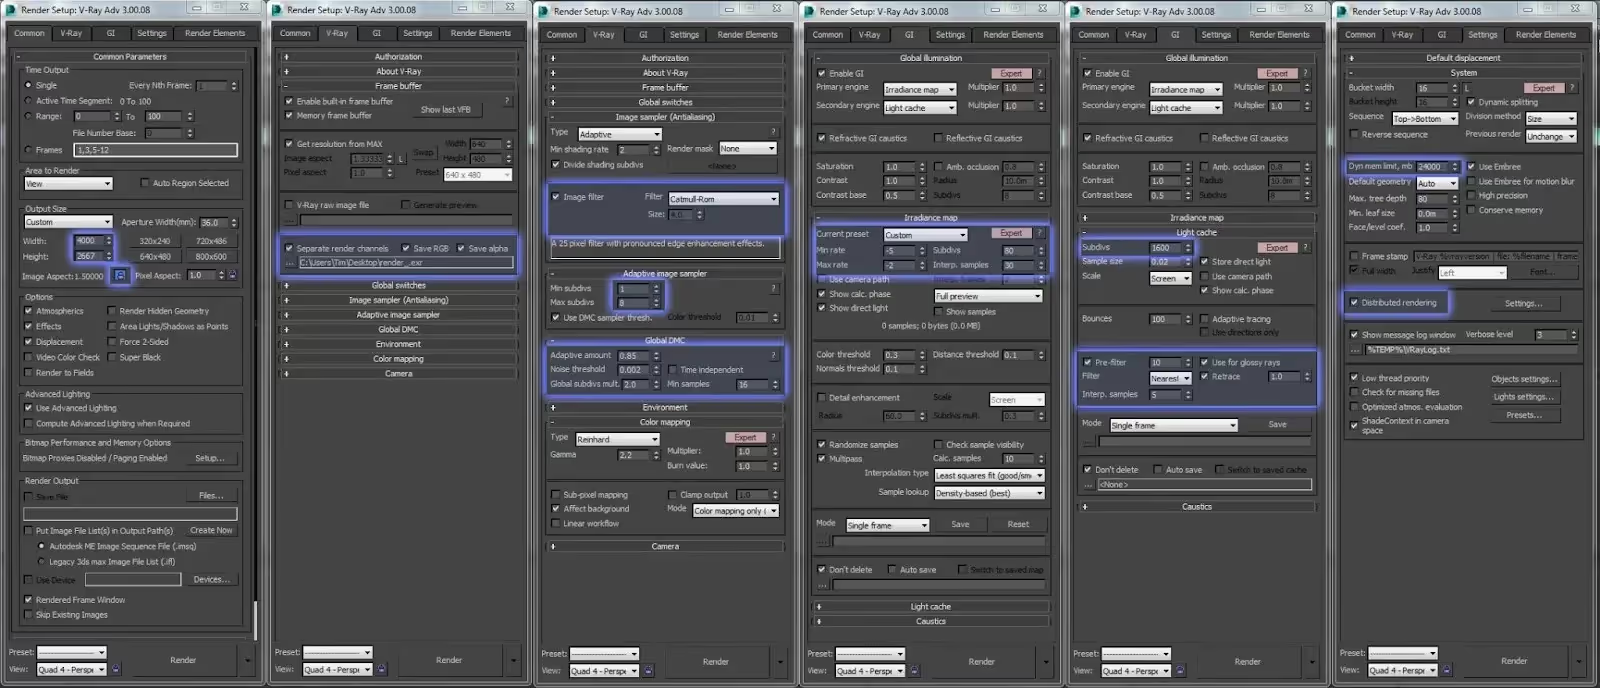
3ds Max supports various render engines, each suitable for different types of projects. The default scanline renderer works well for simple scenes or real-time applications, while Arnold offers advanced ray-tracing features ideal for high-quality cinematic outputs. V-Ray, a third party engine by Chaos Group, is often favored for architectural visualization, and excels in rendering complex interplays of light and materials. Choosing the right engine depends on your project's specific needs regarding speed, quality, and realism.
Render quality is controlled through settings such as resolution, anti-aliasing, and shadow fidelity. Higher settings produce better quality but increase render times and resource use. It’s crucial to strike a balance suitable for your project's scope and the available hardware. Use draft quality for test renders and reserve high-quality settings for final outputs.

The output configuration is pivotal for your workflow. Determine the necessary resolution and file formats early in the production process to ensure compatibility with subsequent tools and platforms. Common formats include still images like PNGs for lossless quality or video files like AVIs for animations. Consider your end use—whether for digital platforms, broadcast, or print—and configure your settings accordingly.
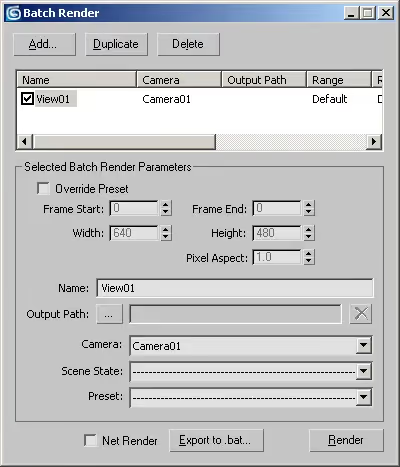
Batch rendering is an efficient way to handle multiple scenes or camera angles simultaneously. This tool allows you to set up a queue of render jobs, each with individual settings, which 3ds Max processes in sequence. This is especially useful for large projects or when working with multiple variations of a scene.

Choose whether to render your project by individual frames or by entire scenes based on your project’s needs. Frame-by-frame rendering is essential for high-quality outputs, particularly in VFX work where compositing and post-processing are expected. Scene-by-scene rendering might be more appropriate for simpler projects or when consistent lighting and effects are used across several shots.
3ds Max provides detailed feedback during the rendering process, including time estimates and a progress bar. Monitoring this allows for immediate intervention if issues arise, such as unexpected delays or errors. Regular checks can prevent significant time losses, especially with lengthy or complex rendering tasks.
For maximum control in post-production, export animations as a sequence of frames. This method allows detailed adjustments to each frame in post-processing software and is essential for high-end effects work.
After rendering, compositing is the next step. This involves combining visual elements from separate sources into single images, often creating illusions that are not feasible to capture on film. Using compositing software like Adobe After Effects, integrate rendered elements with live-action footage, adjust color levels, or add special effects.
Finally, compile your rendered frames into a video file using video editing software. Tools like Adobe Premiere Pro facilitate adding soundtracks, transitions, and final color grading to bring your animated project to its polished completion.
Errors during rendering can range from incorrect material settings to software bugs. Regularly save your work and keep backup copies of different stages of your project. When issues arise, revert to these saves to avoid starting over from scratch.
Enhance your rendering efficiency by optimizing scene elements before you begin the rendering process. Use proxies for complex objects and turn off features like global illumination during previews to save time.
Lighting and shadow problems often occur due to improper light settings or high contrast in textures. Adjust the light source settings, such as intensity and decay, and modify shadow maps for softer or more pronounced effects as needed.
Mastering rendering in 3ds Max is a journey of continuous learning and experimentation. While this guide provides a comprehensive overview, the depth of 3ds Max's capabilities are best explored through hands-on practice and ongoing study.
To further refine your skills, engage with Autodesk’s official training materials, online tutorials, and user forums. These resources are invaluable for staying updated with the latest techniques and industry standards, ensuring that your skills remain sharp and relevant in a rapidly evolving digital landscape. Whether you are just starting out or seeking to upgrade your expertise, the expansive community and resources surrounding 3ds Max will support your growth every step of the way.