

.avif)


Render farms are essential to 3D production pipelines but are not often in the sphere of a 3D artist’s consciousness - until a project requires more frames to render than can reasonably be done on a local workstation. Rendering over a cloud-based network more often, if not always, means transferring your project file and all its assets and other linked files from your local environment to a new one, which can create various problems and lead to losing money over renders that you can’t even use. This is why freelancers and studios who employ online render farm services regularly organize their projects so that they can send their files to their trusted render farm service and get their finished frames without complications.
As it happens, I need a render farm for an animated project I will soon be working on, so I decided to try out some of the online 3D community’s more frequently recommended services. I had to anticipate collaborating with other artists and my generally poor housekeeping habits, so I prepared a scene that would simulate the worst possible incarnation of my future project regarding its organization and dependencies.
About the scene
The test project is made in Blender 3.3, which is about 2 weeks into its official release at the time of this writing and will comprise a main .blend file that references other .blends from different folders and drives. I set it up to replicate a scenario where different people responsible for different assets could work on their dedicated .blend, and any updates they make to their assets would automatically reflect in the main file containing the final layout, camera work and render settings. The main file will be what is rendered on the farm. In terms of developing the project, this approach would make everything more streamlined and easier to revise.
However, I need to be sure I can send this off to a render farm and get the correct results, mainly since my rendering budget would be limited, and I’d need to make every cent count. In other words, there would be no room for losing render credits over bad frames resulting from this type of project setup.
The render farms
People vouched for three render farms - Fox, Rebus, and GarageFarm. Each seemed to have real-time support, a sophisticated file transfer and preparation plugin and generous starting credit. It would be among these three services if I were to find the perfect farm for my project.
Fox Render Farm
My first impression of the Fox web application was its uncluttered and slick UI. A series of pop-ups concisely explained how to use the service. I downloaded their Raysync client and installed it. As soon as I prepared to upload a file, I got this set of instructions:

So I made my paths relative using Blender’s External Data tools, and for good measure, packed all my data into the main .blend. Unfortunately, one of my assets could not be made relative for some reason and could not be packed.

Since this was something I could anticipate in my future project, I just deleted the offending asset for now and pressed on.

After uploading and hitting “continue”, I was asked to set a config for this project, which would have allowed me to link any plugins and double-check my preferred Render Engine.

After which, Fox began to analyze my scene.

The analysis log output some concerning prompts- none of my linked .blend files were detected. There was an option for me to upload a folder which meant that if I collated my files into a better-organised project directory, I wouldn’t have had these issues, which was fair enough. It was also clear that Fox did not support the latest Blender release at the time, but since I planned only to render a test of every 50th frame, I may as well continue and see what happens.

Interestingly, I was able to set how long a frame should render before alerting me that something may be wrong and when to stop the job after a timeout is registered. I chose to stop the rendering as soon as a time-out alert was reached.
My 5 frame test was completed, and I was pleasantly surprised to find I could preview the result from within the web application, but only 3 frames were rendered successfully. As I feared, none of the linked assets appeared in the scene.
The 5-frame job cost me $0.893, and the time per frame averaged around 18 mins on Fox’s standard CPU rendering model.

Takeaway:
I enjoyed interfacing with Fox’s UI, and I thought it was cool that I could preview my rendered frames right in the web application, and I found the cost of the renders reasonable. I like how I can set how long the farm should let a render process time out before aborting it. This gives me more direct control over managing tests on risky projects. If I organize better, I think I would like to try rendering with them again.
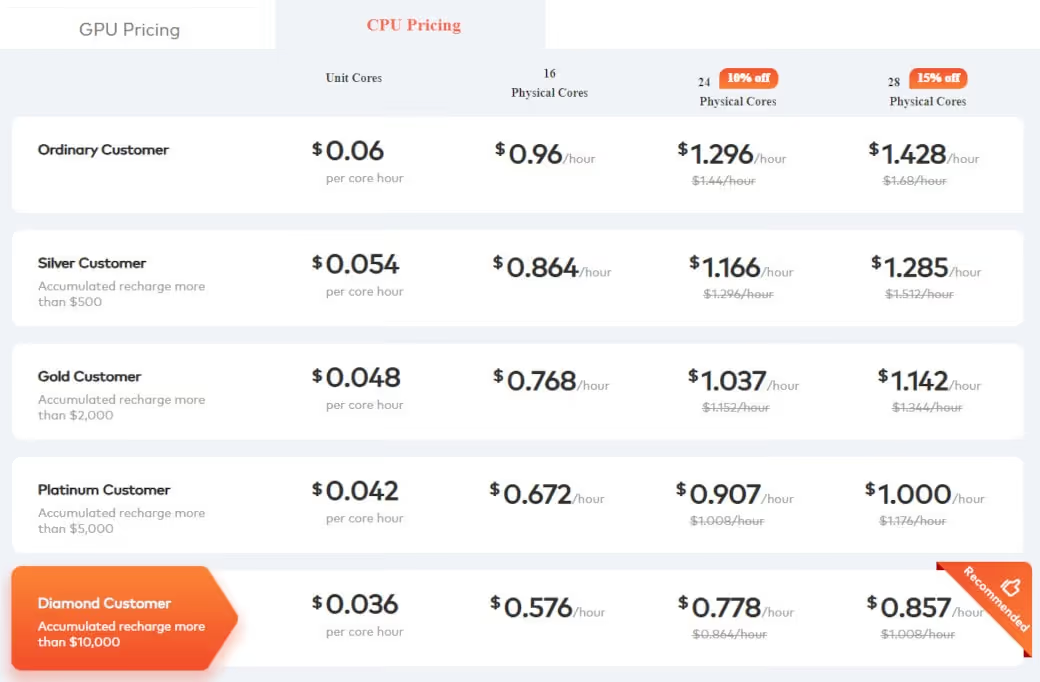
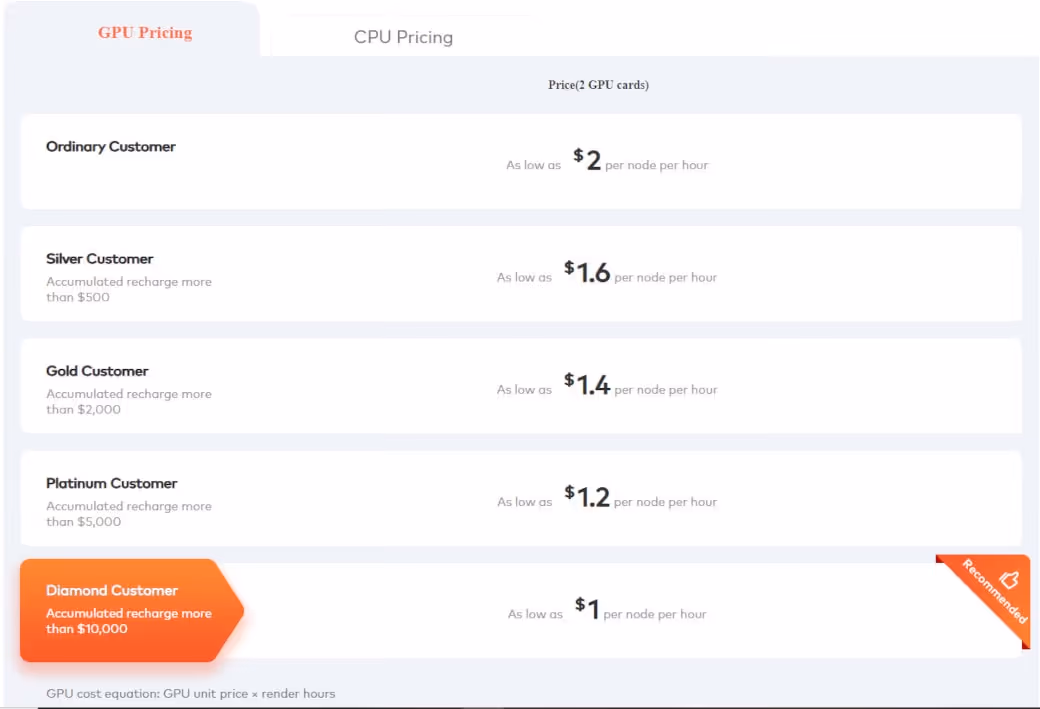
Fox charges a base $0.06 per GHZ/hour for CPU Rendering and $2 per OB/hour for GPU. They offer tiered discounts depending on the amount of accumulated payments (recharges) as shown below:
No set priority levels determine your place in the rendering queue or the number of nodes you can use. These can be discussed with their support which is available on Skype 24/7.
Rebus
After registering and going through the quickstart guide, downloading and installing Rebusdrop, I found a comprehensive set of controls sitting nicely in Blender’s render settings panel.

Running “quick check” allowed me to identify any problematic areas in the scene before uploading my file - an excellent way to “nip problems in the bud”, as it were.

The logs told me scripted expressions are unsupported, but from what I gathered, the scene should not require any scripts to run. Hitting the fix me button gave me an option to bake all scripted expressions. Other errors will offer other solutions that Rebus Drop will suggest after you hit “fix me”.
Sadly, I couldn’t get Blender to complete the baking process, and it would always crash.
I wanted to indicate a step for my render range, but even after doing so in Blender’s native settings, Rebus Drop sent me prompts asking if I was sure I wanted to render the full 1-250 frame range. I decided to try contacting their support.

After a short conversation with a member of support (who was very friendly and accommodating), it became clear that I would need to make all of my dependencies local to the scene to be able to upload it via rebus drop. This would, unfortunately, take the time I did not have at the moment.
Takeaway:
I love how Rebus Drop integrates into Blender and provides many opportunities to check and resolve problems before uploading any files. However, it was clear that my project workflow wouldn’t fly with Rebus either, and I was beginning to suspect I wouldn’t be able to render projects with this set-up on any online render farm.
Rebus’ base rates are 1.19 cents per Ghz/hour for CPU and 0.45 cents per OB/hour for GPU, regardless of how many nodes are used. They offer volume discounts up to 60% depending on how many credits you top up:

Renders made with trial credits will come with watermarks, but as soon as you buy render points, you can download your previous renders again with the watermarks removed.
GarageFarm
With my hopes all but diminished, I resolved to at least finish this little experiment and try my luck with GarageFarm.NET.
When I checked their dedicated Blender page, I was pleasantly surprised by an ongoing 33% off deal they had on all Blender renders. Also, if you register from your software’s dedicated page on their site, you get $50 worth of starting credits instead of the usual $25.
Their plugin - renderBeamer, is similar to RebusDrop, where it runs as a stand-alone program but also integrates itself into 3D software. However, in Blender, it is way less interactive than RebusDrop, with basically just an option in Blender’s Render drop-down menu to “Beam it up”, which is how one would upload a project.
Other than a prompt warning me that the auto-run scripts switch is off on their farm by default, I received no additional warnings for my scene, which could either be a good or bad sign.

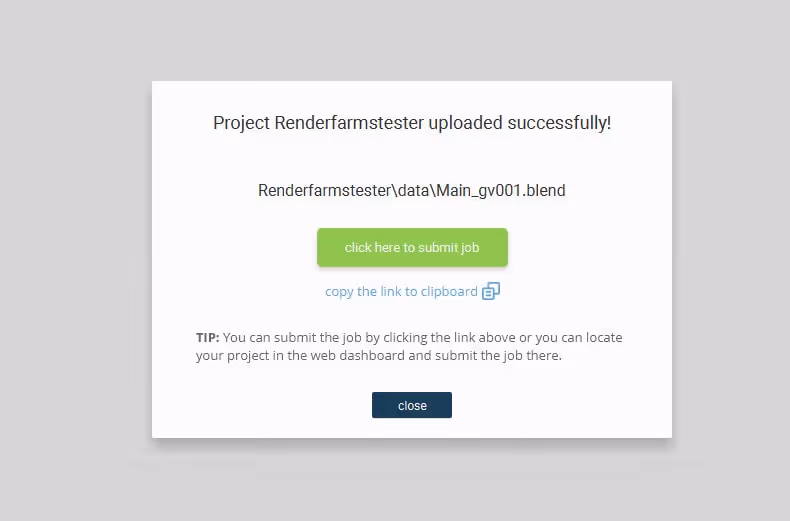
Once the project uploaded I was alerted through a pop-up with a link for me to submit my job. After clicking on it, I was redirected to my web dashboard and another pop-up that allowed me to review some of my render settings before starting the render. The process so far has been pretty straightforward.

I chose to render on Low priority and, as with the previous tests, add a step of 50 to the frame range.
My 5-frame test was completed successfully, cost me around $2 of credit, and gave me a full range estimate of $100. This felt reasonable to me provided my frames were rendered correctly. When I finally previewed them, I couldn’t believe my eyes.


All frames were rendered precisely as they should have, with zero additional preparation from my side. I had heard GarageFarm’s support team was one of the best, but I didn’t even need to get in touch with them! I don’t know how, but they took my absolute train wreck of a scene and rendered it without any problems. Since I knew that my scene set-up would work on their farm, I worked on my scene a little more to get a better-looking final render.
Takeaway:
Other than my not being a fan of the shade of blue they use on their UI, I have nothing but compliments for GarageFarm.NET. While I probably would not have been as disorganized on an actual project, it’s good to know that a farm out there has anticipated situations like mine and developed its automation to handle them. In the end, paying a few extra cents for a worriless rendering experience is entirely acceptable. While it’s always best to stay neat and orderly when managing a project, it’s a boon for anyone nearing the deadline of a job and only then realizing they need a render farm to try one out to great success without needing to change anything in the project.
Outro
At one point, I was sure this experiment would be a complete bust, and I would have to rethink using linked libraries in Blender and adopt a more cumbersome workflow to be able to use a renderfarm, but in the end, GarageFarm.NET proved me wrong, and I couldn’t be happier. I’d like to emphasize the test project was optimized for my intended production workflow and not for rendering on a network, so I wouldn’t fault Fox or Rebus for not being able to render my project off the bat. I encourage the reader to try out all three render farms since we all have different workflows and would appreciate certain aspects of a render farm experience over others. Having said that, I was so pleased with GarageFarm that I shared my findings with them, which led to this article!
Thanks for reading, Mel.
Register Now and Get $50 FREE Credits!


