


Many Blender aficionados have claimed, with every new sculpting update, that it is closer to becoming a viable alternative to more popular and dedicated sculpting applications such as ZBrush. Whatever your beliefs on the subject, Blender 3.5’s new support for VDM brushes is definitely a point in their favor. In this article, we’ll take a look at this exciting new feature, and how to get started using it in your sculpting workflows!
Before we go on, if you’re in need of some serious rendering power, check out our Blender Render Farm for the smoothest and friendliest rendering experience for your projects!
What is VDM?
VDM stands for Vector Displacement Mapping, and like a height map, it uses directional information mapped into an image to move geometry on a surface. What makes it better than normal displacement however, is that it uses the Red, Green and Blue channels of an image to affect the points of a mesh, allowing for the use of more complex shapes, particularly ones with overhang, which would not be possible to create with a traditional displacement map.
The main advantage of VDMs is that they allow us to take a more modular or kit-bashy approach to details on a sculpt, which in turn makes the process more conducive to quick concepting and less tedious on the whole. To get a better understanding of what VDMs can do, let’s launch Blender 3.5 and see it in action!
VDMs In Blender
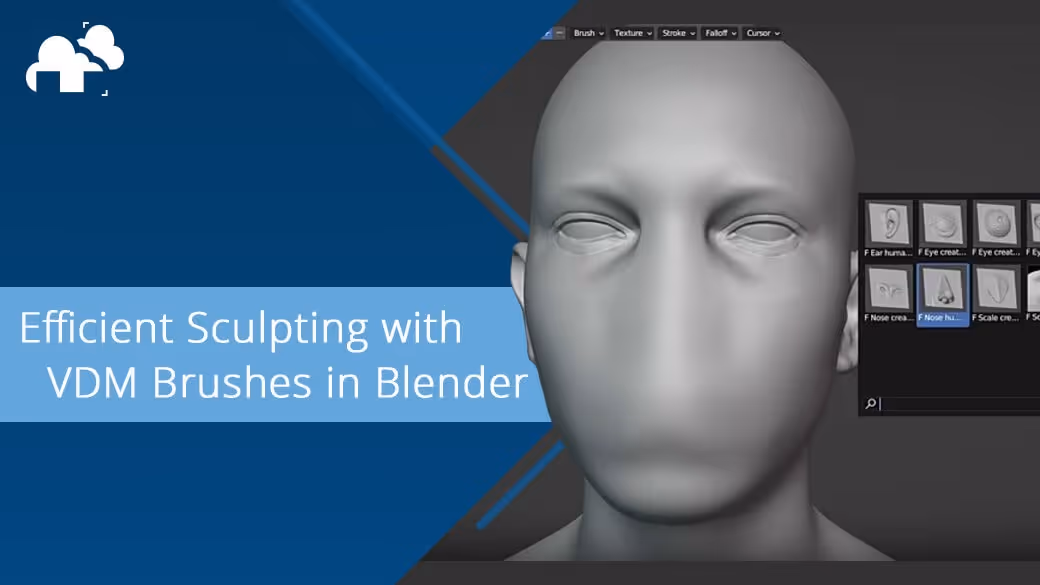
In the demo file provided by the folks at the Blender Foundation, We see on the right of the viewport a VDM brush for a human ear. This is one of several brushes available in the file.
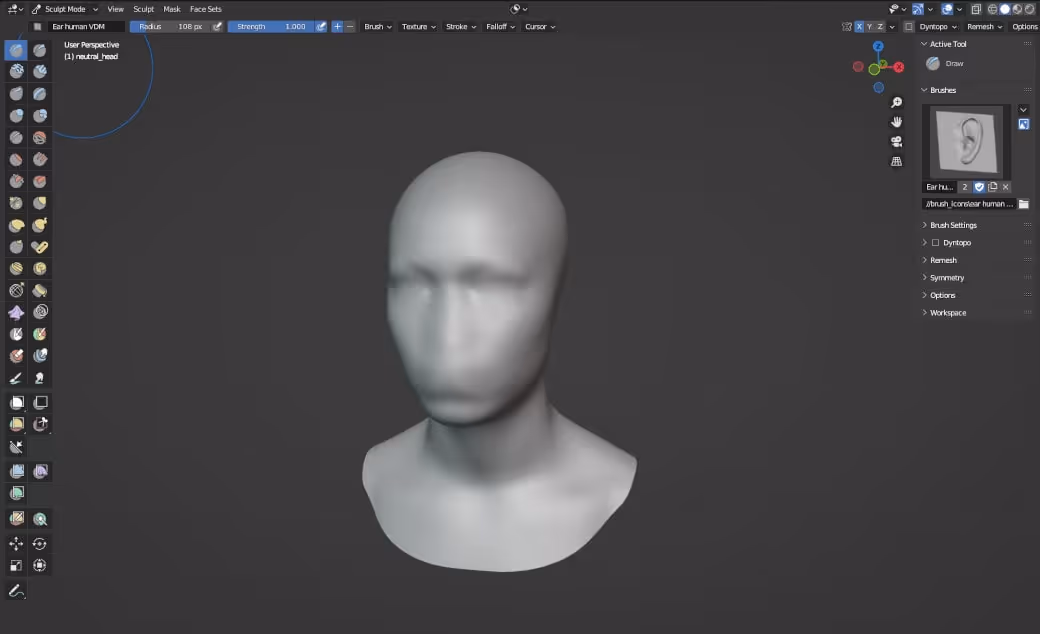
The brush itself is the basic draw brush, but with an EXR image texture loaded. Notice the ear shape represented by multiple colors instead of black and white as we might have come to expect from our experience with displacement thus far. The multicolored image consists of data from the RGB channels of an ear sculpt that was baked out into a plane. According to the developers, for the VDM brush to work correctly in Blender, it must have a high level of hardness, a falloff that is constant or close to constant, and its Mapping should be set to Area Plane. Most importantly, the new “Vector Displacement” checkbox should be ticked.

While other stroke methods can yield interesting results, “Anchored” allows us to adjust the scale and rotation of our VDM detail as we place it on our mesh.

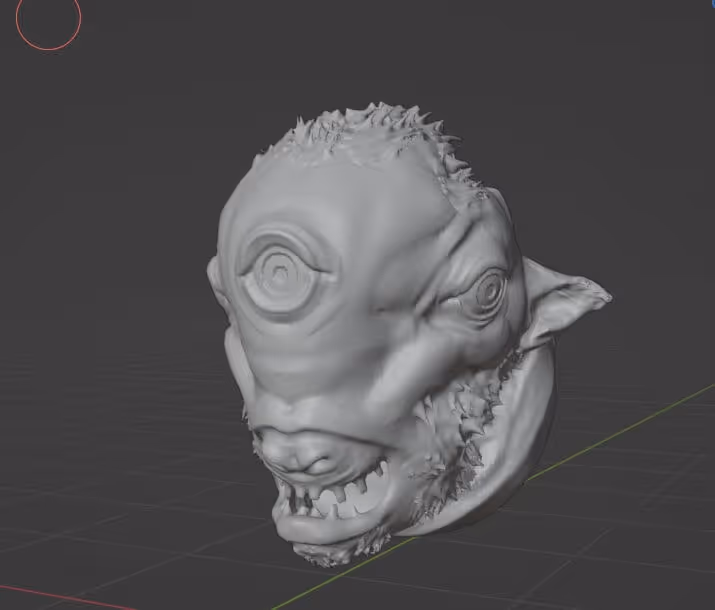
In this single demonstration, the possibilities are made clear. We could have libraries of different ear, eye, nose, or mouth variants to choose from and quickly apply to our head sculpts, feathers, scales, or fur for creatures or even ornaments, trims, or greebles for more hard surface concepts!
Best of all, since the brush alters the geometry of the sculpt, we can remesh with impunity and use Dyntopo to isolate our polygon density to areas where we want to add our VDMs - a boon for those of us who are without the beefier machines and need to optimize for performance.
Of course, to be able to leverage this new feature to the fullest, we need to know HOW to create VDM maps in the first place. Fortunately for us, the Devs at Blender were also kind enough to provide an add-on and some manual demo files that have everything set up for us.
Creating VDMs
When we install and enable the addon, a new VDM Brush Baker panel will appear in our brush settings panel in Sculpt Mode.
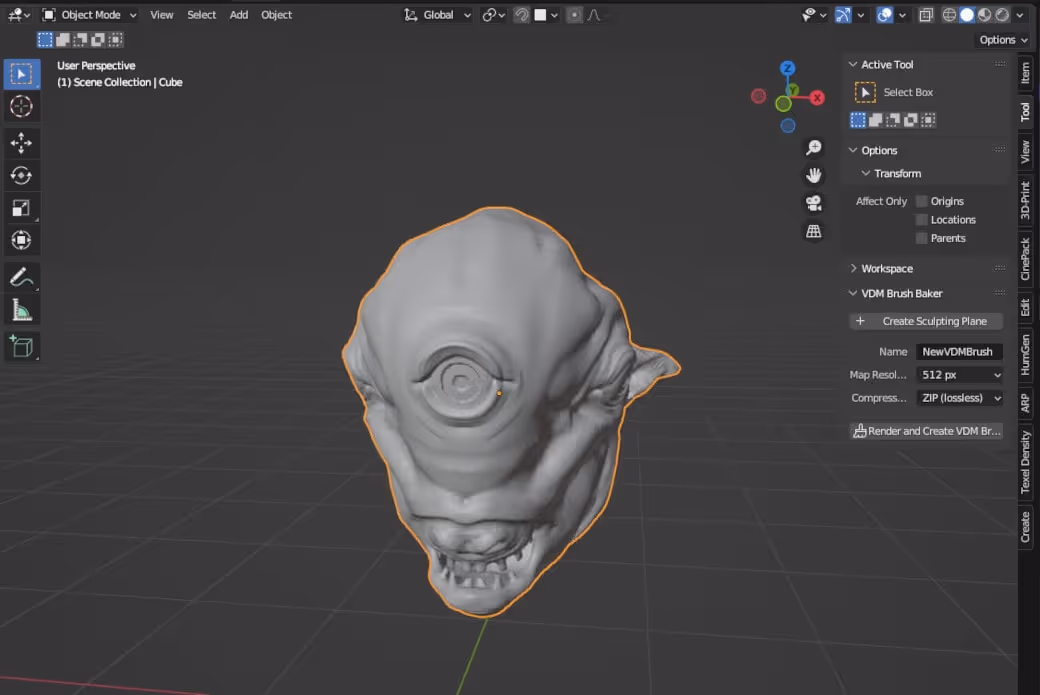
Hitting “Create Sculpting Plane” will give us a grid mesh subdivided with a Multires modifier. This grid will serve as our base from which we can sculpt whatever detail we want. We should note that contrary to applying our VDM brush to a surface, when creating the brush we are limited to the resolution we get from the Multires modifier since the grid’s UVs are used in the baking process.
In Sculpt Mode, let’s create a patch of fur with some clumps curling outwards from the surface, then let’s name our brush “FUR” and hit “Render and Create VDM Brush”.

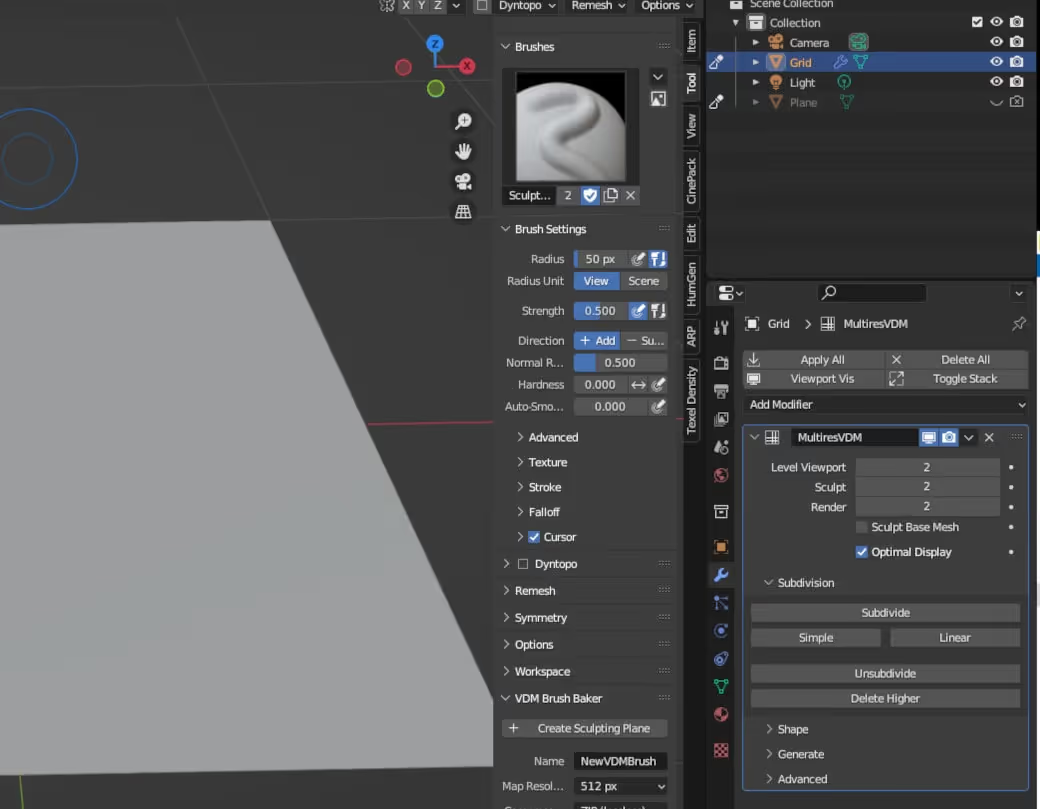
Now we can hide or delete our grid and enter sculpt mode with our working mesh, and we’ll find our VDM in the Draw brush. Let’s make sure we use the “Anchored” stroke method, and go to town!
Thanks to the add-on we can create a VDM for any detail that comes to mind as we sculpt, all the while emboldened by the ease of this new workflow in Blender. If some time has passed after the release of Blender 3.5 before you encountered this article, there may already be a wide range of VDM brushes made available by the Blender community! But, even now, we can make use of the multitudes of sculpting alphas or height maps online to our advantage-whether to convert them to VDMs as is or as a starting point for a more complex shape.
Let’s start by creating a new Sculpting Plane from the VDM brush add-on panel, and adding a Displacement modifier below the Multires modifier.

We can load an alpha into the Displacement modifier, and by adjusting the strength or other parameters in the modifier, arrive at a result we can use.
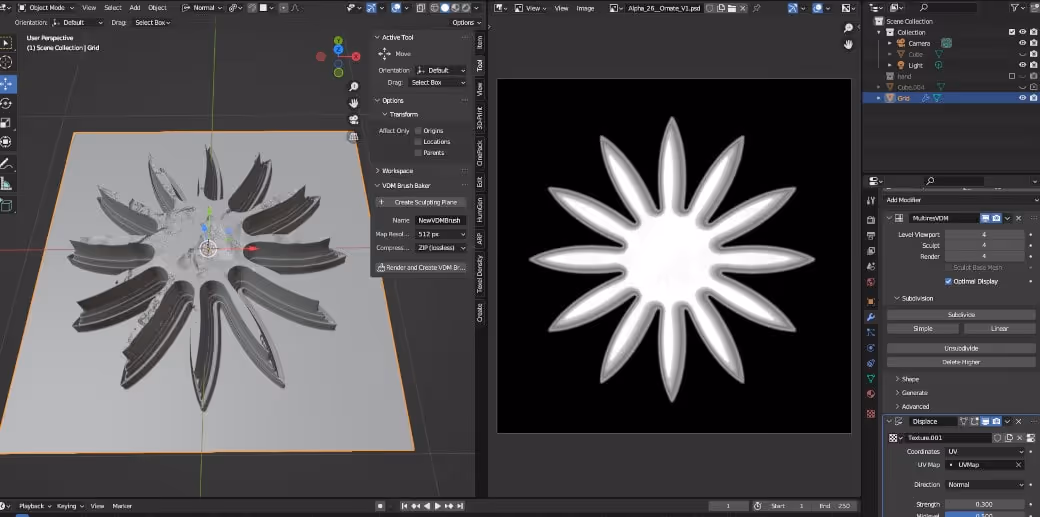
The more subdivisions we add to the Multires modifier, the finer the result, but we need to be careful not to overdo it and choke our workstations! We can always sculpt over what we get later. We’ll need to apply the Displacement modifier, and while modifiers should ideally be applied from the top of the stack down, we shouldn’t have any problems in this case.
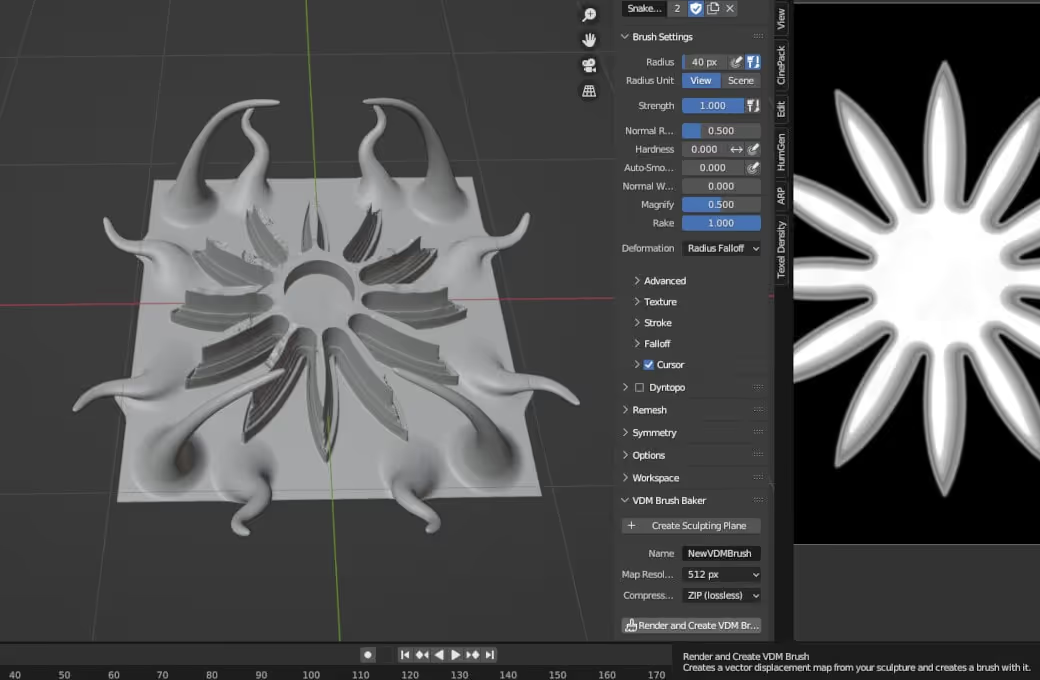
Back in sculpt mode, we can make adjustments however we like. When we’re ready to create our VDM, all we need to do is hit “Render and Create VDM Brush” once more…
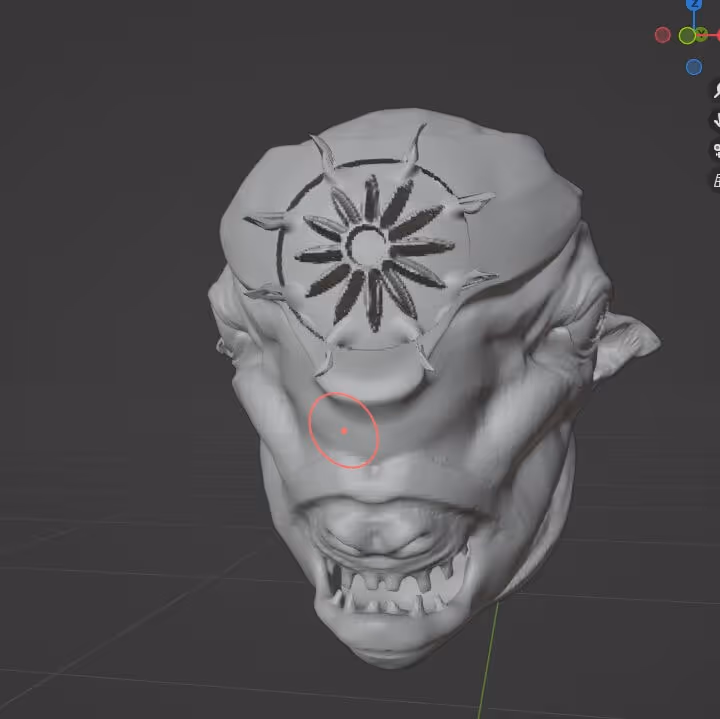
...and without a fuss, we have yet another VDM brush to play with!
In conclusion, Blender 3.5's new support for VDM brushes is a major step forward in the software's sculpting capabilities. By using VDM maps, artists can create more complex shapes and take a more modular approach to sculpting, resulting in a faster and more efficient workflow. Thanks to an add-on provided by Blender, it's easy to create VDM brushes for any detail that comes to mind, and the possibilities are endless. Whether you're a seasoned Blender user or just getting started, VDM brushes are definitely a feature worth exploring.
Register Now and Get $50 FREE Credits!