


In computer graphics, achieving photorealism is a pursuit that involves understanding and replicating the complex behaviors of light in the real world. Among these behaviors, one of the most visually striking is the phenomenon of caustics. Whether it’s the shimmering light patterns seen at the bottom of a swimming pool or the intricate reflections cast through a glass of water, caustics are everywhere in nature. This guide will explore what caustics are, their role in ray tracing, and how you can render them effectively to elevate your 3D projects.
What Are Caustics?
Definition and Simple Meaning
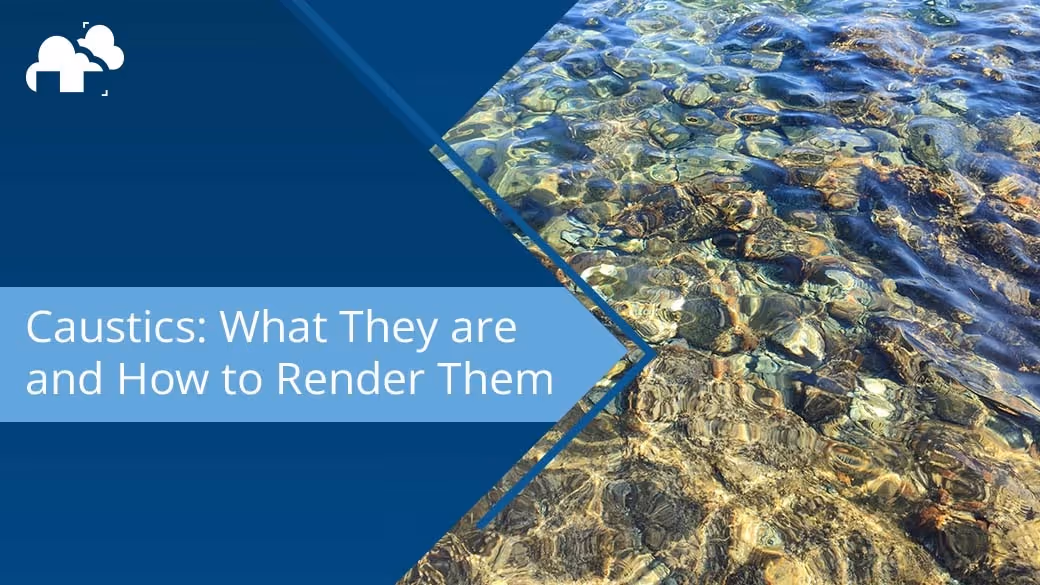
In simple terms, caustics are the light patterns created when light rays are focused through reflection or refraction from a curved surface. Imagine the bright patches of light you see on the floor when sunlight passes through a glass of water—that’s a caustic effect. These patterns result from the complex interplay between light and materials, often manifesting as bright, concentrated spots of light surrounded by softer areas of shadow.
Caustics in Light and Optics
Caustics are a direct consequence of light's interaction with transparent or reflective surfaces. When light passes through or reflects off these surfaces, it bends and concentrates along specific paths due to the laws of refraction and reflection, leading to the formation of caustic patterns. In optics, these patterns are often studied to understand the behavior of light, particularly in systems involving lenses, mirrors, and other optical devices.
Caustic Chemicals: Examples and Definitions
The term "caustic" also refers to substances capable of burning or corroding organic tissue by chemical action. However, in the context of optics and rendering, caustics refer solely to the optical phenomenon described above. It's essential to distinguish between these uses to avoid confusion, especially in interdisciplinary discussions.
How Do Caustics Fit into Ray Tracing?
The Role of Caustics in Ray Tracing
Ray tracing, a technique in computer graphics for generating images by tracing the path of light through pixels in an image plane, plays a crucial role in accurately rendering caustics. Since caustics are essentially focused light patterns, they require a sophisticated method of light simulation that can track how light rays interact with surfaces in a scene. Ray tracing excels at this because it calculates the path of each light ray, considering how it reflects, refracts, or is absorbed by surfaces.
Rendering Techniques for Accurate Caustics
There are several methods to render caustics accurately, with photon mapping and path tracing being the most prominent.
- Photon Mapping: This technique involves simulating the way photons (light particles) travel through a scene. Photons are emitted from light sources and bounce around the scene, interacting with surfaces. When they hit reflective or refractive surfaces, they are focused into caustic patterns that can then be rendered onto the final image.
- Path Tracing: This is a more generalized approach that simulates the paths of rays as they bounce around a scene. It is particularly effective for global illumination, where light bounces multiple times between surfaces, creating soft shadows, diffuse reflections, and caustics. Path tracing can be computationally expensive, but it often produces highly realistic results.
Check out this extensive video by SilverWing VFX on the phenomenon in Caustics and how it relates to 3d rendering:
Why Caustics Are Difficult to Render and Simulate in 3D
Caustics, while visually stunning, are among the most challenging lighting effects to accurately render in 3D. The difficulty stems from the complex nature of light behavior when it interacts with reflective or refractive surfaces. When light passes through or bounces off materials like glass or water, it bends and focuses in intricate patterns, creating caustics. Accurately simulating these effects requires a detailed calculation of light paths, which is computationally demanding for several reasons.
Complexity of Light Interactions
Rendering caustics involves simulating the behavior of numerous light rays as they reflect, refract, and scatter within a scene. Each ray of light must be tracked as it interacts with different surfaces, focusing or dispersing to create the bright and shadowed areas characteristic of caustics. Unlike standard diffuse or specular reflections, where light bounces in more predictable ways, caustic effects are highly dependent on the precise geometry and material properties of the objects involved.
For instance, when light hits a curved glass surface, it refracts in varying directions, creating a focal pattern that is highly specific to the curvature, thickness, and refractive index of the material. Capturing this complexity accurately requires advanced rendering techniques such as photon mapping or path tracing, which simulate thousands or even millions of light paths. This level of detail dramatically increases the computational load.
High Sample Counts for Noise Reduction
Another challenge in rendering caustics is noise. Due to the stochastic nature of light simulation in ray tracing, caustics can often appear grainy or noisy if not enough samples are used. High sample counts are necessary to reduce this noise and produce a clean, smooth caustic effect. However, increasing the number of samples exponentially increases the render times.
For example, a simple caustic effect might require hundreds of samples per pixel to resolve the light paths accurately. In complex scenes with multiple light sources and refractive objects, the number of samples needed can skyrocket, leading to extremely long render times, even on high-end hardware.
Computational Intensity and Resource Demands
Because of the need for high sample counts and the intricate light path calculations involved, rendering caustics is incredibly resource-intensive. This makes it a significant challenge for individual artists or studios with limited computing power. High-resolution renders with complex caustic effects can take hours, if not days, to complete on a single machine, especially when using physically accurate rendering techniques like path tracing.
The computational demands are further exacerbated in animation, where caustic effects must be rendered consistently across hundreds or thousands of frames. Maintaining the same level of detail and reducing noise across all these frames can be overwhelming for typical desktop setups.
How Render Farms Come Into Play
Render farms provide a solution to the immense computational demands of rendering caustics. A render farm is a cluster of high-performance computers networked together to distribute the rendering workload. By leveraging the collective processing power of multiple machines, render farms can significantly reduce render times, making it feasible to render complex caustic effects that would otherwise be too time-consuming or costly on a single workstation.
Distributed Rendering for Efficiency
In a render farm, a large scene or animation can be broken down into smaller tasks, such as individual frames or even portions of frames, which are then processed simultaneously across multiple machines. This parallel processing drastically cuts down the time needed to complete a render. For instance, a render that might take several days on a single machine could be completed in a matter of hours on a well-equipped render farm.
This efficiency is crucial for projects with tight deadlines or for artists who need to iterate quickly on their work. By reducing the time spent waiting for renders, artists can focus more on creative decision-making, tweaking and refining the caustic effects to perfection without being hindered by long render times.
Access to High-End Resources
Render farms also provide access to high-end resources that may not be available to individual artists or small studios. This includes cutting-edge GPUs, CPUs, and vast amounts of RAM, all optimized for high-performance rendering tasks. These resources are essential for handling the large datasets and complex calculations required for accurate caustic rendering.
Additionally, many render farms offer tailored services that optimize the rendering process based on the specific needs of the project, such as dynamic load balancing, priority rendering, and advanced noise reduction techniques. This ensures that the final output not only meets the desired quality standards but is also delivered in a timely and cost-effective manner.
Cost-Effective Solutions
While the upfront costs of building a high-performance rendering setup can be prohibitive, render farms offer a cost-effective alternative by allowing artists to "rent" processing power on a per-project basis. This pay-as-you-go model enables artists and studios to scale their resources according to the demands of each project, avoiding the need for significant hardware investments.
Render farms also often provide tools and interfaces that integrate seamlessly with popular 3D software like Blender, Maya, and Cinema 4D, making it easy to offload rendering tasks to the farm with minimal setup. This accessibility democratizes the ability to produce high-quality renders, making it possible for artists of all levels to create stunning caustic effects without being limited by their hardware.
Faking Caustics in 3D: Efficient Methods for Simulating Realism
When rendering caustics in 3D, achieving photorealistic results can be computationally expensive and time-consuming. However, there are several techniques to simulate or "fake" caustics without the heavy computational load, offering a balance between realism and performance. This section will guide you through one of the most effective methods: using light textures or gobos to simulate caustic effects.
Using Light Textures (Gobos) to Simulate Caustics
One of the most practical approaches to faking caustics is by using gobos, which are essentially texture maps applied to light sources. These textures can mimic the intricate light patterns produced by real caustics, such as the light refracted through water or glass, without requiring complex light calculations.
Step 1: Create or Obtain a Caustic Texture Map
To begin, you need a texture map that resembles the caustic patterns you wish to simulate. These can be sourced from online libraries or created manually using image editing software. The key is to have a texture that mimics the light distortion typically seen in caustic effects.
Step 2: Apply the Texture to a Light Source
In your 3D software, such as Blender, Maya, or Cinema 4D, select a spotlight or another direct light source in your scene. In the light's shader settings, you can apply the caustic texture map to control how the light is projected. This is often done by adding the texture map to the light's "color" or "intensity" inputs, depending on your software's specific setup.
For Blender users, this can be done by enabling the “Use Nodes” option in the light settings, then adding an "Image Texture" node and connecting it to the "Emission" shader of the light. You can further control the projection using a "Mapping" node, which allows you to scale, rotate, or translate the texture to fit your scene's needs.
Step 3: Fine-Tuning the Projection
Once the texture is applied, you can adjust the light's parameters to fine-tune the effect. Modify the light’s radius or softness to control the sharpness of the caustic pattern. For a more diffused effect, increase the size of the light source; for sharper caustics, reduce it. Adjusting the brightness and color of the light can also help blend the caustics naturally into the scene.
Step 4: Enhancing Realism with Additional Effects
To enhance the realism, consider adding subtle animations to the gobo texture, which can simulate the dynamic movement of water or the shifting light in a scene. This can be done by animating the position or scale of the texture over time, giving the caustics a more natural, fluctuating appearance.
Another tip is to use multiple light sources with slightly varied caustic patterns to create a more complex and layered effect. This can replicate the way light interacts with multiple surfaces in a real-world environment, adding depth to your render.
Advantages and Limitations
Using gobos to fake caustics is a highly efficient method that significantly reduces render times compared to physically accurate caustic simulations. However, this technique does have limitations. It may not capture all the nuances of light behavior in highly complex scenes, and the caustic effect will be less interactive with the objects and materials in the scene compared to full-fledged photon mapping or path tracing.
Despite these limitations, when used correctly, this method can produce visually convincing results, especially for projects where rendering time and resources are constrained. It's an excellent technique for those working in animation, visual effects, or any scenario where quick and effective caustic effects are needed.
This video by Cartesian Caramel demonstrates how Caustics can be simulated in Blender through the use of a noise texture driving the Emission of the Principled Shader, essentially acting as a Gobo:
Examples of Caustics in Everyday Life
Caustic Effects in Nature
Nature is replete with examples of caustics. The shimmering patterns at the bottom of a pool, the focused beams of light beneath a glass bottle, and the intricate light plays on a wet beach are all examples of caustics. These natural occurrences are often the inspiration for rendering caustics in digital scenes, aiming to replicate the same level of realism.
Wonder Labs explains Caustics as it appears in real life in this video:
Artificial Caustics in Art and Design
Artists and designers often use caustics to add a sense of realism or to create visually compelling effects in their work. For instance, in architectural visualization, caustics can enhance the realism of water features or glass structures, while in product design, they can highlight the transparency and reflective qualities of materials like glass and metal.
Why Understanding Caustics Is Important in 3D Modeling
Enhancing Realism and Visual Appeal
Incorporating caustics into your 3D models can significantly enhance the realism and visual appeal of your renders. Caustics add a level of detail that mimics real-world lighting conditions, making your scenes more believable and engaging. They can also draw attention to specific elements within your composition, guiding the viewer’s eye and adding depth to the scene.
Practical Applications in Animation and Visual Effects
Caustics are not just for static renders; they play a critical role in animation and visual effects. For example, in underwater scenes, moving caustic patterns can add dynamism and realism, simulating how light interacts with water over time. In visual effects, caustics can be used to create magical or otherworldly light effects, enhancing the narrative and emotional impact of a scene.
Learning Resources and Tutorials on Caustics
To master caustics, take advantage of the wealth of learning resources available. Tutorials on platforms like Blender Guru, CG Cookie, and Gnomon School offer in-depth guides on setting up and rendering caustics in various software. Additionally, exploring academic resources on optics and light behavior can deepen your understanding and help you apply these principles more effectively in your work.
By understanding and mastering the rendering of caustics, you can bring a new level of realism and artistry to your 3D projects, making them not only visually stunning but also technically impressive. Whether you're working on a still render, an animation, or a complex visual effects shot, caustics are a powerful tool in your creative arsenal. Happy rendering!
Register Now and Get $50 FREE Credits!