What is 3D modeling to begin with?
Is it some newfangled way of watching America’s Next Top Model on TV with a pair of the famous red & blue specs? Well, no, not at all… it’s something even better. 3D modeling is the digital creation of three-dimensional objects in dedicated computer software, such as Autodesk Maya, or more excitingly put, creating something from nothing in a digital world. Apologies if, like me, the mere mention of the phrase ‘digital world’ has set off the Digimon theme tune playing in your head.
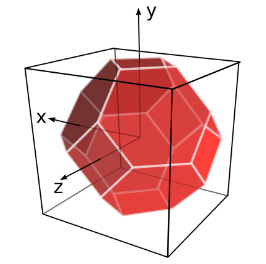
3D refers to the three dimensions of the universe, used to determine an object’s position within space, or ‘spaaaaace!’ as fellow Portal 2 fans will remember (the “4th dimension”, time, is irrelevant in this case). The letters X (left/right), Y (up/down) and Z (forward/backwards) represent these three dimensions; the first two of which may bring back good or bad memories of school math class. With the basics out of the way, let’s jump into speaking a little about 3D modeling software.
What about 3D modeling software?

There are a large number of computer applications out there that can be used for 3D modeling, available either as freeware or via a paid subscription; the latter often allows you to download a 30-day free trial, such as in the case of Maya. A lot of the software used in 3D modeling is capable of much more, including the creation of 3D animations, like Zootropolis (also known as Zootopia), or even South Park — “Whaaat!?” I hear you shout; yep the seemingly 2D-animated TV show is produced primarily with Maya.
3D modeling is only one of several important steps toward rendering out a final animation, which is where GarageFarm.NET comes in. We of course are talking about our industry leading Maya render farm, which this post will focus on. And to help you along the way, a handy list of supported software can be found at our supported apps page. So before we get into the tools I use for 3D modeling, let’s first take a step back and take a look at what a 3D model is actually made from.
Okay got it, but what is a 3D model made from?
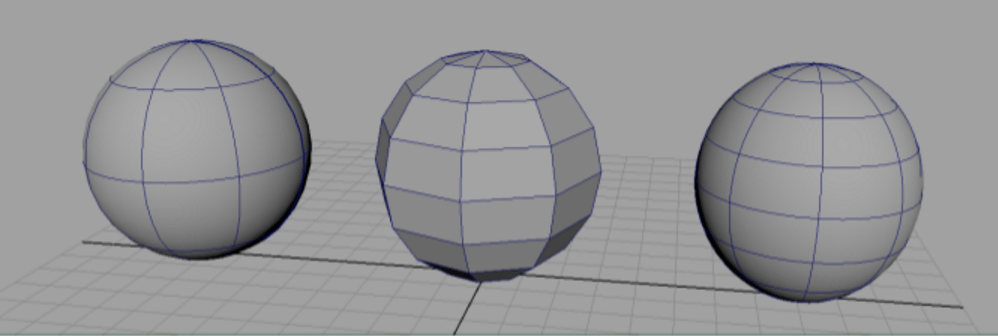
There are 3 different types of geometry you can use for 3D modeling, these are: polygons, NURBS (Non-Uniform Rational Basic Splines) and subdivision surfaces. A couple of resources I found useful for finding out more about the different geometry types are "What-When-How" and "About Tech".
- Polygons
- These are made up of vertices, edges and faces. The vertices (singular: vertex) are the corners of a face, while their edges act as the face’s outline; connecting the faces to one another, whilst delineating the faces themselves.
- If you wanted to recreate Kryten from Red Dwarf, polygonal modeling would be the way to go. This is the most common geometry type used in the animation, film and games industries. Polygonal models are built up from simple shapes known as Polygon Primitives, such as a cube, sphere, or a cylinder. The shape is then added to, pushed and pulled to eventually make the object or character you are aiming for.
- A massive benefit of a polygon-based model is how easy it is to edit. It’s great for modeling characters and manufactured objects, however, this geometry type is based on hard edges, so requires extra work – and sometimes a lot of extra geometry – if you want to give the appearance of a curved model. Depending on just how organic and curvy you want your object to be, this is where you might be better off working with NURBS geometry.
- NURBS
- Say you wanted to 3D model a famous racecar, perhaps the Jaguar D-Type (1954—1957) for example, but its bodywork is so blooming curvy it would require an ungodly amount of polygonal geometry to achieve… well this is where working with NURBS geometry could be a lifesaver. NURBS geometry is created using bézier curves, so where you might need a large number of polygons to create the appearance of a nice curve, NURBS geometry may only require as little as 3 vertices to achieve that same curve. NURBS surfaces are most commonly used when modeling for engineering and vehicle design since they are the most mathematically precise.
- Subdivision Surfaces
- SubD’s have characteristics of both polygons and NURBS surfaces; they are made up of vertices, faces & edges like polygons, but use curves like NURBS. When you press 3 on the keyboard to view your selected object(s) in Smooth Preview mode, a SubD version of your model is what you’ll see. Pressing 2 will show both the polygonal and SubD versions of your model, whilst 1 returns it to back to normal.
Poly 3D modeling tools
I absolutely love 3D modeling, there’s something so satisfying about turning a couple of flat orthographic drawings into an object or character you can view from any angle, and even feel if you decide to go as far as 3D printing. Maya has a large number of tools you can use for polygonal 3D modeling, some vital and others really helpful if you know how to use them. Like any 3D modeller, when it comes to modeling I use various tools, and have covered some of them below.
- Insert Edge Loop
- The Insert Edge Loop tool creates an edge ring around a specified piece of geometry. This is usually one of the first tools you’ll use if you decide to start off with quite low poly geometry, such as a cube. If you’re looking to build a curve, hold shift while you do this and the edge loop will either hold that curve, or create it for you. The Insert Edge Loop tool is important for making your geometry gradually more complex to support feature development.
- >Delete Edge/Vertex
- At some point you may end up deciding that you want to get rid of some geometry, rather than just using backspace to delete, say, a ring of edges (this leaves behind stray vertices that you have to go in and clean up) use Delete Edge/Vertex instead, which will get rid of the unwanted edges and remove any unwanted vertices that would have been left hanging around.
- In certain cases there will come a point where you need to create a hole in your geometry, such as for a character’s eyes or mouth, and have highlighted the unwanted faces then used backspace to get rid of them. There’s been a few times where I’ve deliberately cut a hole in my geometry but have accidentally deleted a face in the back of the object as well. Luckily there’s a couple of tools that help you solve this problem.
- Fill Hole & Append to Polygon
- Fill Hole does exactly that, just select one of the open edges, activate the tool and voilà; however, if you’ve accidentally deleted multiple faces side by side, it will not return the edges you had before, so you’ll need to go and manually draw the edges back in. If this happens, it’s better to use Append to Polygon, because it lets you rebuild individual faces and choose exactly where they should go, and how big they should be.
- Multi-Cut
- When your geometry really starts to get complex you may want to switch to using the Multi-Cut tool, which allows you to choose exactly where you want new edges (or vertices) to be, and how far you want them to extend. Also simply holding ctrl lets you create an edge loop, and holding shift will snap the tool to certain increments along the highlighted edge e.g. 50%, which is very useful for keeping the object’s topology evenly spaced; the closer two or more edges are together, the sharper that feature will be when Smooth Preview is applied.
- Extrude
- This tool might take you back to your childhood playing with one of Play-Doh’s little contraptions, where you’d squeeze the dough through different shaped holes, such as a star. Well, the Extrude tool is pretty much the same concept, but rather than pushing dough through a hole, you are pulling out (or pushing in) completely new geometry from whatever faces or edges you have selected.
- One of the many things this is useful for is creating furniture, such as a table. The problem is, as soon as you hit 3 it’s going to look like it’s made of goo. You could go in and add a bunch of edge loops to tighten things up, but you can bet your edge flow is going to end up looking messy, it’s at times like these that using the Bevel tool is a lifesaver. The Extrude tool’s Offset feature is great for setting up the rings of edges & faces used to support the deformations of a character’s mouth and eyelids.
- Bevel
- A couple of Maya’s basic features really come in handy here: to easily select a ring of edges, select the desired edge, hold shift and quickly double-click an edge beside it; to just select a line of edges do the same as before but instead double-click an edge that’s a distance away. You can also select rings/lines of vertices using the same method. When your geometry is more complex, sometimes Maya doesn’t select the full edge/vertex ring, so be aware of this and always check to make sure.
- Bevel lets you shore up an object’s sides and lets you choose exactly how sharp you want the edges to be by typing any number from 0.001 into the tool’s Fraction box. It’s recommended that you set the Segments to 2, and in most cases to keep your Fraction value below 1, because the tool is very sensitive and can create messy geometry if not used wisely.
- Mirror Geometry
- If you’re building an object that has some form of symmetry, such as a human character, keeping the left & right sides the same can be very difficult, this is where using Mirror Geometry becomes invaluable. A great tactic is to model half of your object, then use the tool to create the other side of the geometry on either the X, Y, or Z axis. Make sure the edge you are mirroring from is completely straight, otherwise there will be gaps along the center line of the complete model.
- Merge & Merge to Center
- If your mirrored geometry has gaps, never fear because the Merge tool is here! Highlight the vertices or edges that need bringing together, then use Merge or Merge to Center, it’s also worth popping into the Channel Box’s Input menu to set the Distance Threshold to a number that will bring all the intended vertices together; the higher the number the stronger the ‘pull’. For vertices that are only slightly apart, setting this to 0.001 is the go-to number, because this helps avoid moving any vertices that may have been selected accidentally.
- Freeze Transformations
- Alongside deleting the model’s history, this is absolutely vital when preparing a model for skinning, and really useful for when you’re dealing with multiple objects in a scene, because it will set all the object’s Translate and Rotate values to 0, and the Scale to 1. So whenever you move the object, you can easily return it to the position you froze the transformations at.
Why take up 3D modeling in the first place?
First and foremost is the simple fact that 3D modeling allows you to turn your imagination into a reality. With the multiplicity of free 3D software and the free trials, what might start as a hobby can become a career. 3D modelers are sought after because of the significant number of industries the skill is useful for; because of the variety of applications, working with this profession can be very profitable. Even so, you can probably bet that whatever a modeler’s level of study or place in the industry, you might often find its profitability is not the biggest motivation.
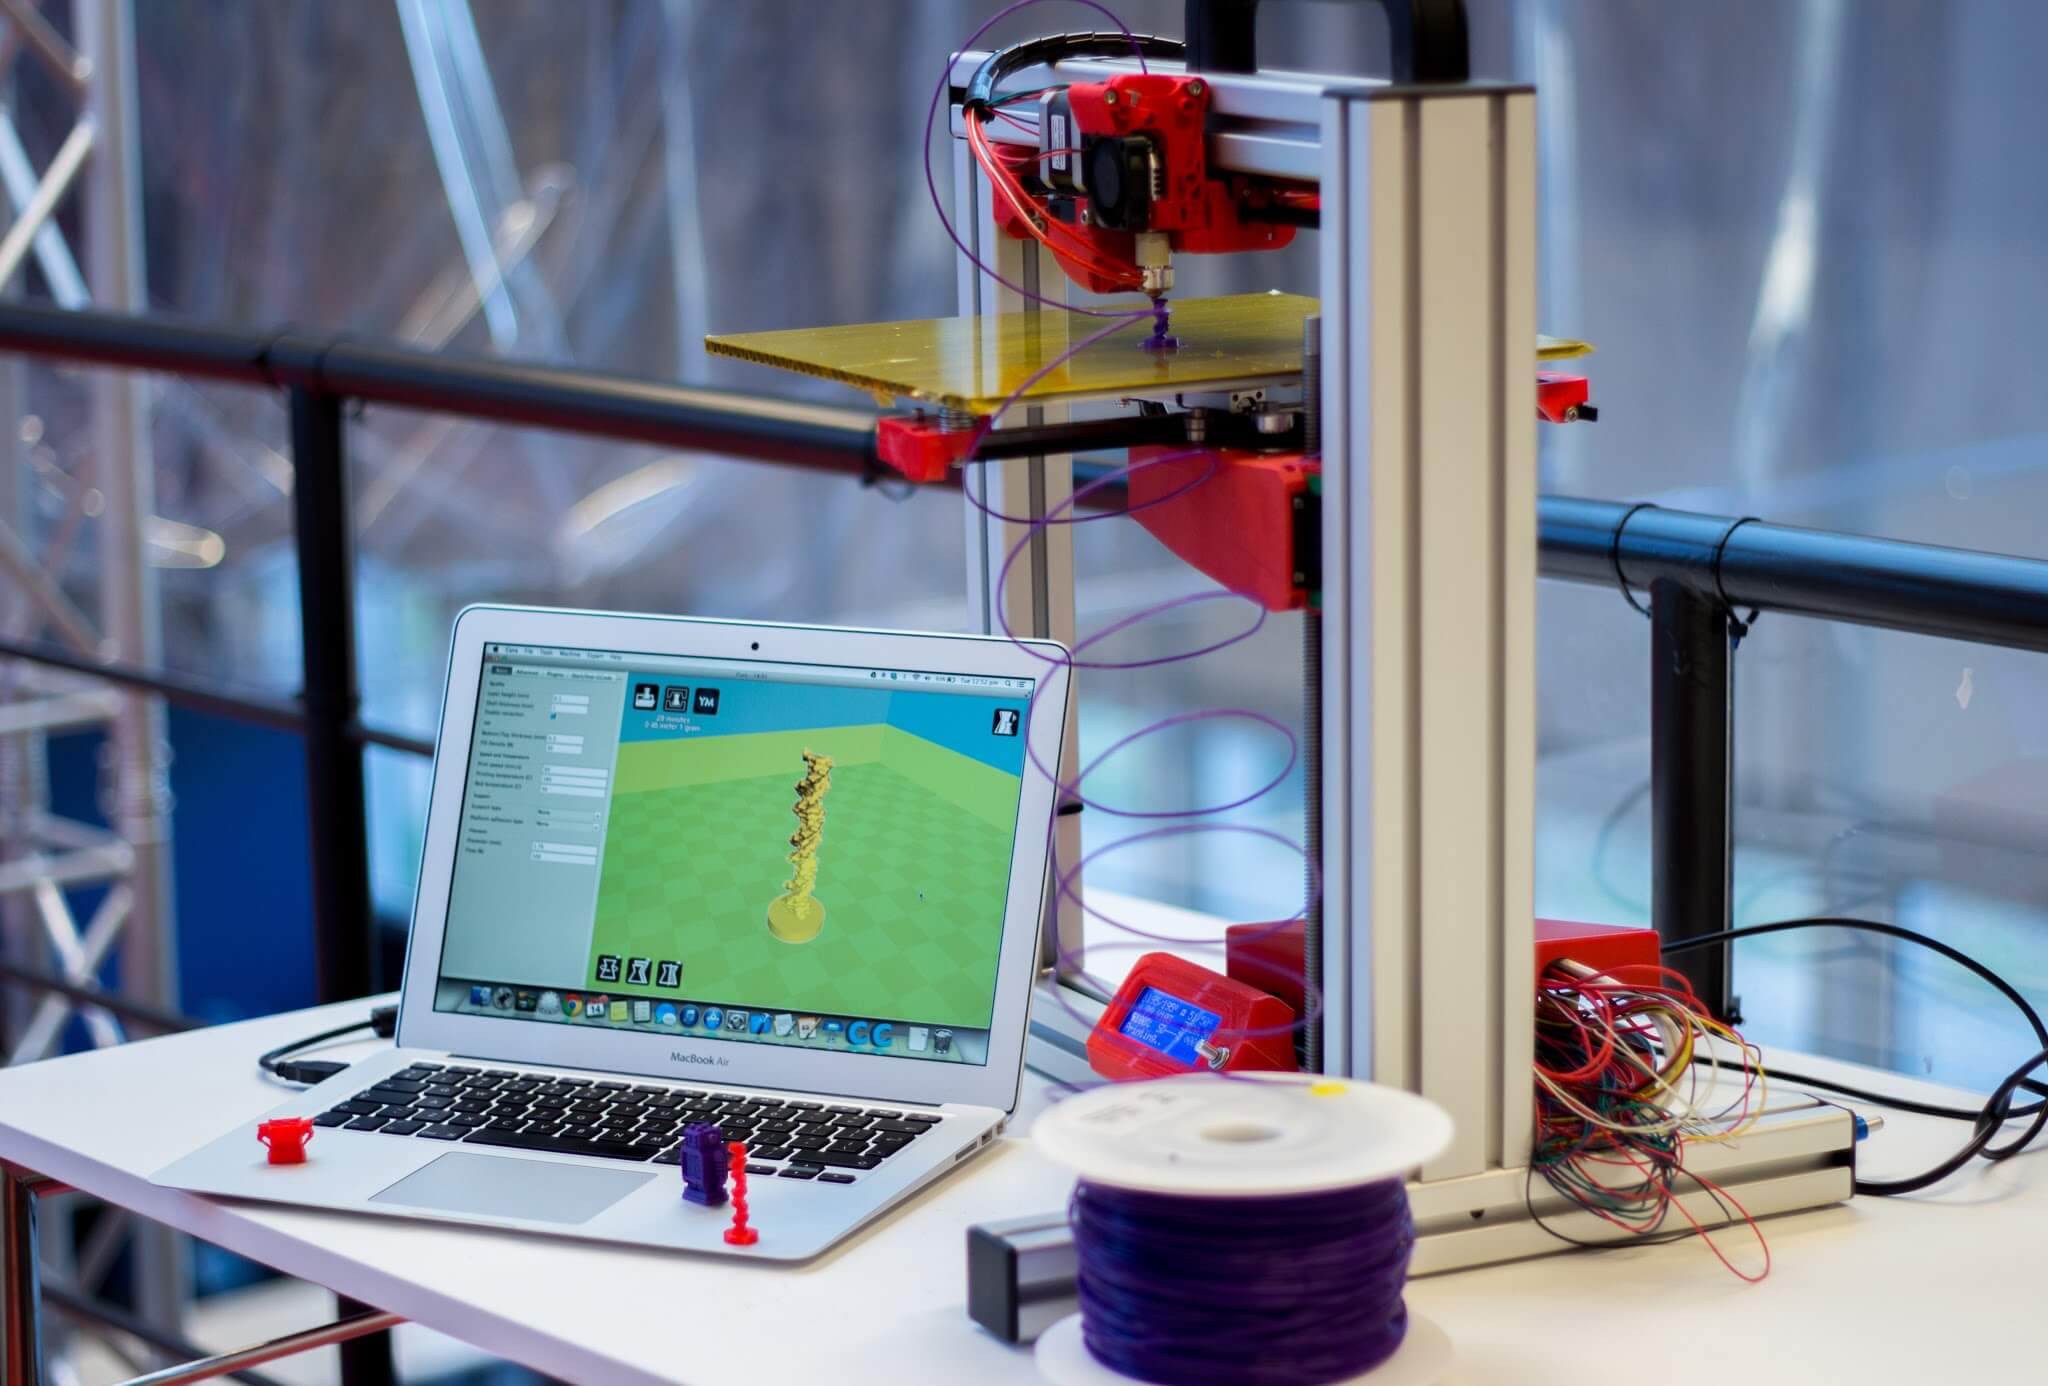
3D modeling has applications in various industries, including entertainment, such as film, TV, and videogames, as well as engineering, construction, and 3D printing, while also having literally life changing applications within the healthcare industry. The multi-purpose development of 3D printing technology is very exciting; to create a 3D print you usually need someone to actually create the digital model first.
The low cost of using 3D models is a huge draw for industries, for example, it is far more economical than having to spend hundreds or thousands (or even millions) on developing prototypes out of real world materials such as steel. They can instead create interactive digital 3D prototypes, receive quick feedback, and quickly make any necessary tweaks to the model.
These prototypes can then be printed at (almost) any scale the manufacturer desires. With film and TV it is of course far cheaper and far less dangerous to blow things up using CGI than using actual explosives, and far far cheaper to ‘damage’ a CGI vehicle in an exhilarating chase scene, than to damage multiple real life stunt vehicles.
With every passing year the potential applications of 3D printing are growing, and with it the already abundant possibilities 3D modeling brings are also growing. There are various amazing things 3D printing lets us create for the healthcare industry, from low-cost prosthetic limbs to synthetic skin! If you want to find out more about this, check out this list of ‘12 things we can print in medicine right now’ from early 2015. For me, the real world benefits of 3D modeling are part of what make it truly worthwhile…
Register Now and Get $50 FREE Credits!


