


As most 3D artists know, lighting can make or break the look, feel, and realism of a 3D scene. Because of this, good lighting controls are vital for creating high-quality 3D content that fulfills the vision of artists while being quick and easy to render. In this article, we'll be looking at how the new light-linking feature in Blender allows artists to take control of their projects, improving both the look of renderings and render times on a render farm. We'll go over what light linking is, how to use this new feature, and how it can save you time when rendering locally or when using a render farm service.
Light linking allows artists to choose what objects a light affects in a scene. The feature is commonly used to fine-tune lighting on specific scene objects and optimize render times. The feature has been a feature of commercial render engines like V-Ray and Arnold for years. However, only recently has it become available in Blender in experimental feature builds. The feature is now set to be included in the upcoming Blender 4.0 release.
How light linking works
Light linking works by limiting what objects a particular light affects in a scene. Blender's implementation of light linking does this in two ways, with two different types of light linking groups. The first type allows artists to choose the receiver objects for a light. An object in the receiver group for the light is affected by the light, while those not in the group remain unaffected by the light.
The second type lets artists choose shadow blocker objects for a light. Any object assigned as a blocker will generate shadows coming from the light. And importantly, objects can be set to be excluded from shadow generation, allowing light to hit the object but also pass through it to light objects behind. These settings let artists stray from the physically accurate calculations of the renderer, leading to greater creative control at the expense of accuracy.
Light linking for creative control
In the past, lighting specific objects in a scene for creative purposes in Blender's Cycles render engine required careful consideration and usually ample post-processing using light groups and compositing software. With the introduction of light linking, creative lighting decisions will become much easier for artists using Blender. Let's look at how to practically use this feature to control the look of a scene.

To follow along, you can download the cycles-light-linking experimental branch of Blender from blender.org.
Once in Blender, we can select any light and go to the Object Properties Panel, > Shading > Light Linking. From here, we can control all of the light linking settings for the light. First, we need to set an object or collection to restrict the light's effects. We can select an existing Collection as our light-linking collection or create a new one. By creating a new collection, objects can be linked to the collection by selecting the object> selecting the light > pressing CTRL-L > and choosing the Link Receivers to Emitters.
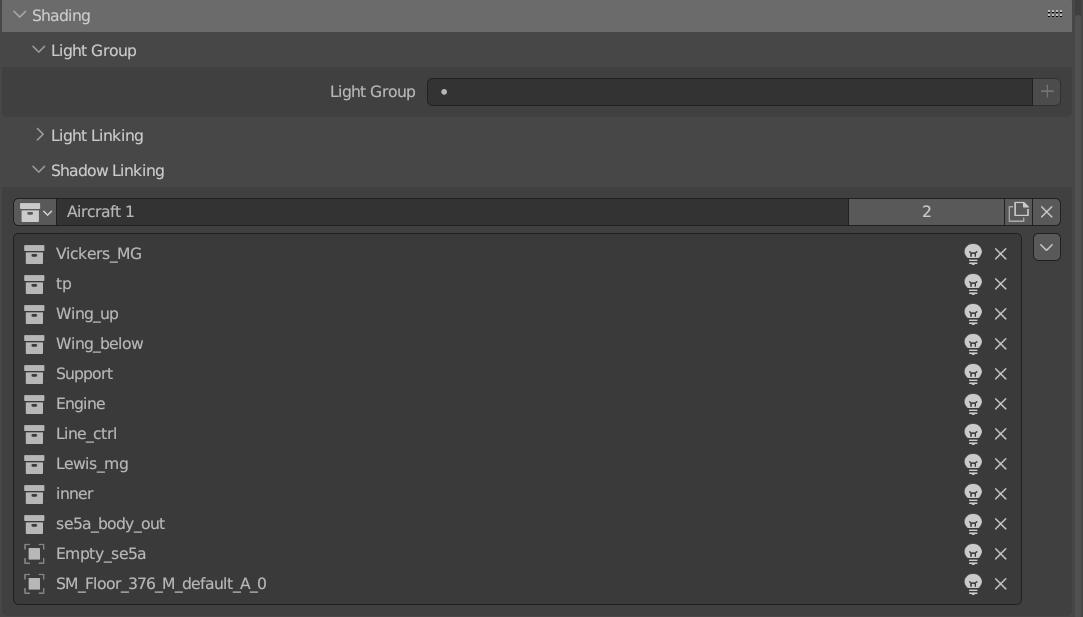
In the example scene we're testing with (Special thanks to alfanesta and panzerowl for the assets used in this scene), we'll experiment by restricting the effect of the rim light to only the primary aircraft model. In this case, there is already a collection for the object we want to link to the light. So, I can simply select the aircraft model's collection as our light-linking collection. Once we've added some linked receivers to the light, we can also toggle whether we're including or excluding the object from the light's effects. In our case, we want to include the listed objects, which will automatically exclude those not listed.

Now the rim light can only be seen by the aircraft model, so the light's intensity, color, and size can be changed without worrying about how it may affect the rest of the scene. This can be hugely helpful for complex lighting situations, such as lighting characters' faces or dealing with large environments with a mixture of interior and exterior elements.
By allowing artists and animators to control the lighting on a per-object or per-part basis, it is possible to create more complex and detailed scenes without overwhelming the rendering process or the render farm. This can help to ensure that each frame is rendered efficiently and accurately without sacrificing image quality or detail.
Optimizing scenes for render farms
Another advantage of light linking is that it can help to reduce render times and render farm costs. By selectively assigning certain lights to certain areas of our scene, complex path tracing calculations can be cut down and noise reduced while maintaining good image quality.
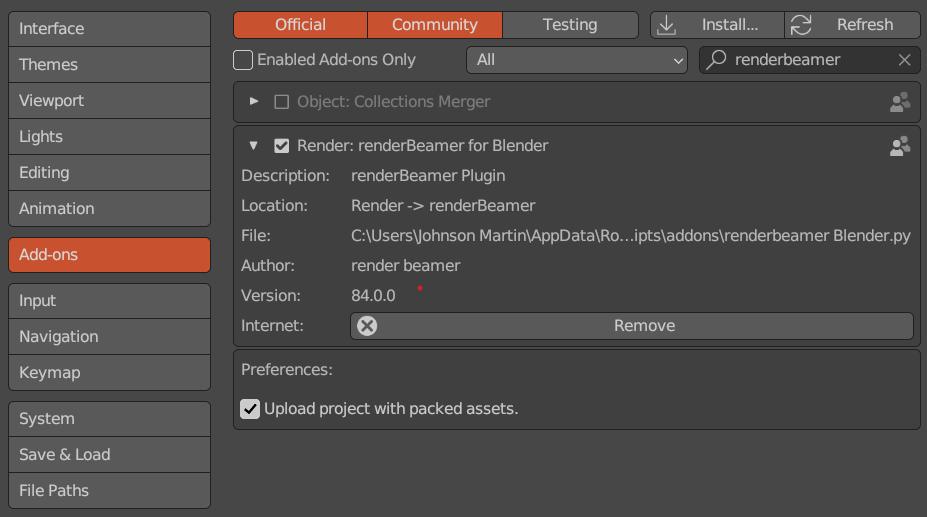
To demonstrate this, we can test rendering our example scene using an online render farm such as GarageFarm. To start, we'll download the renderBeamer app from app.garagefarm.net so that we can send our scene to the render farm straight from Blender's interface. Once renderBeamer has been downloaded and installed, we can open it and install the Blender add-on from the interface. After installation, enable the renderBeamer add-on from Blender's preferences panel. Now we can render any .blend project with GarageFarm's render farm by going to Render > renderBeamer > Beam it up from Blender's UI.
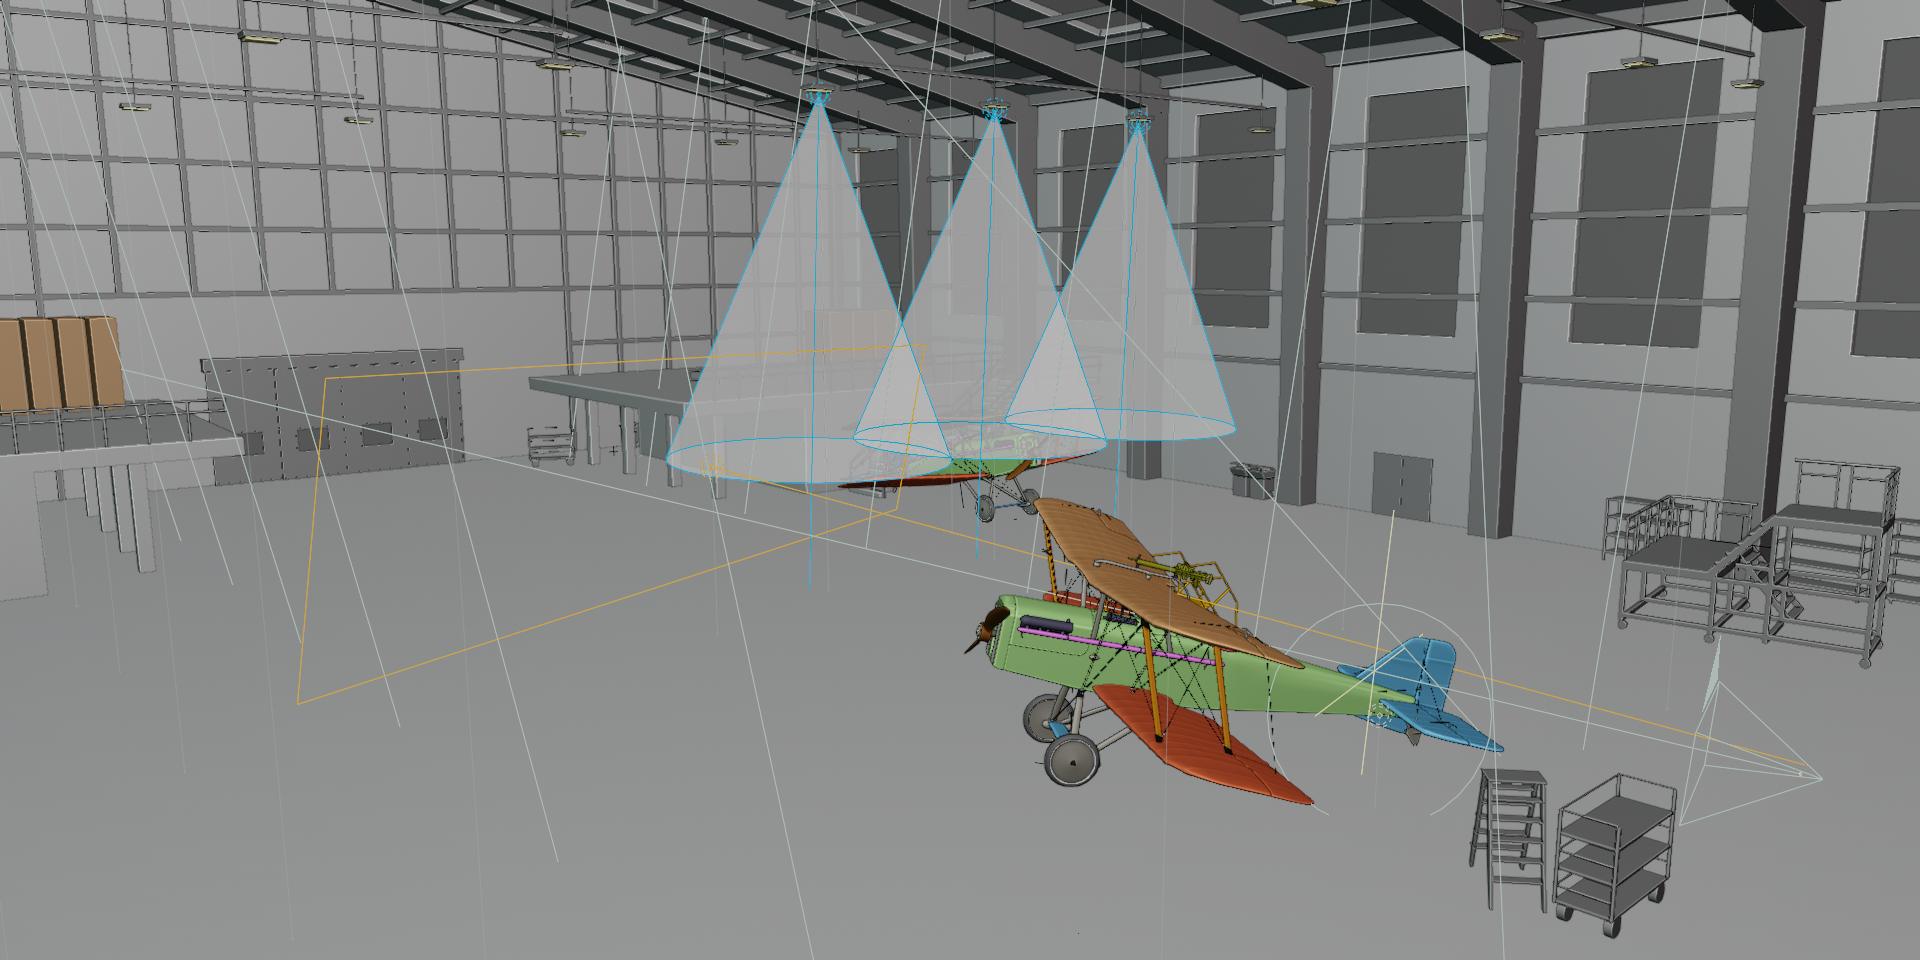
To understand how light linking affects render farm rendering, I've set up two different versions of our example scene. The first will not use any light linking. For the second version, the three background spot lamps are linked to the volume object generating the haze in the scene. This way, the spotlights will only affect the volume and will not affect the rest of the scene. I've also restricted the rim light from our previous example to improve the scene further.
After rendering the example scene with and without using light linking, we can see there can be significant advantages to using the feature. Without any changes to our scene, it rendered in about 1:28. With our light linking changes, the scene rendered in 1:15. That's over 17% faster rendering; without any changes to the number of lights used, our noise threshold, or sampling. Controlling lights on a per-object basis makes it possible to create more complex lighting schemes without worrying about overwhelming the rendering process or the render farm. This helps ensure that each frame in a scene is rendered efficiently without sacrificing detail or the creative requirements of the scene.
Wrap up
Light linking is a great feature for directing the look and feel of a scene outside of the limitations of accurate ray-traced renders. Having these tools built directly into Blender's Cycles render engine will be a huge boost for Blender users and lighting artists. For now, the feature is experimental only, but you can track the progress of its implementation here on Blender's project tracker. If all goes well, it looks as though the feature may be available for use in production in Blender 4.0.
Blender's fast-paced development has given rise to some amazing new rendering features, but quality rendering still takes a lot of processing power! So if you're looking for a render farm to get started with rendering your projects in Blender, check out our render farm services here at GarageFarm.NET and receive 33% off!
Register Now and Get $50 FREE Credits!