
As a trusted ISO-certified render farm, we are committed to helping 3D Artists meet their deadlines, we understand the importance of speed and optimization. Every part of the production pipeline that can be done faster contributes meaningfully to getting projects ready to render, sooner.
Drivers are one of the features present in most if not all major 3D DCCs that may seem daunting to beginners at first, but can be very useful in animated projects. This article goes over the underlying concepts of this feature, as well as some examples of Drivers in action that will hopefully encourage you to give drivers a try in your favorite 3D software.
Drivers are handy tools that make animating easier and more efficient by connecting different properties together. Much like rigs, they’re like the puppet strings that help you bring your 3D creations to life. Beyond that, Drivers can even be used to change practically anything that can be keyframed.
If you don’t already use them, it’s likely that you have at least encountered them in some of the tools or plugins in your toolkit. Drivers are called as such because they create connections between objects and/or properties causing one to be driven by changes to another. Let’s have a look at a few use cases. The following demonstrations will be made in Blender, but the principles are universal and can be applied to software like Cinema 4D, 3ds Max, Maya or others!
Blend Shapes, Shape Keys, or whatever else they might be named refer to stored information of the coordinates of the vertices that comprise a mesh. They allow us to adjust the form of a model and store it as a “layer” on top of the original. Using this stored information, we can interpolate between the starting form and the adjustments we made, effectively blending the two. This is commonly used to quickly animate changes in facial expressions on characters. Take this bust for example:
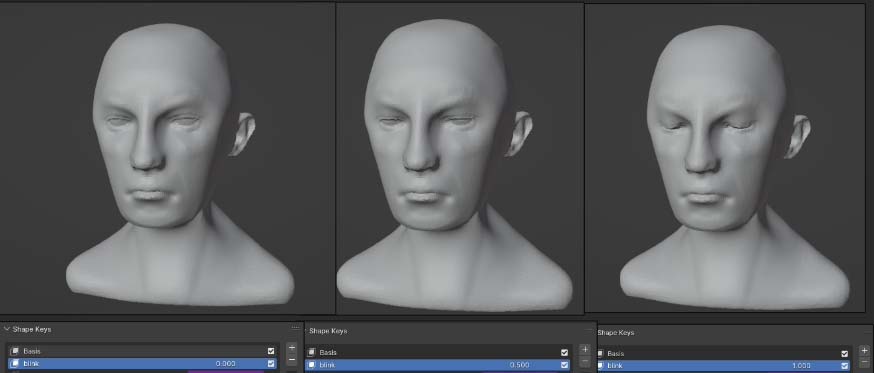
Left: A bust sculpt with a neutral expression Right: The Shape Key of the bust with eyes closed. Middle: a blend between the two. Notice the numerical values on the highlighted Shape Key named “blink” at the bottom. This determines how much of the Shape Key “layer” influences the original, from 0 on the left to .5 and finally to 1 on the right.
If we continue creating more shapes for this character, we will eventually have a long list of Shape Keys to go through to get the face to move in different ways. It will take less time to have a controller that we can move from the viewport directly for this purpose. Here is where Drivers come in handy!
In Blender, we simply right-click the property we want to add a Driver to which in this case is our “blink” shape key. We can then choose what the Driver should connect to from the Drivers Property tab as shown below.
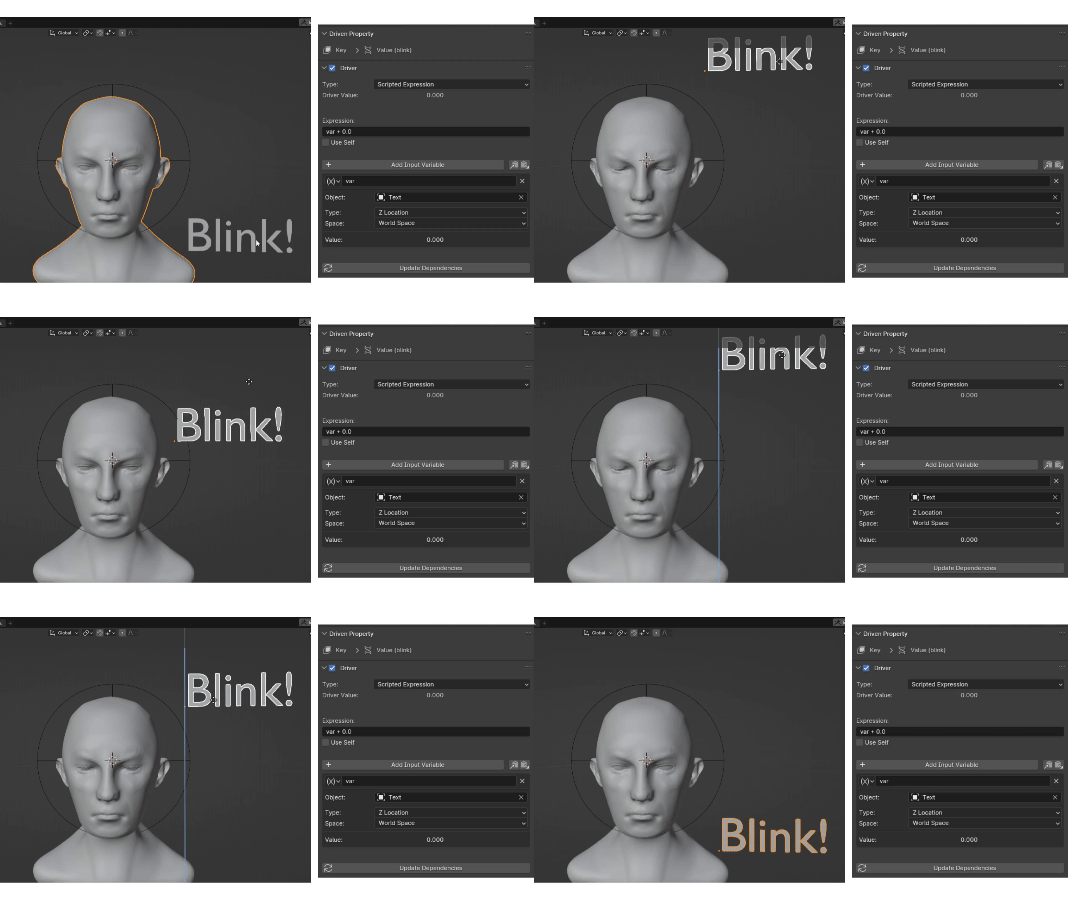
Behind the scenes, we created a text object that says “Blink!”, and this object causes our model to blend into the Shape Key when we move it up, and go back to its original state when we move the text back down.
The panel on the right of the bust is how the Driver is set up. We see it uses a mathematical expression var + 0.0 that assigns a variable value to be added to 0.0. The variable in question is the Text object, and the value type the driver is taking from the Text object is its position in the up axis of the 3D space.
In Blender, this is the “Z” Axis, whereas in software like 3ds Max or Maya, the “Y” Axis represents the vertical direction.
As the text object moves up from its starting Z position (which is zero) the value of its Z position goes up and is added to the value of the Shape Key which cuts off at a maximum of 1. The reverse is true for when the text object goes below the zero position as the Z position value becomes a negative integer which, in effect, subtracts the value of the Shape Key until it cuts off at its minimum value: 0.0.
On production-ready characters, shape keys are usually driven by bones on a face rig for a wider, more complex range of facial expressions. This is only a simple demonstration of one of the immediate benefits of Drivers: You can use them to make any Transform value of any object directly affect other parameters!
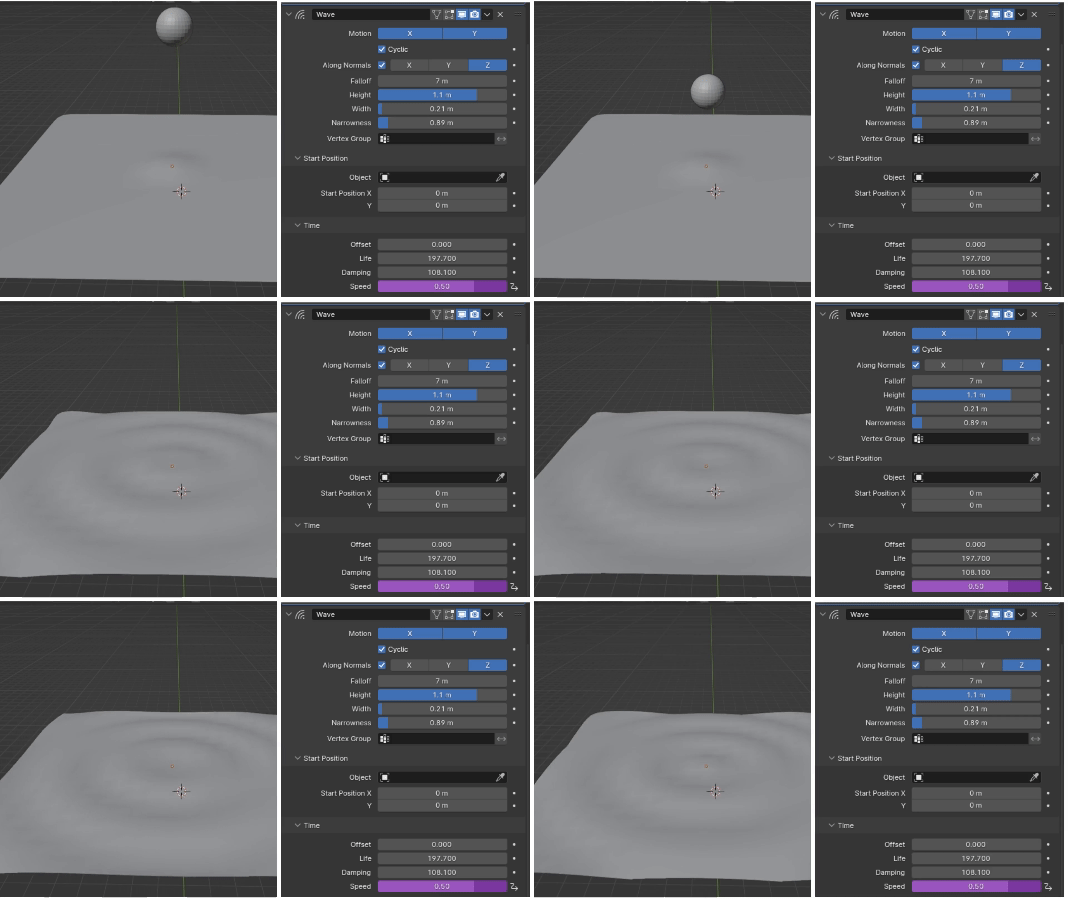
In the example below, we have a Plane with a deforming modifier that has a Driver assigned to the “Speed” parameter. This parameter creates the rippling effect that plays over time, and is triggered by the sphere when the sphere’s Z location hits 0, coinciding with the Plane.
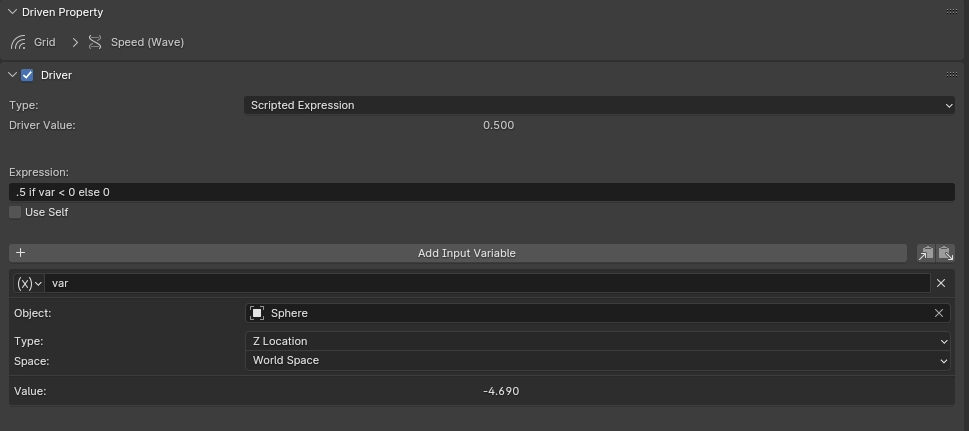
Here, we use a conditional statement as an expression: .5 if var < 0 else 0.
In common parlance, this tells the Driver: “If the variable, which is the sphere, has a Z location value that is less than 0, the value of the Modifier’s Speed will be .5. Otherwise, it should remain at 0.
This makes it easy for us in the future to adjust the animation of the Sphere without needing to rework the animation of the deforming Plane. Conditional expressions like this could be useful for triggering walls that break on impact or other similar effects.
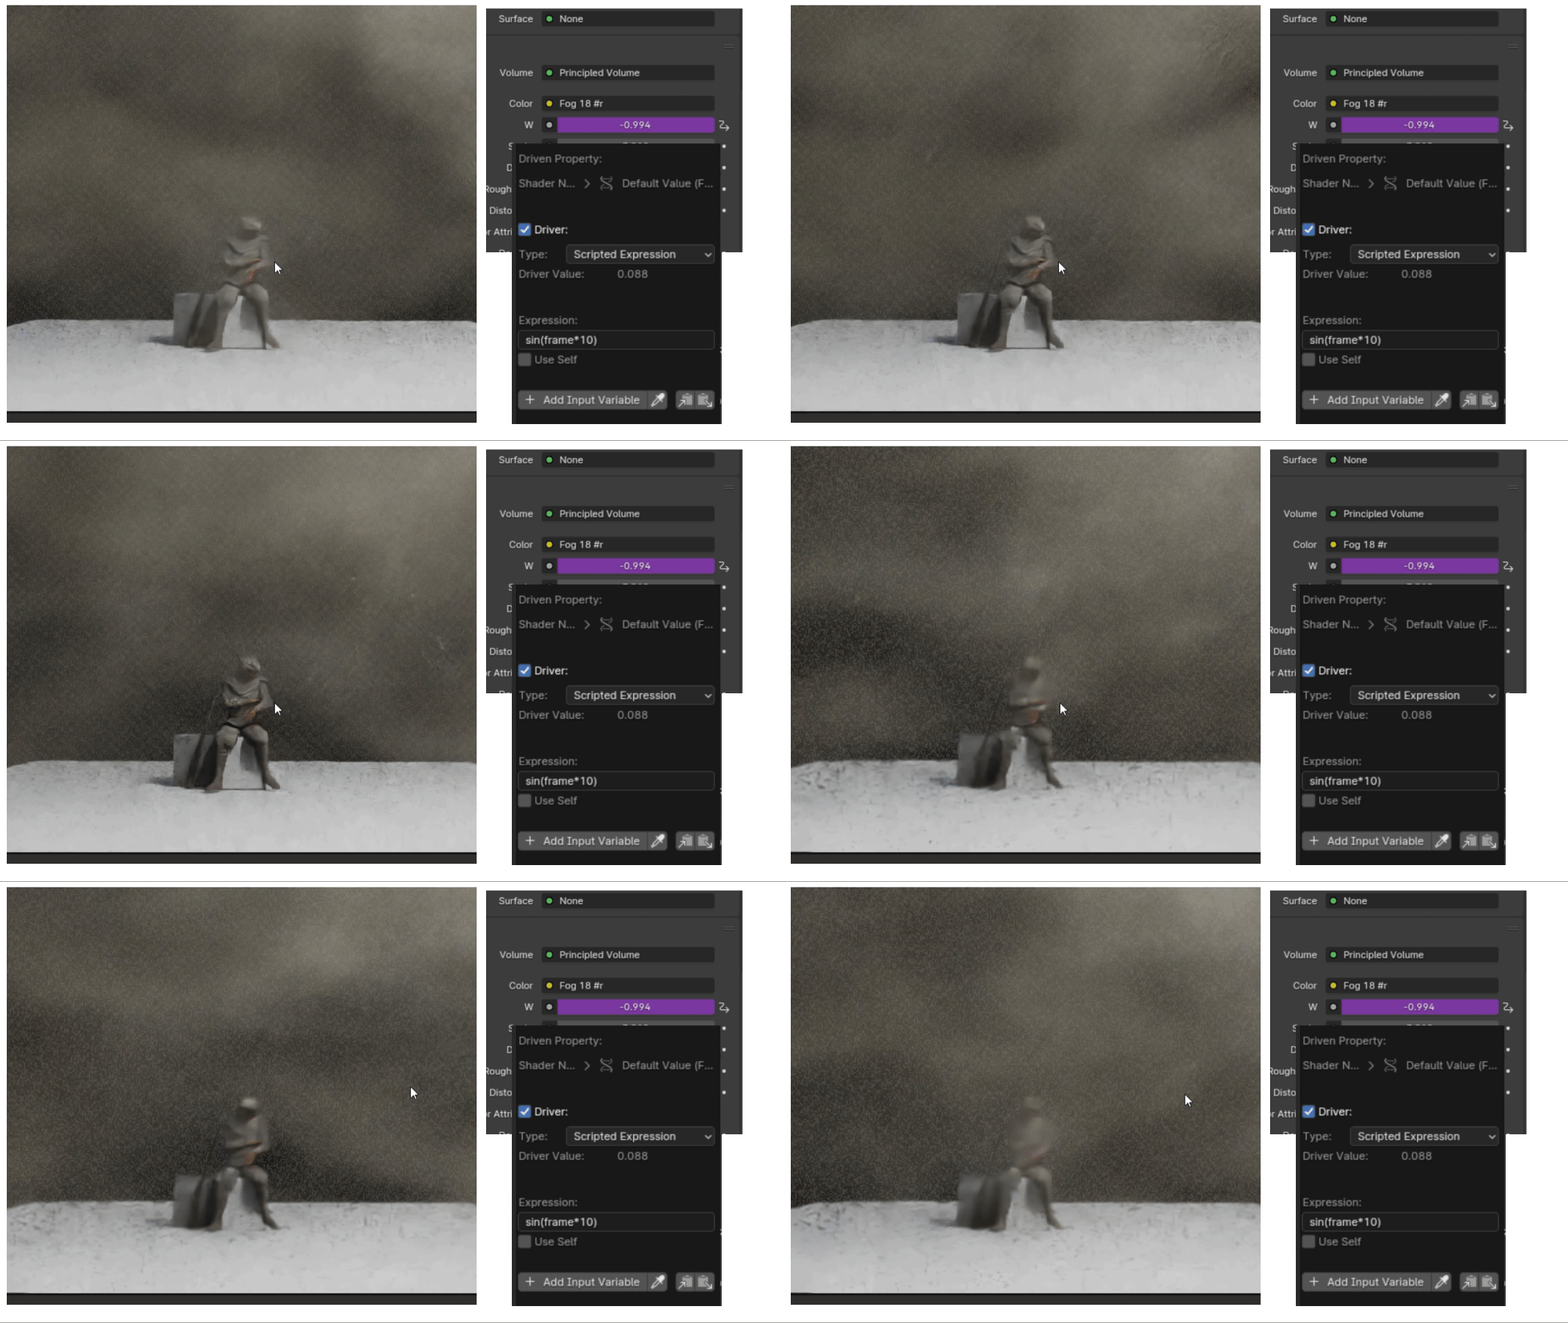
In this last example, we use only an expression to drive the “seed” value of a texture in a volumetric shader to create the swirling fog without any keyframes:
We use the expression sin(frame*10) to make the value oscillate between a range of -1 to 1, ten times faster than the normal sine wave speed. The Sin function was used because the back-and-forth movement of the values in this case gave the swirling effect we see on the viewport render preview on the left.
Here is a more detailed breakdown of the expression:
Sin: a mathematical function that describes a smooth, periodic oscillation. It’s often used in animation to create natural-looking motion.
frame: This represents the current frame number in the animation timeline. As the animation plays, the frame increases, and the sine function takes this new value to calculate the next point in the oscillation.
*10: This multiplies the current frame number by 10. It’s a way to speed up the oscillation. Without it, the sine function would use the frame number directly, resulting in a slower wave.
Instead of using an object as a variable, we used the movement of frames in the timeline to animate our volumetric texture. Expressions using frame are great for quickly animating elements that are perpetually in motion, and wave functions like Sine are just one way we can break out of linear progressions of a value.
When uploading a project with drivers to a render farm, there are several important considerations to ensure everything runs smoothly:
Compatibility: Verify that the render farm supports the specific 3D software and version you’re using, as well as any plugins or custom scripts involved with your drivers.
Packaging: Ensure all assets, textures, and linked files are included with your project file., or that the render farm service you choose can do this for you. (Tip: Ours can).
Driver Functionality: Confirm that all drivers and expressions work correctly in the render farm environment. This might involve testing a small portion of the project first.
Scripting Languages: If your drivers rely on external scripting languages (like Python for Blender), make sure the render farm has the necessary interpreters installed.
Documentation: Provide clear documentation for any custom setup or complex driver configurations that might not be standard.
Testing: It’s always a good idea to do a test render on the farm with a small section of your project to ensure drivers are functioning as expected.
Support: Check if the render farm offers customer support in case you encounter issues with drivers during the rendering process.
With a little experimentation and tinkering, using Drivers in your workflow can not only make certain animation tasks easier, but also open up new possibilities for your projects. When used with other procedural tools like Geometry nodes for Blender or Cinema 4D’s Mograph, they offer an even deeper level of control. We hope this has at the very least inspired you to try working with Drivers in your future projects, and as always, Happy Rendering!